Loading Paper
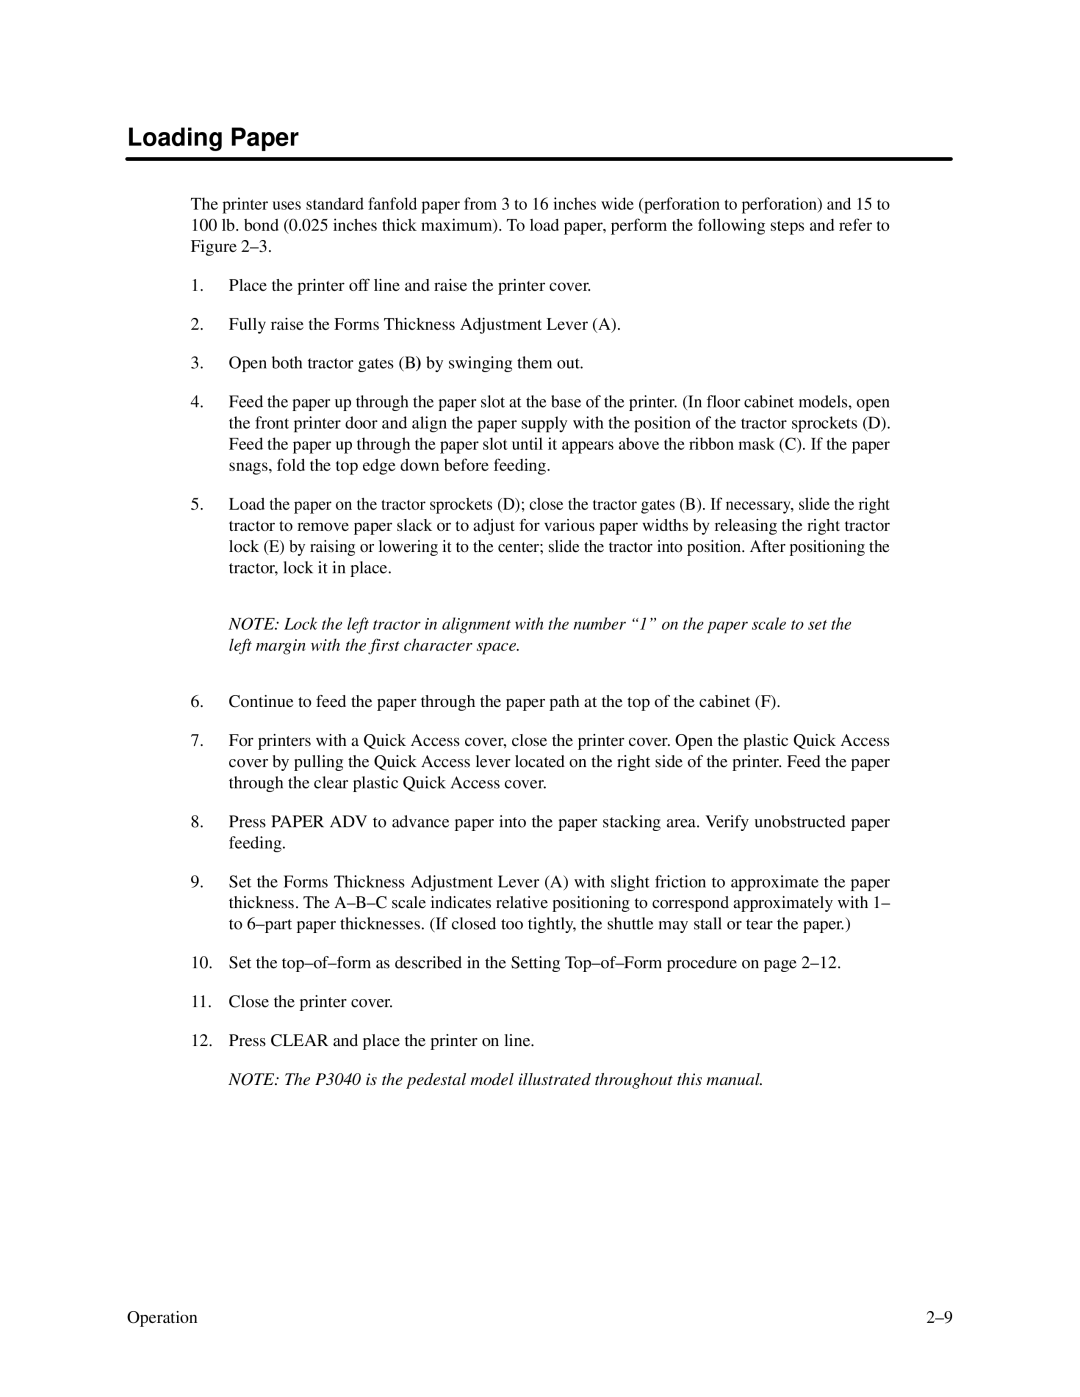
The printer uses standard fanfold paper from 3 to 16 inches wide (perforation to perforation) and 15 to 100 lb. bond (0.025 inches thick maximum). To load paper, perform the following steps and refer to Figure
1.Place the printer off line and raise the printer cover.
2.Fully raise the Forms Thickness Adjustment Lever (A).
3.Open both tractor gates (B) by swinging them out.
4.Feed the paper up through the paper slot at the base of the printer. (In floor cabinet models, open the front printer door and align the paper supply with the position of the tractor sprockets (D). Feed the paper up through the paper slot until it appears above the ribbon mask (C). If the paper snags, fold the top edge down before feeding.
5.Load the paper on the tractor sprockets (D); close the tractor gates (B). If necessary, slide the right tractor to remove paper slack or to adjust for various paper widths by releasing the right tractor lock (E) by raising or lowering it to the center; slide the tractor into position. After positioning the tractor, lock it in place.
NOTE: Lock the left tractor in alignment with the number “1” on the paper scale to set the left margin with the first character space.
6.Continue to feed the paper through the paper path at the top of the cabinet (F).
7.For printers with a Quick Access cover, close the printer cover. Open the plastic Quick Access cover by pulling the Quick Access lever located on the right side of the printer. Feed the paper through the clear plastic Quick Access cover.
8.Press PAPER ADV to advance paper into the paper stacking area. Verify unobstructed paper feeding.
9.Set the Forms Thickness Adjustment Lever (A) with slight friction to approximate the paper thickness. The
10.Set the
11.Close the printer cover.
12.Press CLEAR and place the printer on line.
NOTE: The P3040 is the pedestal model illustrated throughout this manual.
Operation |