CAMERA SETUP
![]() Click the camera icon and the Camera Setup configuration will appear
Click the camera icon and the Camera Setup configuration will appear
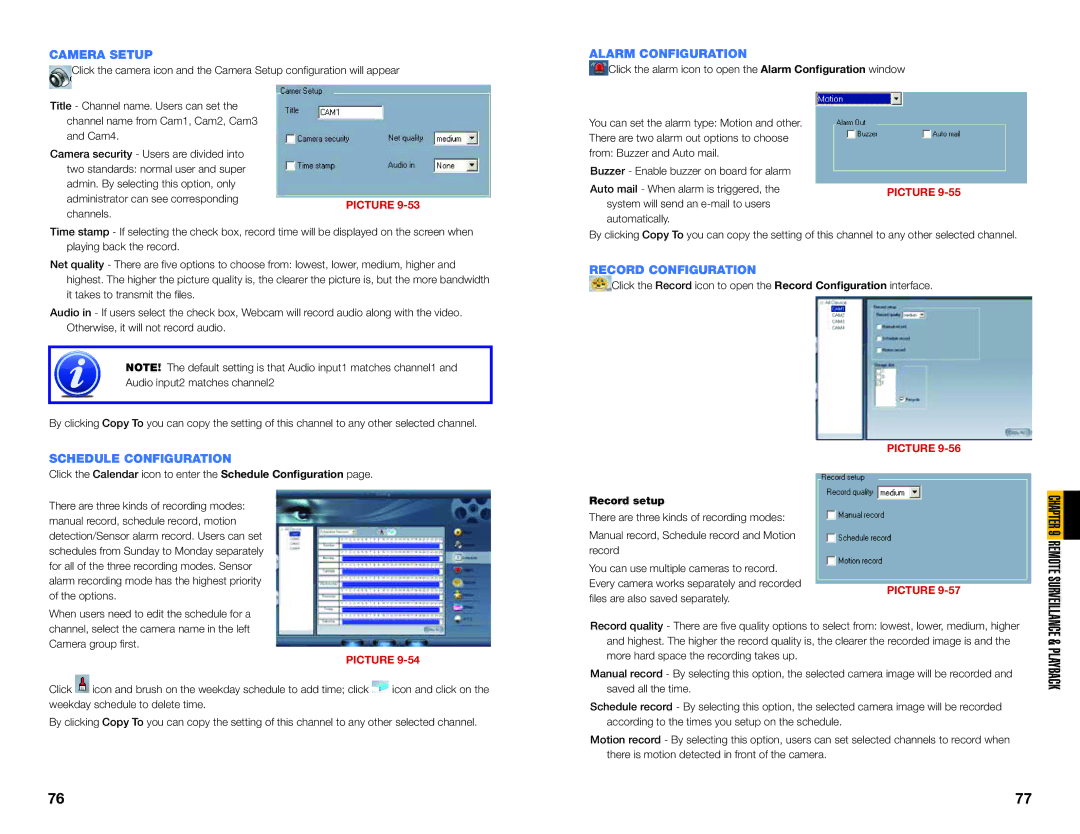
Title - Channel name. Users can set the channel name from Cam1, Cam2, Cam3 and Cam4.
Camera security - Users are divided into two standards: normal user and super admin. By selecting this option, only
administrator can see correspondingPICTURE
Time stamp - If selecting the check box, record time will be displayed on the screen when playing back the record.
Net quality - There are five options to choose from: lowest, lower, medium, higher and highest. The higher the picture quality is, the clearer the picture is, but the more bandwidth it takes to transmit the files.
Audio in - If users select the check box, Webcam will record audio along with the video. Otherwise, it will not record audio.
NOTE! The default setting is that Audio input1 matches channel1 and Audio input2 matches channel2
By clicking Copy To you can copy the setting of this channel to any other selected channel.
ALARM CONFIGURATION
![]() Click the alarm icon to open the Alarm Configuration window
Click the alarm icon to open the Alarm Configuration window
You can set the alarm type: Motion and other. There are two alarm out options to choose from: Buzzer and Auto mail.
Buzzer - Enable buzzer on board for alarm
Auto mail - When alarm is triggered, the system will send an
By clicking Copy To you can copy the setting of this channel to any other selected channel.
RECORD CONFIGURATION
![]() Click the Record icon to open the Record Configuration interface.
Click the Record icon to open the Record Configuration interface.
SCHEDULE CONFIGURATION
Click the Calendar icon to enter the Schedule Configuration page.
There are three kinds of recording modes: manual record, schedule record, motion detection/Sensor alarm record. Users can set schedules from Sunday to Monday separately for all of the three recording modes. Sensor alarm recording mode has the highest priority of the options.
Record setup
There are three kinds of recording modes:
Manual record, Schedule record and Motion record
You can use multiple cameras to record. Every camera works separately and recorded files are also saved separately.
PICTURE 9-56
PICTURE
CHAPTER 9 REMOTE SURVEILLANCE
When users need to edit the schedule for a channel, select the camera name in the left Camera group first.
PICTURE 9-54
Click ![]() icon and brush on the weekday schedule to add time; click
icon and brush on the weekday schedule to add time; click ![]() icon and click on the weekday schedule to delete time.
icon and click on the weekday schedule to delete time.
By clicking Copy To you can copy the setting of this channel to any other selected channel.
Record quality - There are five quality options to select from: lowest, lower, medium, higher and highest. The higher the record quality is, the clearer the recorded image is and the more hard space the recording takes up.
Manual record - By selecting this option, the selected camera image will be recorded and saved all the time.
Schedule record - By selecting this option, the selected camera image will be recorded according to the times you setup on the schedule.
Motion record - By selecting this option, users can set selected channels to record when there is motion detected in front of the camera.
& PLAYBACK
76 | 77 |
