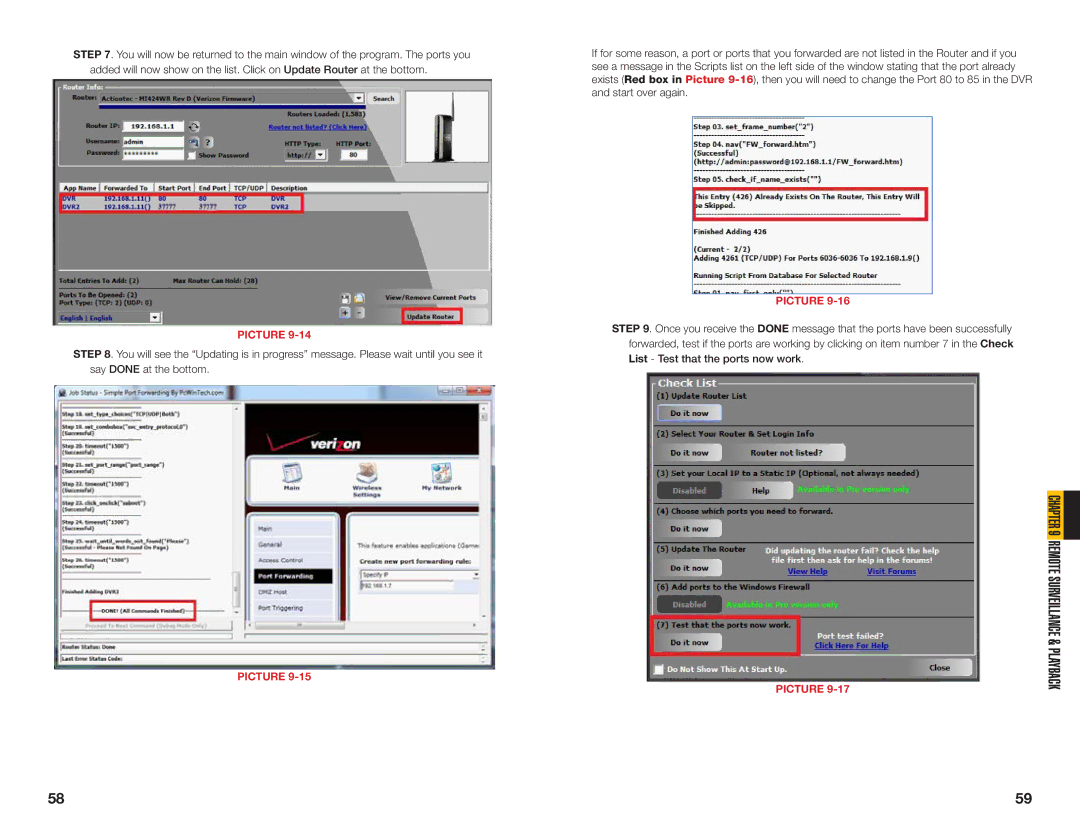
STEP 7. You will now be returned to the main window of the program. The ports you added will now show on the list. Click on Update Router at the bottom.
PICTURE 9-14
STEP 8. You will see the “Updating is in progress” message. Please wait until you see it say DONE at the bottom.
PICTURE 9-15
If for some reason, a port or ports that you forwarded are not listed in the Router and if you see a message in the Scripts list on the left side of the window stating that the port already exists (Red box in Picture
PICTURE 9-16
STEP 9. Once you receive the DONE message that the ports have been successfully forwarded, test if the ports are working by clicking on item number 7 in the Check
List - Test that the ports now work.
| CHAPTER 9 |
|
|
|
|
PICTURE | REMOTE SURVEILLANCE & PLAYBACK | |
|
| |
58 | 59 |
