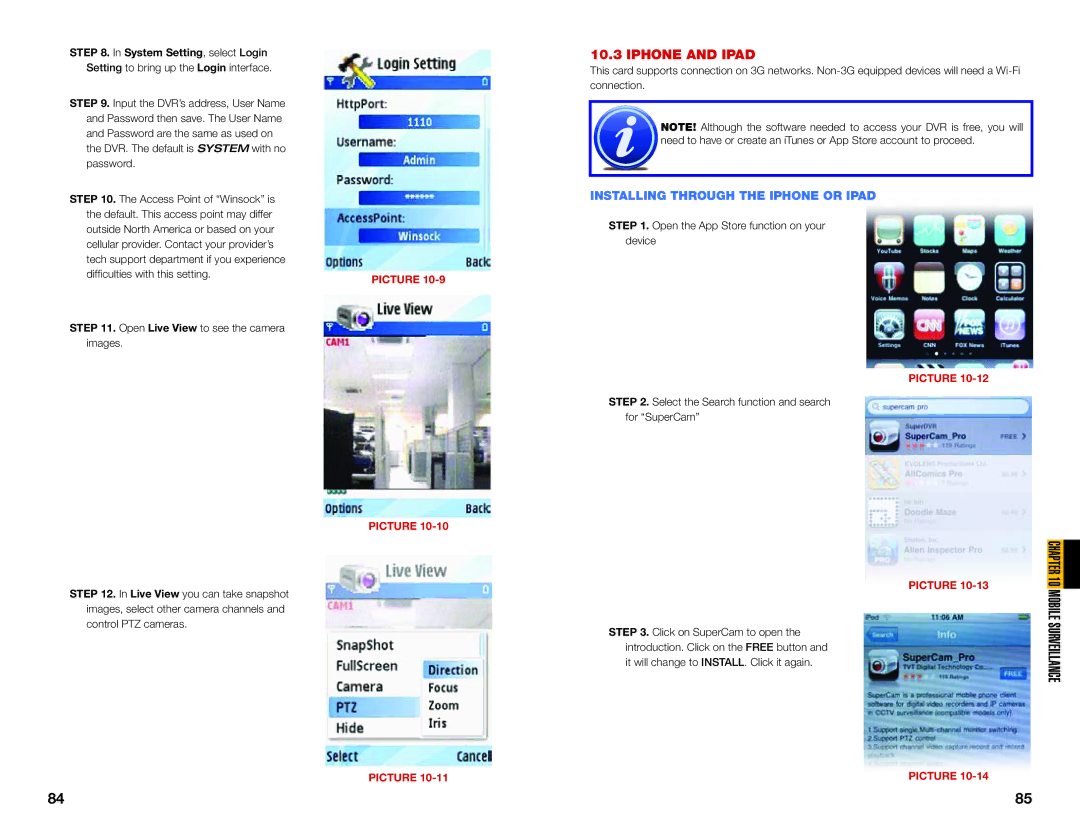
STEP 8. In System Setting, select Login Setting to bring up the Login interface.
STEP 9. Input the DVR’s address, User Name and Password then save. The User Name and Password are the same as used on the DVR. The default is SYSTEM with no password.
STEP 10. The Access Point of “Winsock” is the default. This access point may differ outside North America or based on your cellular provider. Contact your provider’s tech support department if you experience difficulties with this setting.
STEP 11. Open Live View to see the camera images.
STEP 12. In Live View you can take snapshot images, select other camera channels and control PTZ cameras.
PICTURE 10-9
PICTURE
PICTURE
10.3 IPHONE AND IPAD
This card supports connection on 3G networks.
![]() NOTE! Although the software needed to access your DVR is free, you will need to have or create an iTunes or App Store account to proceed.
NOTE! Although the software needed to access your DVR is free, you will need to have or create an iTunes or App Store account to proceed.
INSTALLING THROUGH THE IPHONE OR IPAD
STEP 1. Open the App Store function on your device
PICTURE 10-12
STEP 2. Select the Search function and search for “SuperCam”
PICTURE 10-13
STEP 3. Click on SuperCam to open the introduction. Click on the FREE button and it will change to INSTALL. Click it again.
PICTURE 10-14
CHAPTER 10 MOBILE SURVEILLANCE
84 | 85 |
