Quatech, Inc. |
| AirborneDirect™ User Manual | ||||
|
|
|
|
|
|
|
|
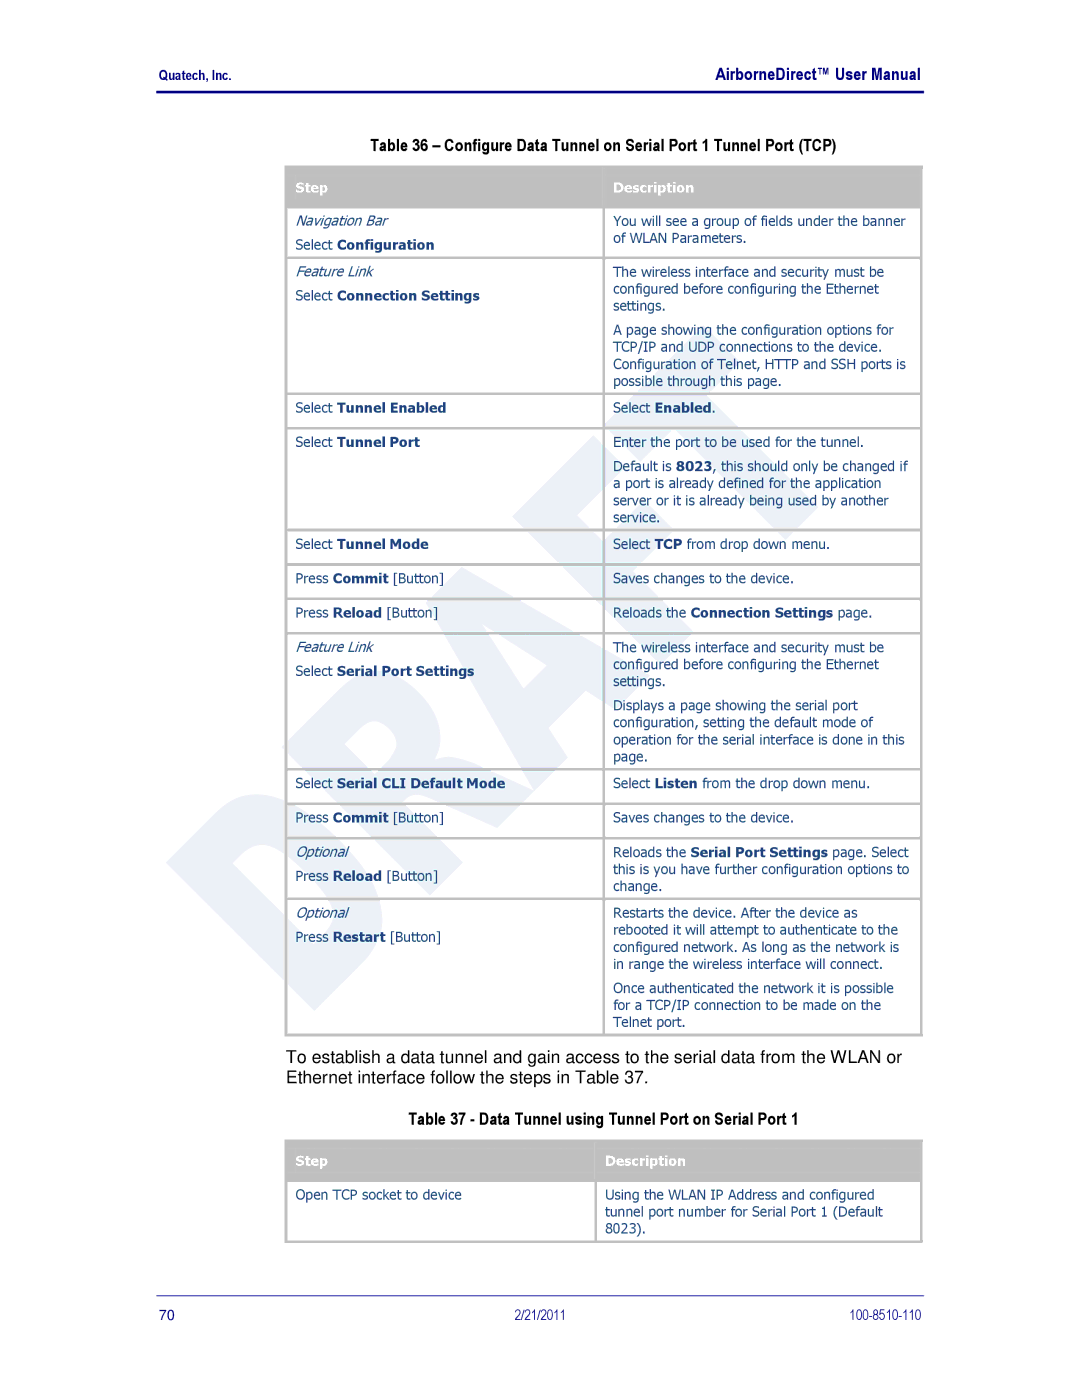
| Table 36 – Configure Data Tunnel on Serial Port 1 Tunnel Port (TCP) | ||||
|
|
|
|
|
|
|
|
| Step |
|
| Description |
|
|
|
|
|
| ||
|
|
|
|
|
|
|
|
|
|
|
|
| |
|
| Navigation Bar |
| You will see a group of fields under the banner | ||
|
| Select Configuration |
| of WLAN Parameters. | ||
|
|
|
|
| ||
|
|
|
|
| ||
|
| Feature Link |
| The wireless interface and security must be | ||
|
| Select Connection Settings |
| configured before configuring the Ethernet | ||
|
|
| settings. | |||
|
|
|
|
| ||
|
|
|
|
| A page showing the configuration options for | |
|
|
|
|
| TCP/IP and UDP connections to the device. | |
|
|
|
|
| Configuration of Telnet, HTTP and SSH ports is | |
|
|
|
|
| possible through this page. | |
|
|
|
|
| ||
|
| Select Tunnel Enabled |
| Select Enabled. | ||
|
|
|
|
| ||
|
| Select Tunnel Port |
| Enter the port to be used for the tunnel. | ||
|
|
|
|
| Default is 8023, this should only be changed if | |
|
|
|
|
| a port is already defined for the application | |
|
|
|
|
| server or it is already being used by another | |
|
|
|
|
| service. | |
|
|
|
|
| ||
|
| Select Tunnel Mode |
| Select TCP from drop down menu. | ||
|
|
|
|
| ||
|
| Press Commit [Button] |
| Saves changes to the device. | ||
|
|
|
|
| ||
|
| Press Reload [Button] |
| Reloads the Connection Settings page. | ||
|
|
|
|
| ||
|
| Feature Link |
| The wireless interface and security must be | ||
|
| Select Serial Port Settings |
| configured before configuring the Ethernet | ||
|
|
| settings. | |||
|
|
|
|
| ||
|
|
|
|
| Displays a page showing the serial port | |
|
|
|
|
| configuration, setting the default mode of | |
|
|
|
|
| operation for the serial interface is done in this | |
|
|
|
|
| page. | |
|
|
|
|
| ||
|
| Select Serial CLI Default Mode |
| Select Listen from the drop down menu. | ||
|
|
|
|
| ||
|
| Press Commit [Button] |
| Saves changes to the device. | ||
|
|
|
|
| ||
|
| Optional |
| Reloads the Serial Port Settings page. Select | ||
|
| Press Reload [Button] |
| this is you have further configuration options to | ||
|
|
| change. | |||
|
|
|
|
| ||
|
|
|
|
| ||
|
| Optional |
| Restarts the device. After the device as | ||
|
| Press Restart [Button] |
| rebooted it will attempt to authenticate to the | ||
|
|
| configured network. As long as the network is | |||
|
|
|
|
| ||
|
|
|
|
| in range the wireless interface will connect. | |
|
|
|
|
| Once authenticated the network it is possible | |
|
|
|
|
| for a TCP/IP connection to be made on the | |
|
|
|
|
| Telnet port. | |
|
|
|
|
|
|
|
To establish a data tunnel and gain access to the serial data from the WLAN or Ethernet interface follow the steps in Table 37.
Table 37 - Data Tunnel using Tunnel Port on Serial Port 1
| Step |
|
| Description |
|
|
|
|
| ||
|
|
|
| ||
|
|
|
|
|
|
|
|
|
|
|
|
| Open TCP socket to device |
|
| Using the WLAN IP Address and configured | |
|
|
|
| tunnel port number for Serial Port 1 (Default | |
|
|
| 8023). |
| |
|
|
|
|
|
|
70 | 2/21/2011 |
