Infotec
Overseas Affiliates
Page
Means Power ON. c means Stand by
Symbols
How to Read this Manual
Preparation
Limitation
Machine Types
Iii
Functions that Require Options
Control Panel
Sample Copykey
Common Key Operations
Startkey
Clear/Stopkey
Table of Contents
Programs
Storing Originals in the Document Server
If Your Machine Does Not Operate as You Want
Vii
Combination Chart 111 Supplementary Specifications 112
127
Viii
Types of Duplex Copies
What You Can Do With This Machine
Copying Book Originals
Copying Originals Such as Books
Series Copies
Sided
Page
Originals
Sizes and Weights of Recommended Originals
Metric version
Inch version
Sizes Detectable by the Auto Paper Select
Document feeder Sizes difficult to detect
Exposure glass
5mm 1mm or more, 0.04 or more 5mm 3.5mm, 0.02 6mm, 0.08
Missing Image Area
Direction-fixed paper or 2-sided paper
Original Orientation
Placing Originals
Document feeder Exposure glass
APress the Special Original key
When copying originals of various sizes
When placing originals one by one
When placing custom size originals
Placing Originals on the Exposure Glass
BSelect the Batch key, and then press the OK key
Batch mode
Sadf mode
Mixed Size mode
BPress the Mixed size key, and then press the OK key
BPress the Custm Size Origi. key
Placing Custom Size Originals
When clearing entered values
Basic Procedure
To confirm the settings
Initial copy display
Interrupt Copy
Auto Start
Original Beeper
APress the Interruptkey
Copy Face Up
Job Preset
Editing Job Prest
Deleting a Preset Job
Copying onto Tab Stock
AOpen the bypass tray
Copying from the Bypass Tray
CSelect the type and size of the pa- per
When copying onto custom size paper
Auto image density
Copy Functions
Manual image density
Combined auto and manual image density
Selecting Original Type Setting
Selecting Copy Paper
Auto Paper Select
Manual Paper Select
AMake sure that the Auto Paper Select key is selected
APress the Auto Paper Select key
BSelect the type of paper
Rotated copy
Create Margin Mode
Preset Reduce/Enlarge
Base Point
APress the Reduce/Enlarge key
BEnter the ratio
Zoom
APress the Auto Reduce/Enlarge key
Auto Reduce/Enlarge
Size Magnification
Directional Magnification %
BPress the Specifd. Ratio key
To specify a ratio with the n and o keys
Directional Size Magnification mm
Sort
Sort
Rotate Sort
When the Booklet Finisher is installed
When a finisher is not installed
Shift Sort
APress the Sort or Rotate Sort key
Stack
Staple
Stapling position and original setting
Finisher 3000M
Finisher 3000B
Booklet Finisher
ASelect one of the stapling positions
Finisher 3000B, Finisher 3000M
Sample Copy
Changing the Number of Sets
BPress the Change Quantity key
Holes
Punch
Punch hole positions
Holes Turn 90º
Duplex
Sided → 2 Sided
Originals and Copy Direction
APress the Dup./Combine/Serieskey
Sided 1 Page → Combine 1 Side
Sided Combine
Sided 2 Pages → Combine 1 Side
Sided 4 Pages → Combine 1 Side
Orientation of the Original and Image
Position of Combine
APress the Dup./Combine/Series key
Placing Originals Originals Placed in the Document Feeder
Sided 4 Pages → Combine 2 Side
Sided 16 Pages → Combine 2 Side
Sided 8 Pages → Combine 2 Side
Sided 4 Pages → Combine 2 Side
Book → 1 Sided
Series Copies
Sided 16 Pages → Combine 2 Side
APress the Dup./Combine/Series key Reference
Front & Back → 2 Sided
Book → 2 Sided
BPress the Series/Book key
→ 2 Sided, then press the OK key
Press the # key after all origi- nals have been scanned
Sided→1 Sided
Copying Book Originals
Sided → Booklet
Sided → Magazine
How to fold and stack copies to make a magazine
How to fold copies to make a booklet
Open to Left Open to Right
Open to Right
Image Repeat
Original A5K/Copy paper A4K Or Original A5L/Copy paper A4L
BPress the Dup./Combine/Series key
Original A5K/Copy paper A4L Or Original A5L/Copy paper A4K
Double Copies
Centering
APress the Edit/Stamp key BPress the Edit Image key
CPress the Double Copies key
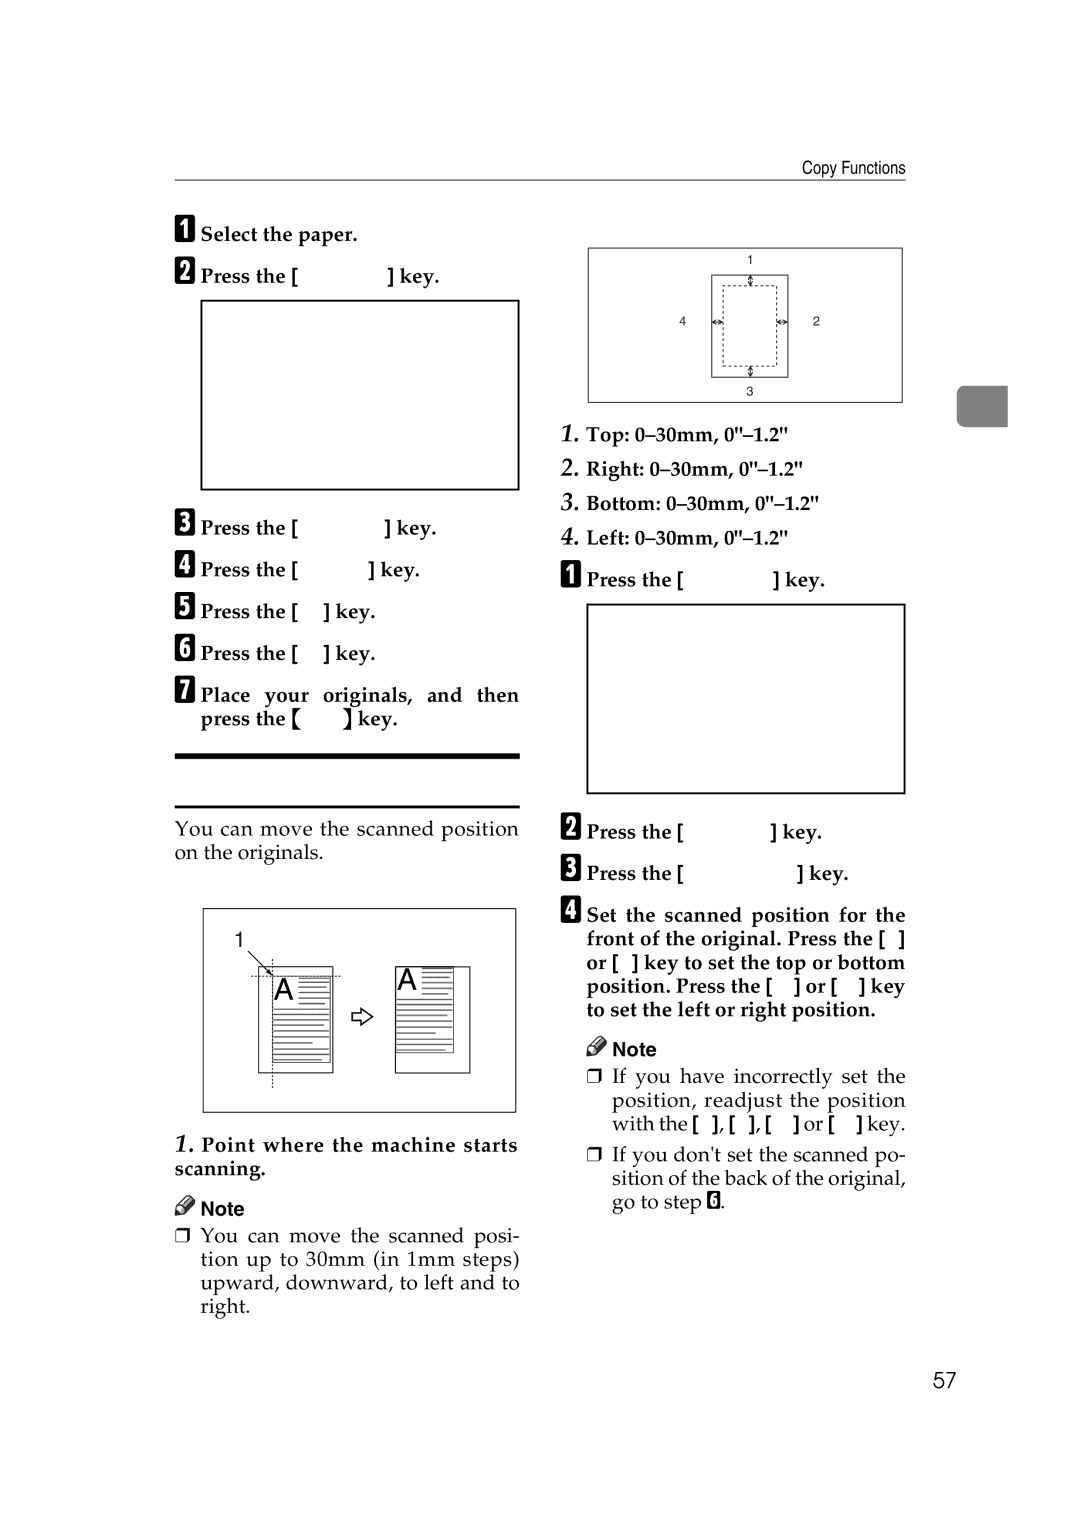
Scanning Position
Point where the machine starts scanning
Center
Erase
Center/Border
Border
Outside
Border Erase
Selecting Same Width
Center Erase
Selecting Diff. Width
APress the Diff. Width key
FSet the border to be eased of the back
APress the Diff. Width key BPress the Erase key
Center/Border Erase
ESet the border to be erased
GSet the center or border to be eased of the back
Outside Erase
Inside Erase
Press the Edit/Stamp key CPress the Erase key
DPress the Erase Inside 1 or Erase Inside 2 key
DPress the Erase Outside key
Edges Full Bleed
APress the 3 Edges Full Bleed key
BPlace your originals, and then press the Startkey
FPress the OK key GPress the OK key
Margin Adjustment
Background Numbering
APress the Edit/Stamp key BPress the Stamp key
CPress the Background Numbering
Stamp Position and Original Direction
Changing the stamp position, size and density
FAfter making all settings, press the OK key
User Stamp
Stamp position and original orientation
To change the stamp position
CPress the Copier/Document Server Features key
To program the user stamp
BPress the User Tools/Counterkey
LPress the Exit key MPress the Exit key
To delete the user stamp
NPress the Exit key
JPress the Exit key
Stamp position and original orientation
Date Stamp
To change the style of date
Numbering
APress the Change Format key
BSelect the date format, and then press the OK key
Stamp position and original orientation
Specify the first printing page and start number
Changing the stamp position
BPress the First Printing Page key
Covers
Front Cover
Front/Back Covers
Designate
APress the Cover/Slip Sheet key
GPress the Next Chapter key
Chapter
Blank Slip Sheets
Press the Next Chapter key
Slip Sheets
When using OHP transparencies set on the bypass tray
CPress the key to select the chapter number
DPress the Insert Sheet key
APress the Cover/Slip Sheet key.2
Storing Originals in the Document Server
EMake the scanning settings for the original
Clear/Stop key. To resume a
Copying
Storing a Program
Programs
ACheck the program settings
Deleting a Program
Recalling a Program
If Your Machine Does Not Operate as You Want
When a Message is Displayed
If You Cannot Make Clear Copies
Problem Cause Action
If You Cannot Make Copies As You Want
Problem Cause Action
Message Cause Solution & Reference
When Memory Is Full
Troubleshooting
User Tools Menu Copier/Document Server Features
User Tools Copy/Document Server Features
User Tools Copy/Document Server Features
User Tools Menu Copier/Document Server Features
User Tools Item Names Default Settings
MM/DD/YYYY
User Tools Item Names Default Settings
User Tools Menu Copier/Document Server Features
BPress the Copier/Document Server Features key
Accessing the User Tools Copy/Document Server Features
APress the User Tools/Counterkey
CSelect the menu you want to set
Auto Tray Switching
General Features 1/5
Exiting From the User Tools
Auto Paper Select Priority
Original Type Display
Paper Display
Auto Image Density Priority
Copy Quality
General Features 3/5
General Features 2/5
General Features 5/5
General Features 4/5
Reproduction Ratio 1/2
Reproduction Ratio 2/2
Edit 1/2
Erase Center Width
Edit 2/2
Double Copies Separation Line
Image Repeat Separation Line
Stamp
Stamp Position
Stamp Setting
Stamp Format
User Stamp 1/2-2/2 Program/Delete Stamp
Input/Output 1/2
Memory Full Auto Scan Restart
Auto Sort
Select Stapling Position Top Left
Select Stapling Position Top Right
Eject Copy Face Up/Down in Bypass Mode
Letterhead Setting
Input/Output2/2
Select Stack Function
110
111
Combination Chart
Preset Enlarge/Reduce
Supplementary Specifications
Bypass Tray Copy
112
Auto Reduce/Enlarge
Zoom
Size Magnification
113
114
Directional Size Magnification
115
116
Stack
Staple
117
118
119
120
Punch
Booklet Finisher, Finisher 3000M
121
Combine
Duplex
Copying Book Originals
122
Repeat
Margin Adjustment
Centering
123
Erase
Preset Stamp
Background Numbering
Date Stamp
125
Numbering
Designate
Front Cover, Front/Back Cover
Slip Sheets
126
127
Index
128
129
130