2. Setting up
Loading the paper
❏Fanfold continuous paper
1. | Move the paper select lever | toward the front of the printer to set | 1 | |
| the fanfold paper setting. |
|
|
|
2. | Set the print head adjustment lever | . In general, position 1 is | 2 | |
| used for |
|
| |
3.Remove the rear cover ![]() of the printer or open the rear cover to lock the cover in the open position.
of the printer or open the rear cover to lock the cover in the open position.
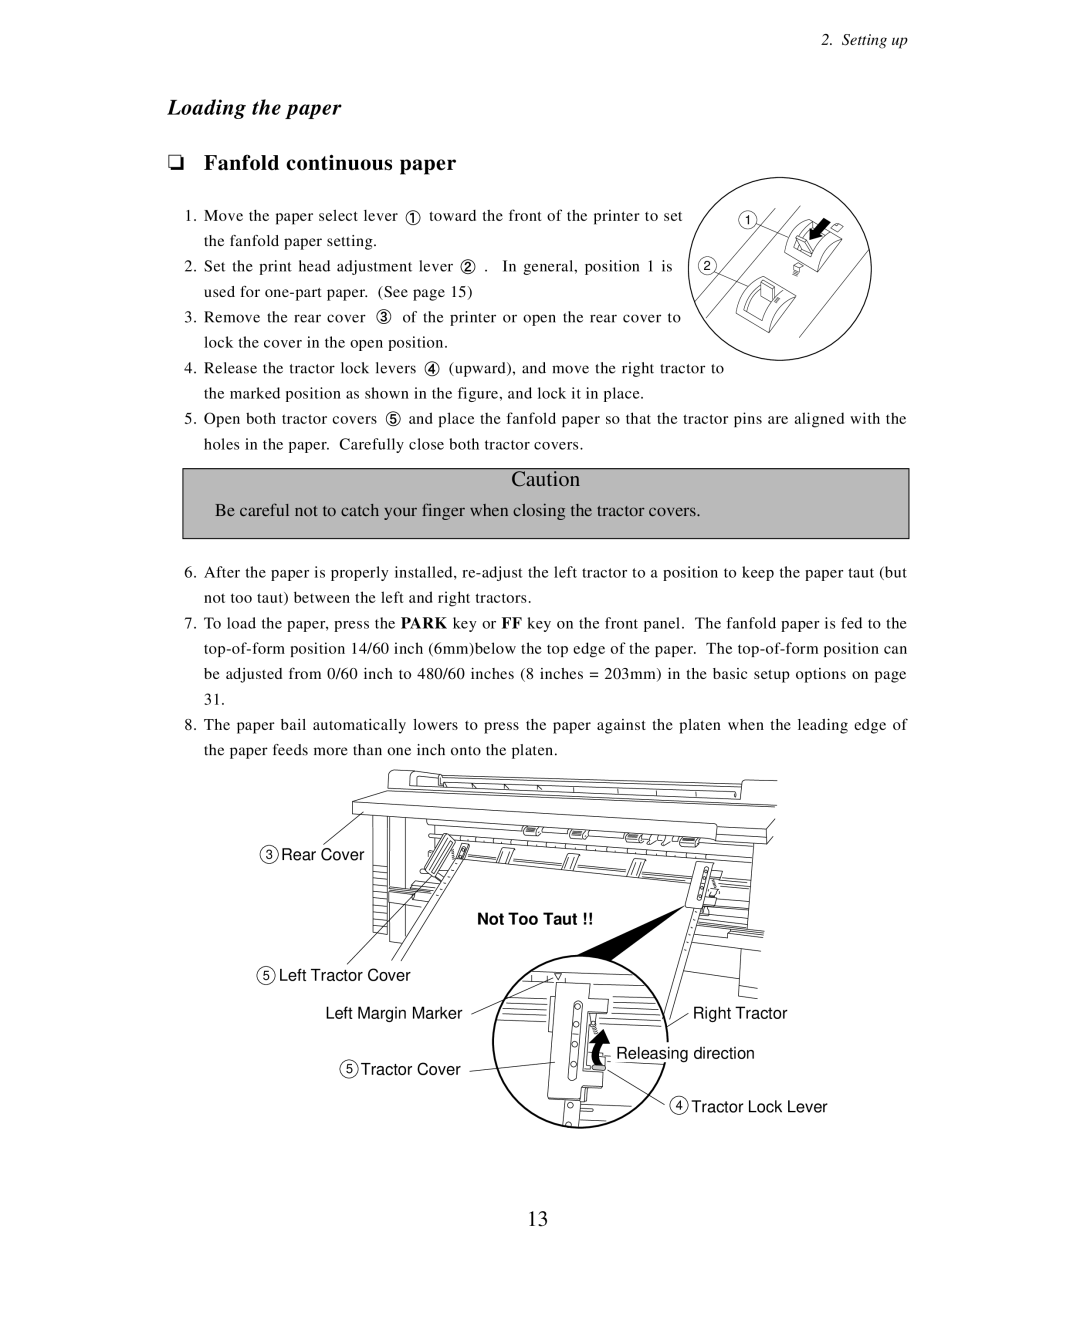
4.Release the tractor lock levers ![]() (upward), and move the right tractor to the marked position as shown in the figure, and lock it in place.
(upward), and move the right tractor to the marked position as shown in the figure, and lock it in place.
5.Open both tractor covers ![]() and place the fanfold paper so that the tractor pins are aligned with the holes in the paper. Carefully close both tractor covers.
and place the fanfold paper so that the tractor pins are aligned with the holes in the paper. Carefully close both tractor covers.
Caution
Be careful not to catch your finger when closing the tractor covers.
6.After the paper is properly installed,
7.To load the paper, press the PARK key or FF key on the front panel. The fanfold paper is fed to the
8.The paper bail automatically lowers to press the paper against the platen when the leading edge of the paper feeds more than one inch onto the platen.
3Rear Cover
Not Too Taut !!
5Left Tractor Cover
Left Margin Marker | Right Tractor |
Releasing direction | |
5 Tractor Cover |
|
4 | Tractor Lock Lever |
13