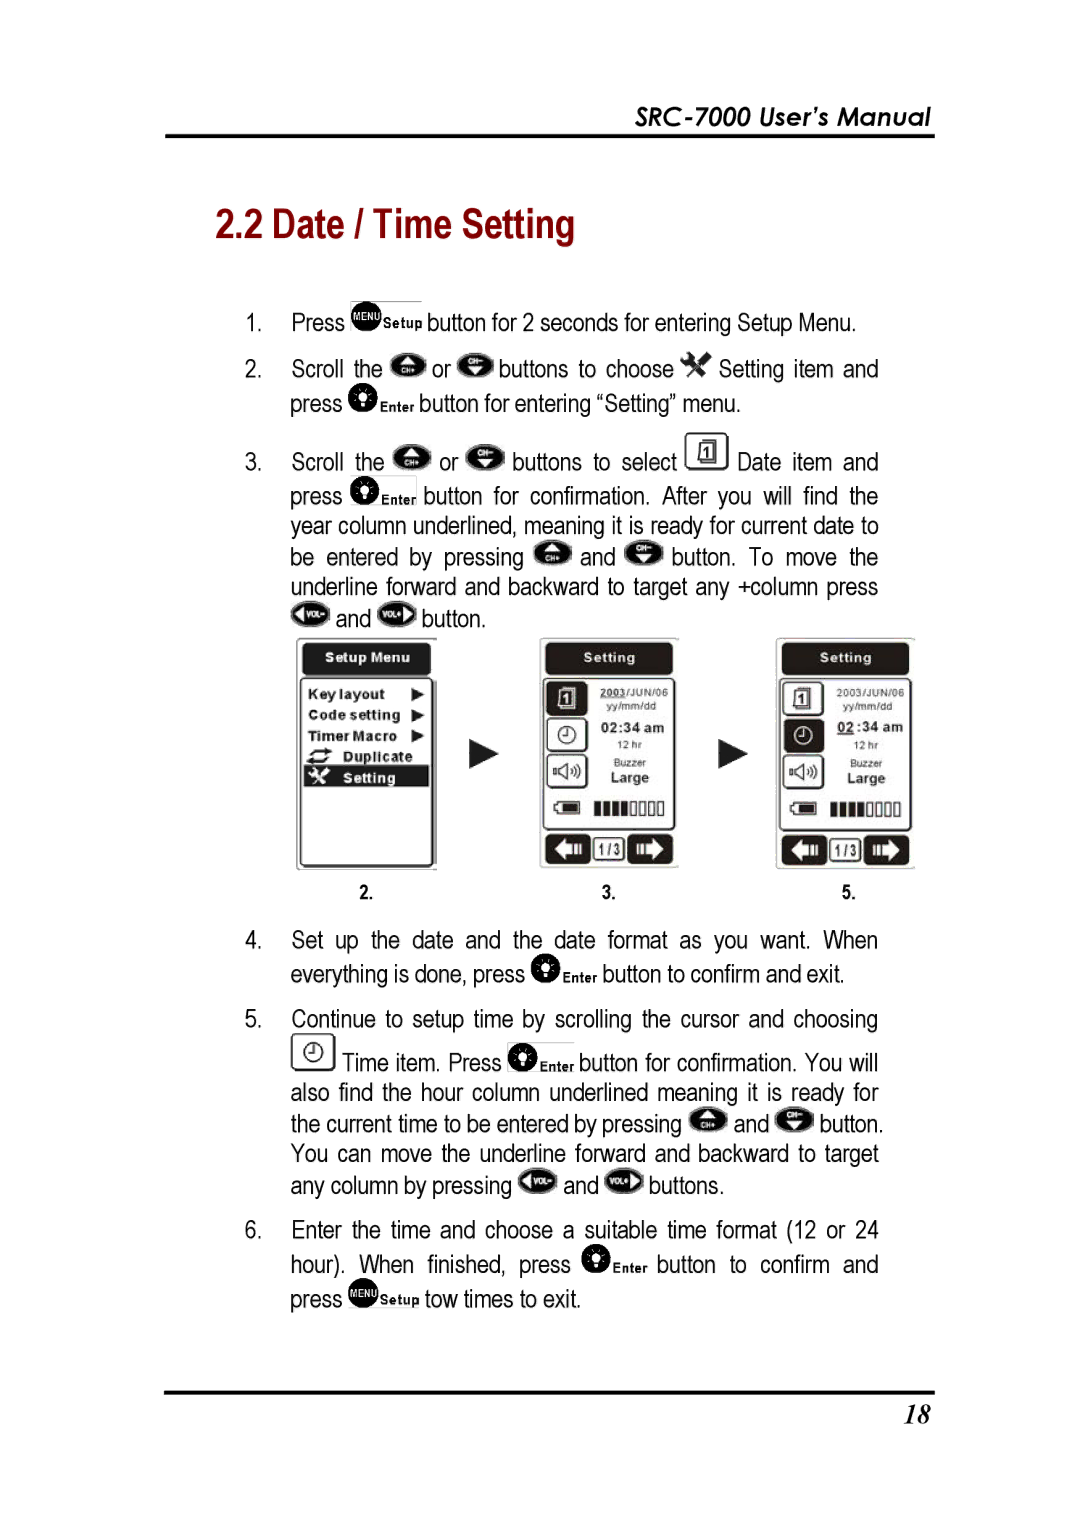
2.2Date / Time Setting
1.Press ![]() button for 2 seconds for entering Setup Menu.
button for 2 seconds for entering Setup Menu.
2.Scroll the ![]() or
or ![]() buttons to choose
buttons to choose ![]() Setting item and
Setting item and
press ![]() button for entering “Setting” menu.
button for entering “Setting” menu.
3.Scroll the ![]() or
or ![]() buttons to select
buttons to select ![]() Date item and
Date item and
press ![]() button for confirmation. After you will find the year column underlined, meaning it is ready for current date to
button for confirmation. After you will find the year column underlined, meaning it is ready for current date to
be entered by pressing ![]() and
and ![]() button. To move the underline forward and backward to target any +column press
button. To move the underline forward and backward to target any +column press ![]() and
and ![]() button.
button.
2. | 3. | 5. |
4.Set up the date and the date format as you want. When
everything is done, press ![]() button to confirm and exit.
button to confirm and exit.
5.Continue to setup time by scrolling the cursor and choosing ![]() Time item. Press
Time item. Press ![]() button for confirmation. You will also find the hour column underlined meaning it is ready for
button for confirmation. You will also find the hour column underlined meaning it is ready for
the current time to be entered by pressing ![]() and
and ![]() button. You can move the underline forward and backward to target
button. You can move the underline forward and backward to target
any column by pressing ![]() and
and ![]() buttons.
buttons.
6.Enter the time and choose a suitable time format (12 or 24
hour). When finished, press ![]() button to confirm and
button to confirm and
press ![]() tow times to exit.
tow times to exit.
18