3-2-5. Operation procedure
(1)Set the screen to Normal or Full mode using the PIC- SIZE key on the remote controller.
(2)Set the unit to the service mode with MUTE + MUTE + MENU keys pressed. (Entering to S mode.)
(3)Set the unit to the convergence adjusting mode by press- ing the “7” key on the remote controller. (Fist screen)
(4)Select the pattern to display by pressing 100, 0, ENT on the remote controller.
(Red adjustment; 100 ... ON, 0 ... ON, ENT... OFF) (Green adjustment; 100 ... OFF, 0 ... ON, ENT... ON) (Blue adjustment; 100 ... ON, 0 ... OFF, ENT... ON)
(5)Select the color to adjust by pressing “3” key on the remote controller.
(6)Confirm that the cursor is in the movable status (the cursor blinking status).
(7)Select the adjusting position by pressing “8”, “4” and “6”.
(8)When the adjusting position is determined, press “5” key on the remote controller to enter the cursor blink- ing status.
(9)Set the cursor to the adjusting position by pressing “2”, “8”, “4” and “6”, and perform the pattern distortion correction and color matching adjustments.
(10)Press “5” key again and move the cursor. Perform the adjustment in the same way as described above.
(11)After the adjustment completes, perform the automatic storing operation by pressing “7” key.
(12)In the same way as described above, adjust WIDE 1, WIDE 2 and WIDE 3 screens using
(13)When all of the screen mode adjustment complete, perform the automatic storing operation by pressing “7” key.
|
| ||
|
|
| |
B2 |
|
|
|
B2 | 14xB |
| 12xA |
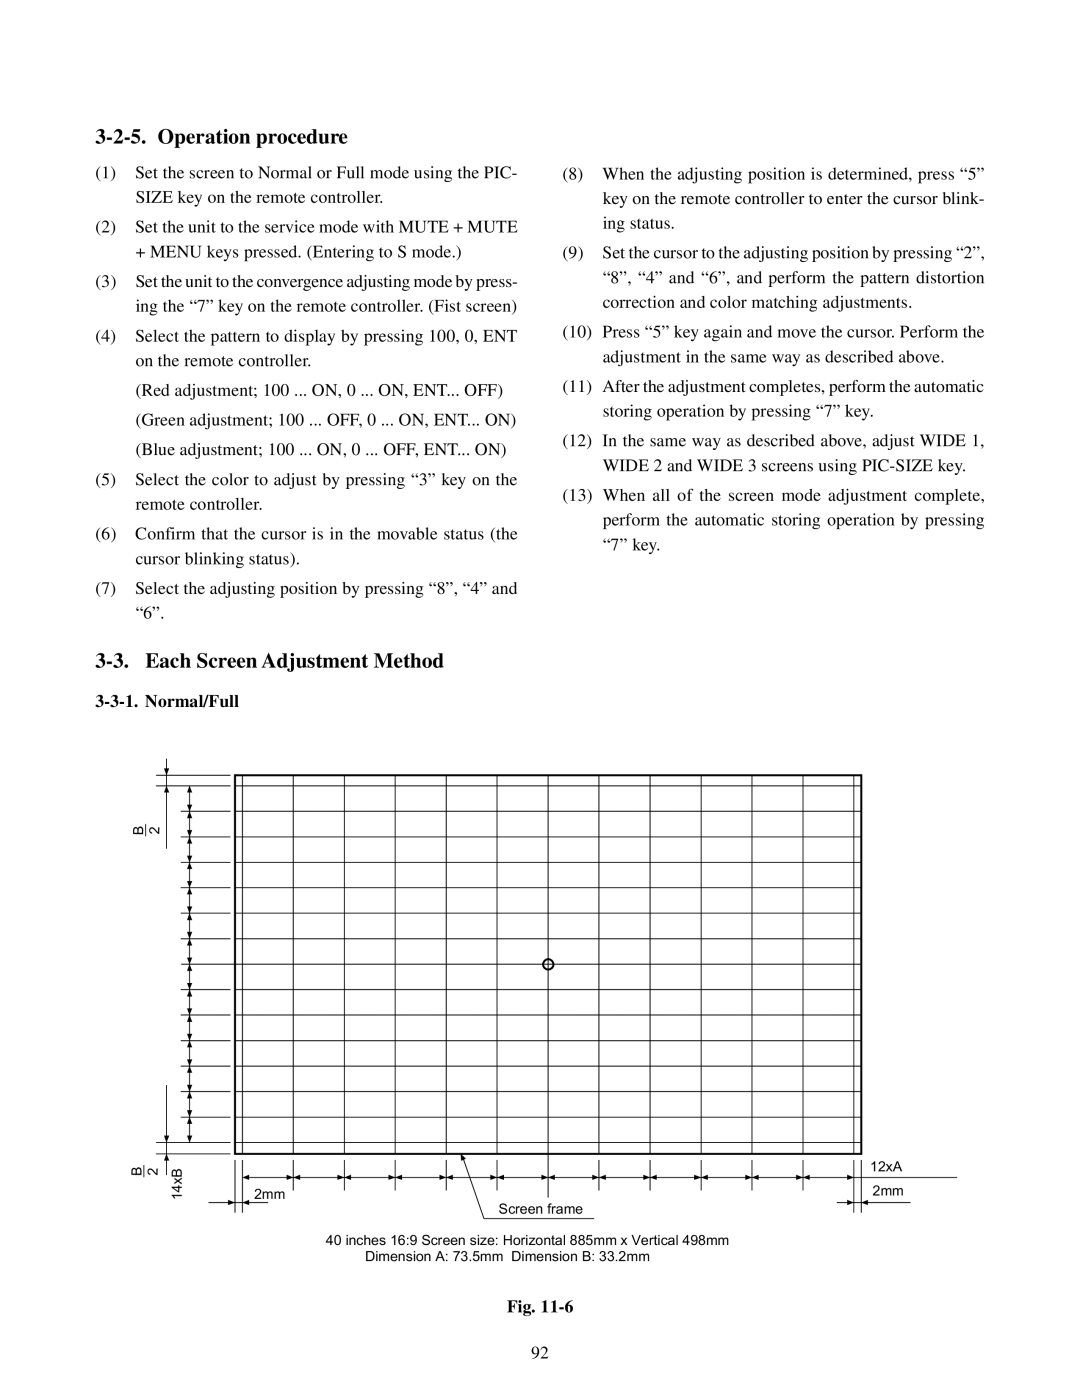
| 2mm | 2mm | |
Screen frame
40 inches 16:9 Screen size: Horizontal 885mm x Vertical 498mm Dimension A: 73.5mm Dimension B: 33.2mm
Fig.
92