Getting Started
Assigning an IP Address
1.From the task bar select Start>Programs>ZebraNet Utilities>ZebraNet View.
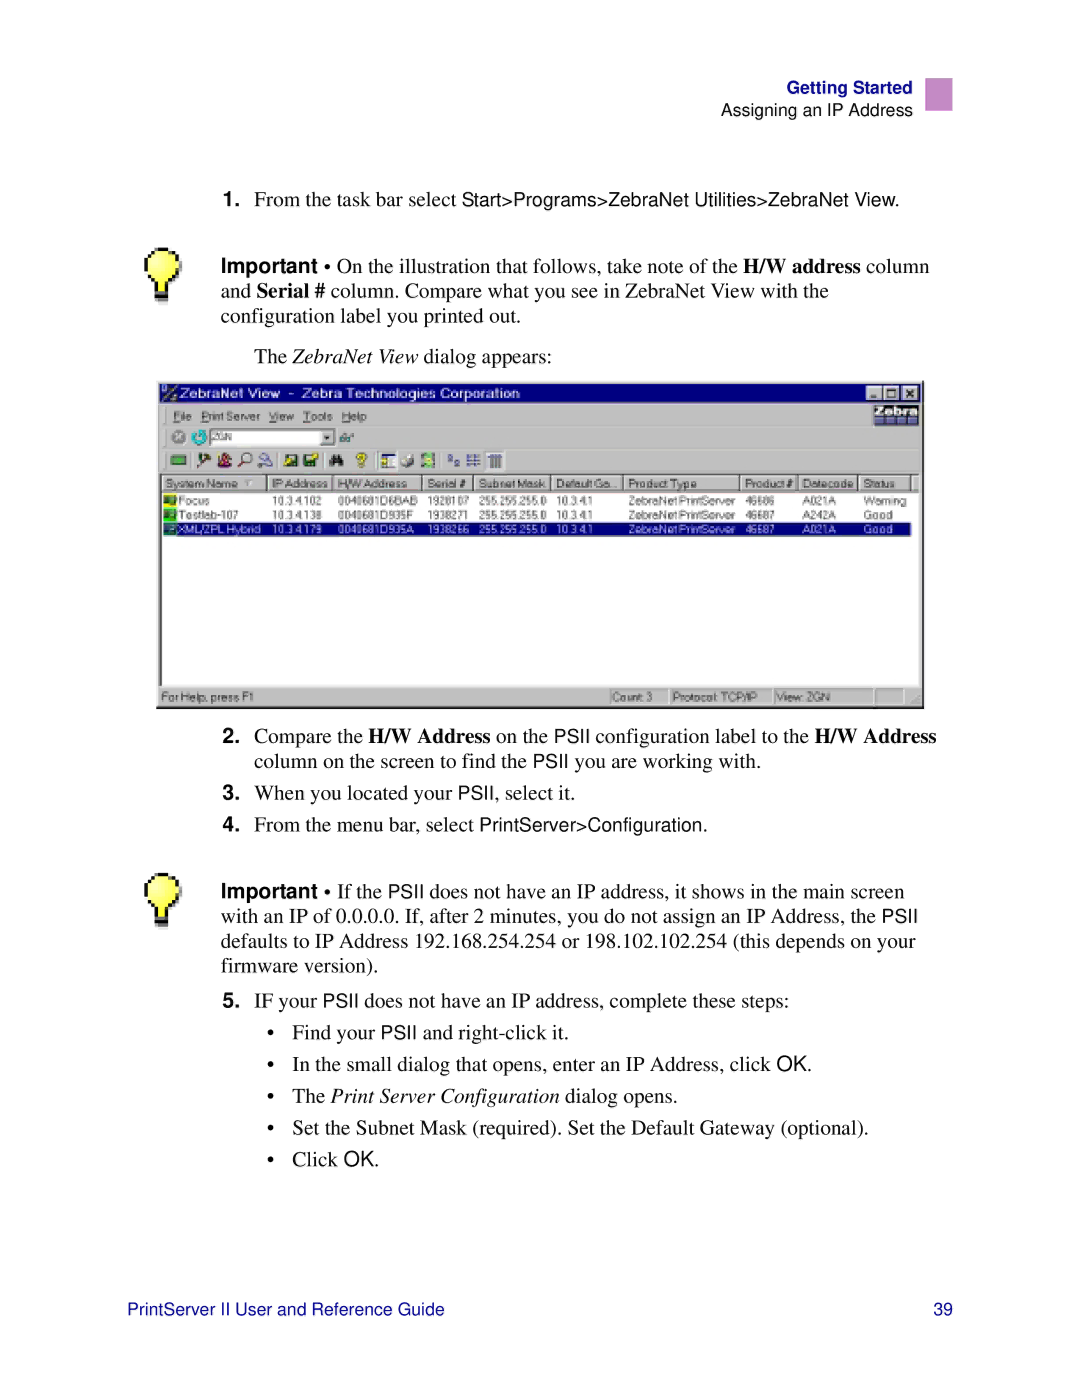
Important • On the illustration that follows, take note of the H/W address column and Serial # column. Compare what you see in ZebraNet View with the configuration label you printed out.
The ZebraNet View dialog appears:
2.Compare the H/W Address on the PSII configuration label to the H/W Address column on the screen to find the PSII you are working with.
3.When you located your PSII, select it.
4.From the menu bar, select PrintServer>Configuration.
Important • If the PSII does not have an IP address, it shows in the main screen with an IP of 0.0.0.0. If, after 2 minutes, you do not assign an IP Address, the PSII defaults to IP Address 192.168.254.254 or 198.102.102.254 (this depends on your firmware version).
5.IF your PSII does not have an IP address, complete these steps:
•Find your PSII and
•In the small dialog that opens, enter an IP Address, click OK.
•The Print Server Configuration dialog opens.
•Set the Subnet Mask (required). Set the Default Gateway (optional).
•Click OK.
PrintServer II User and Reference Guide | 39 |