Installation
Internal PSII
.
Note • The parallel port on the back of the printer is not operational when the internal PSII is installed. The hardware of the PSII mounting bracket covers the parallel port.
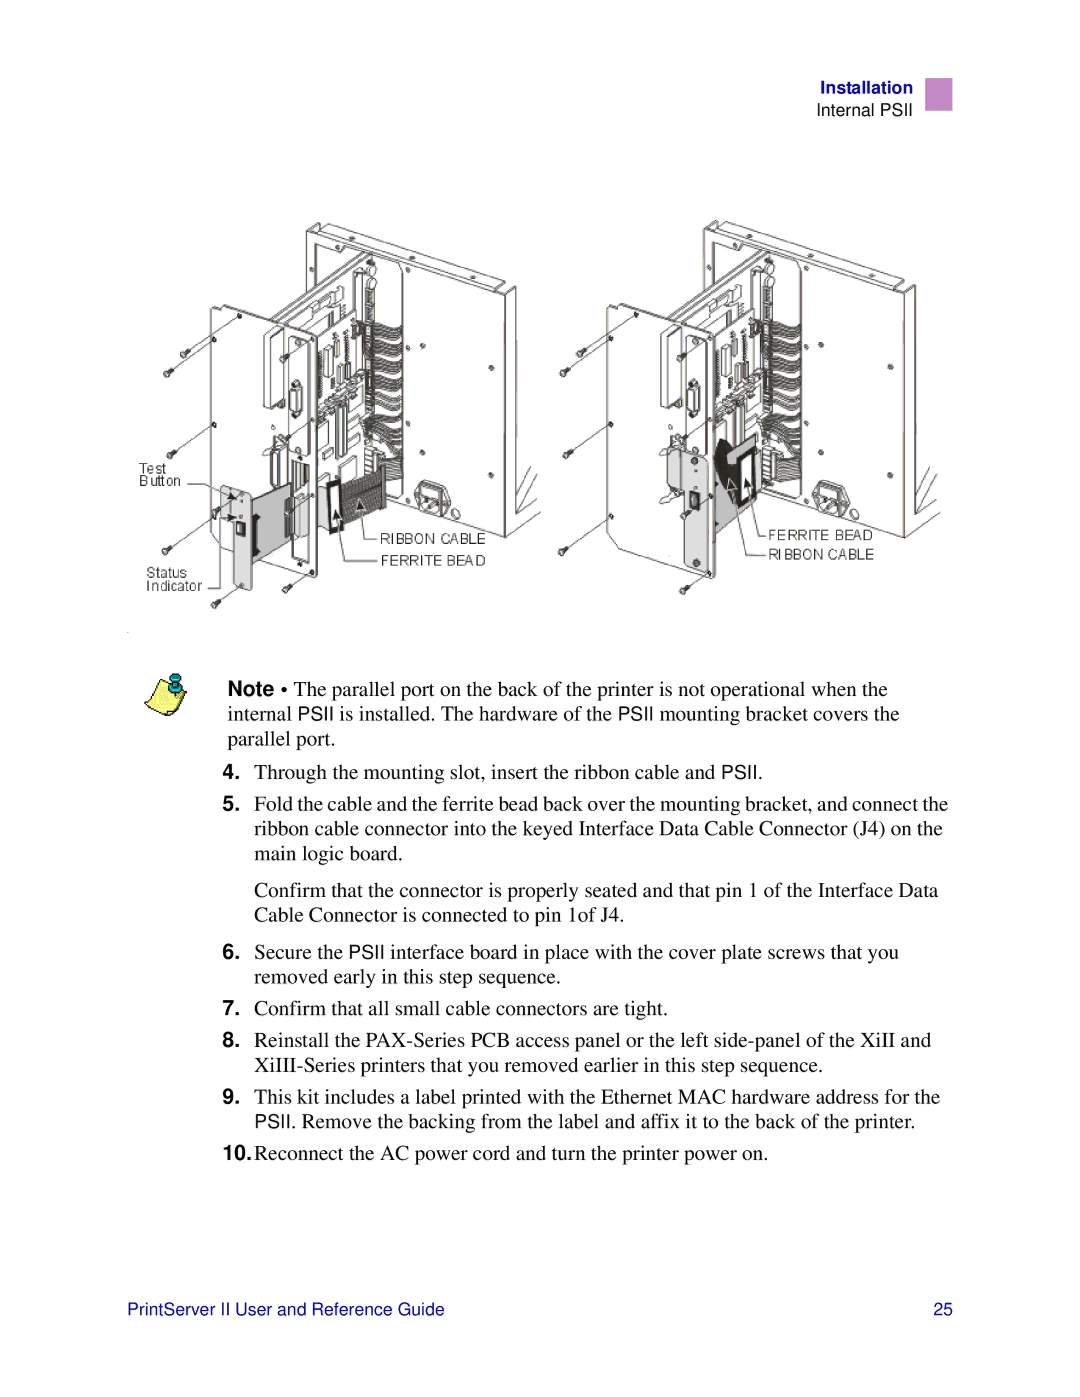
4.Through the mounting slot, insert the ribbon cable and PSII.
5.Fold the cable and the ferrite bead back over the mounting bracket, and connect the ribbon cable connector into the keyed Interface Data Cable Connector (J4) on the main logic board.
Confirm that the connector is properly seated and that pin 1 of the Interface Data Cable Connector is connected to pin 1of J4.
6.Secure the PSII interface board in place with the cover plate screws that you removed early in this step sequence.
7.Confirm that all small cable connectors are tight.
8.Reinstall the
9.This kit includes a label printed with the Ethernet MAC hardware address for the PSII. Remove the backing from the label and affix it to the back of the printer.
10.Reconnect the AC power cord and turn the printer power on.
PrintServer II User and Reference Guide | 25 |