Black & Decker 489051-00 instruction manual Dado Head SET Table Insert

Page 22

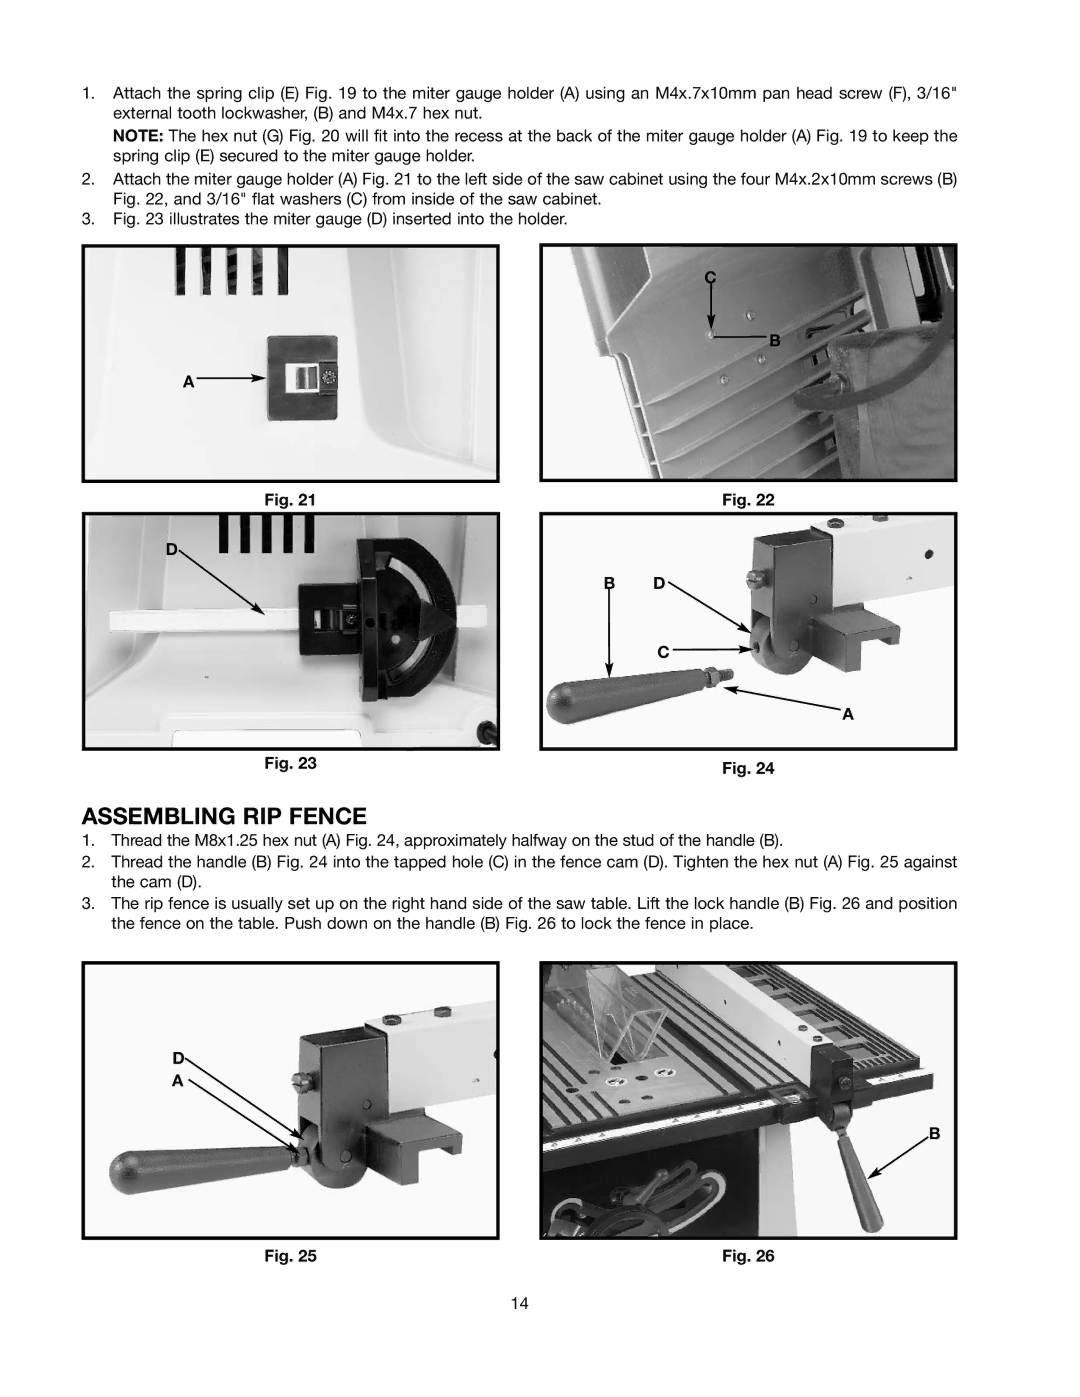
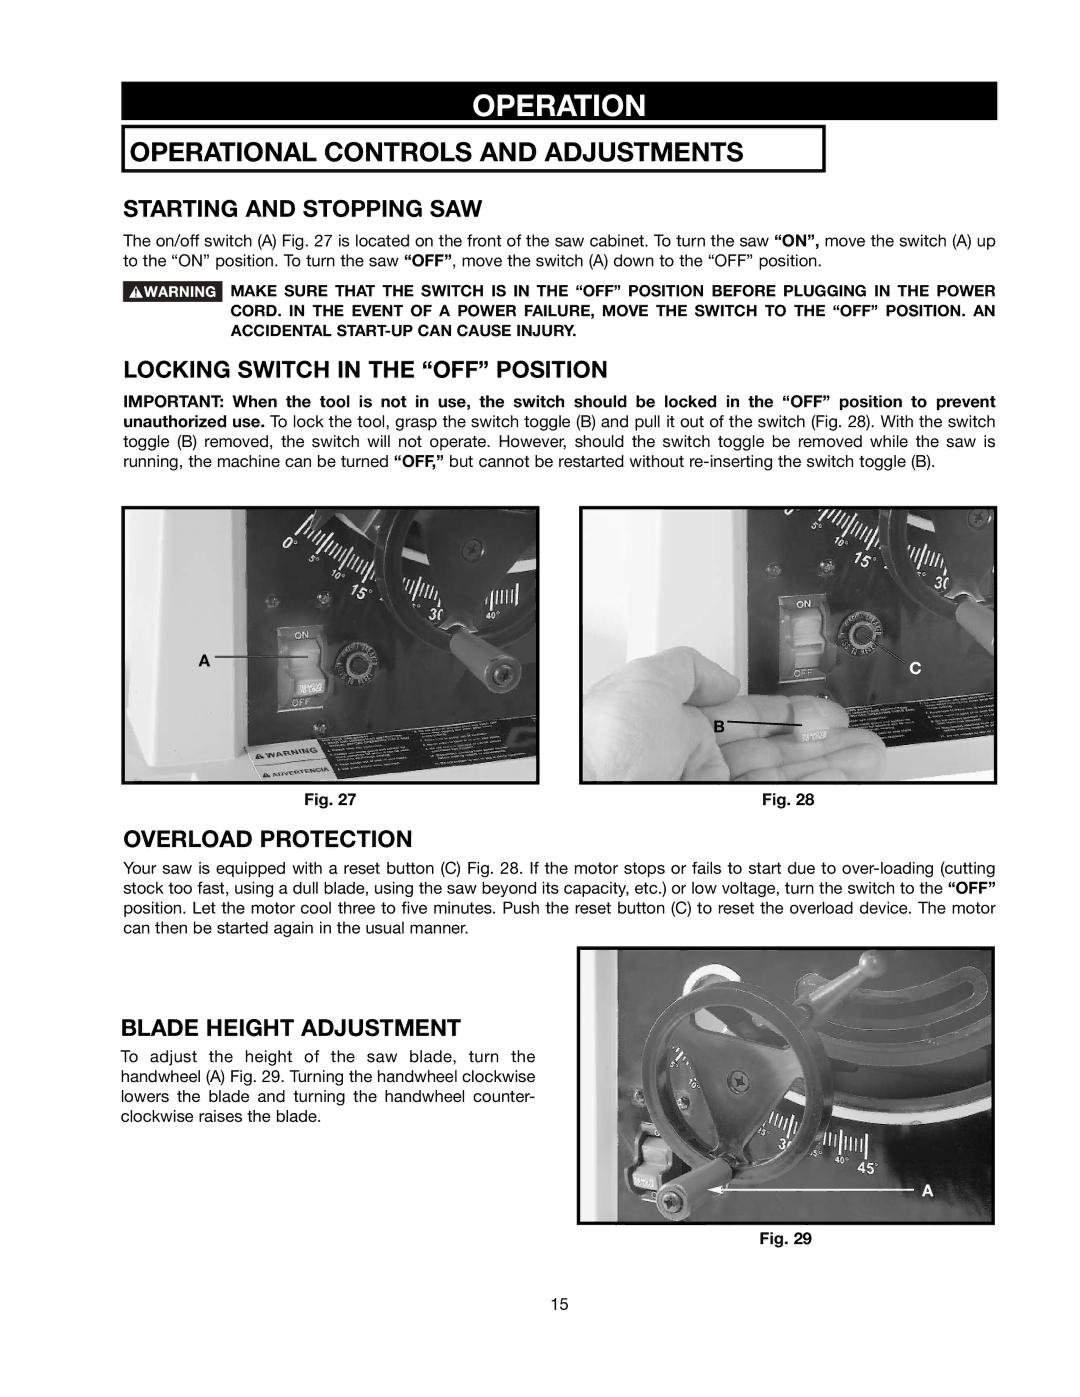
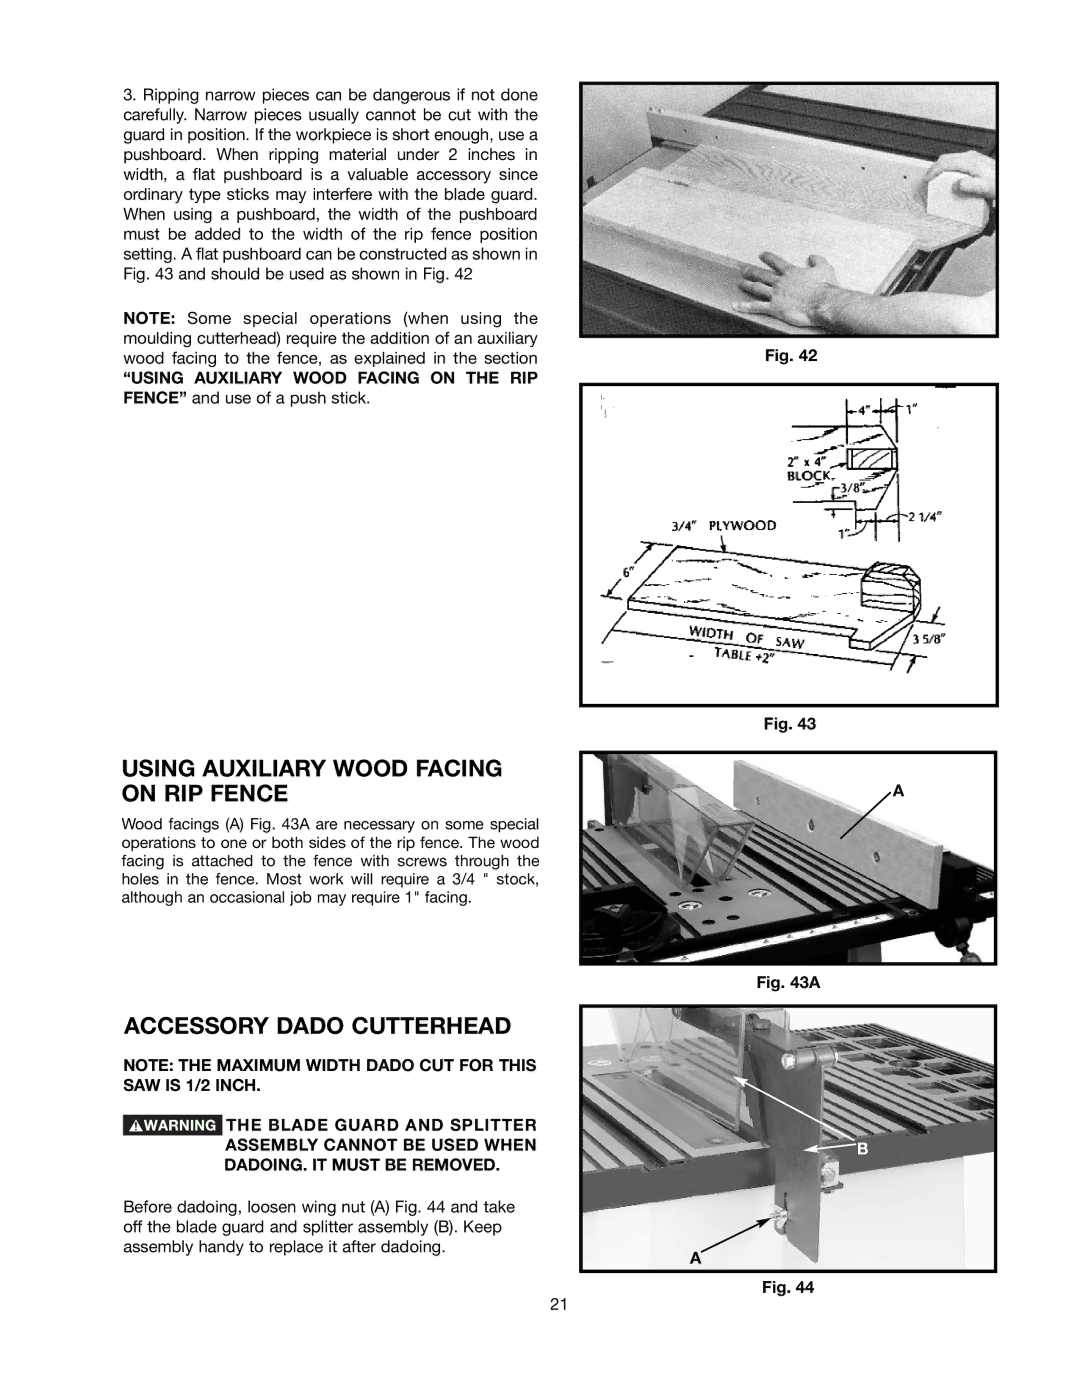
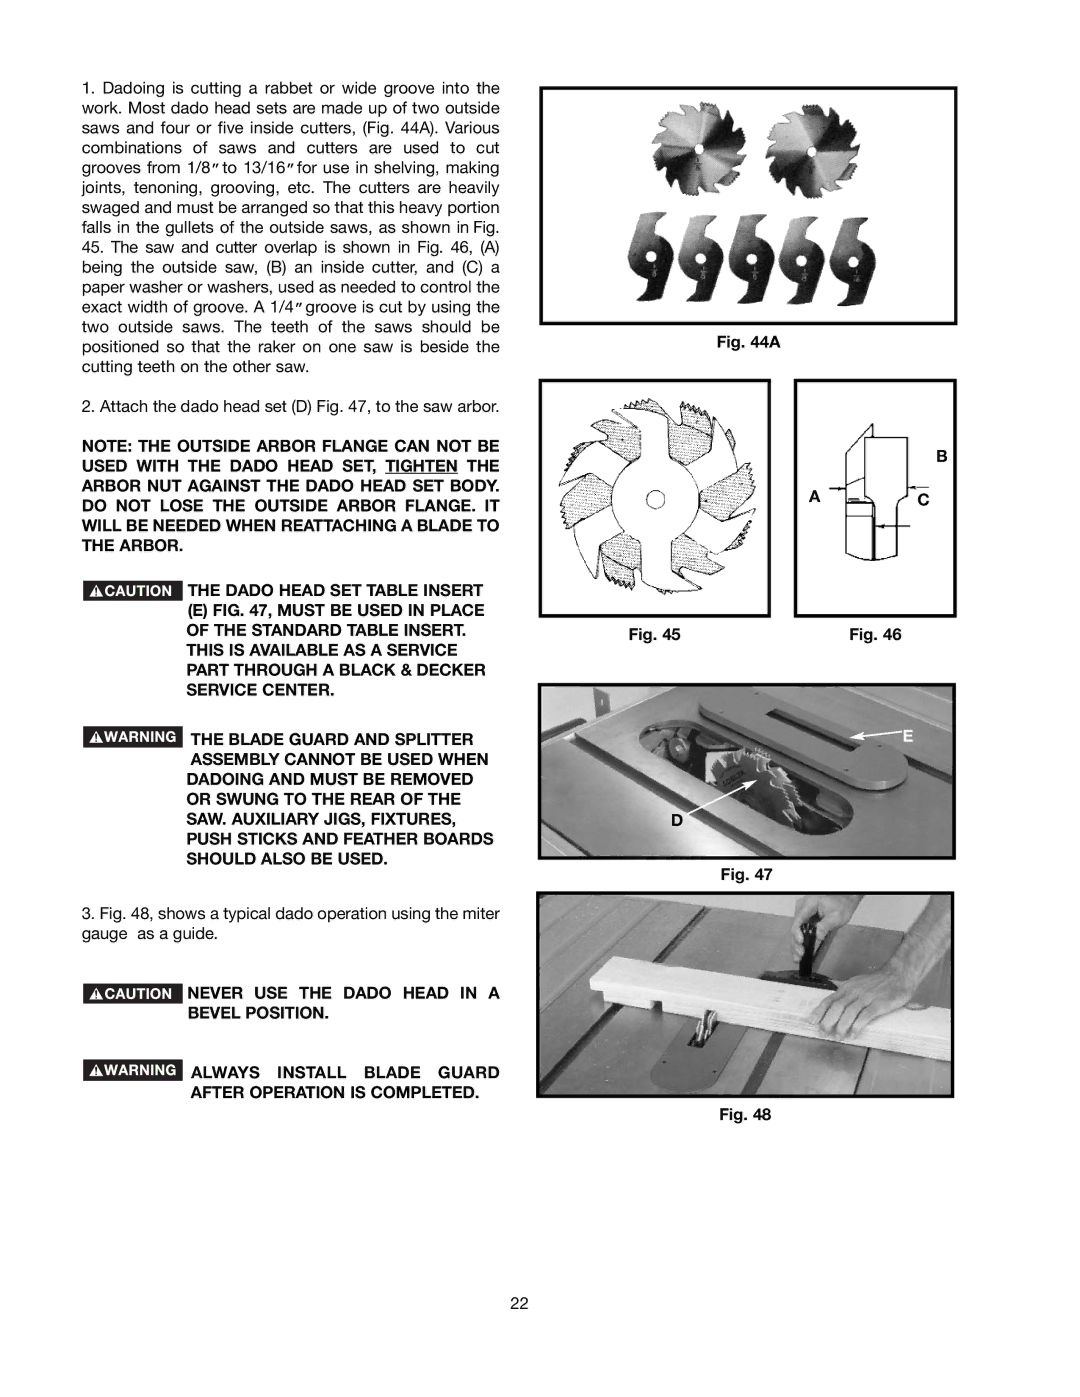
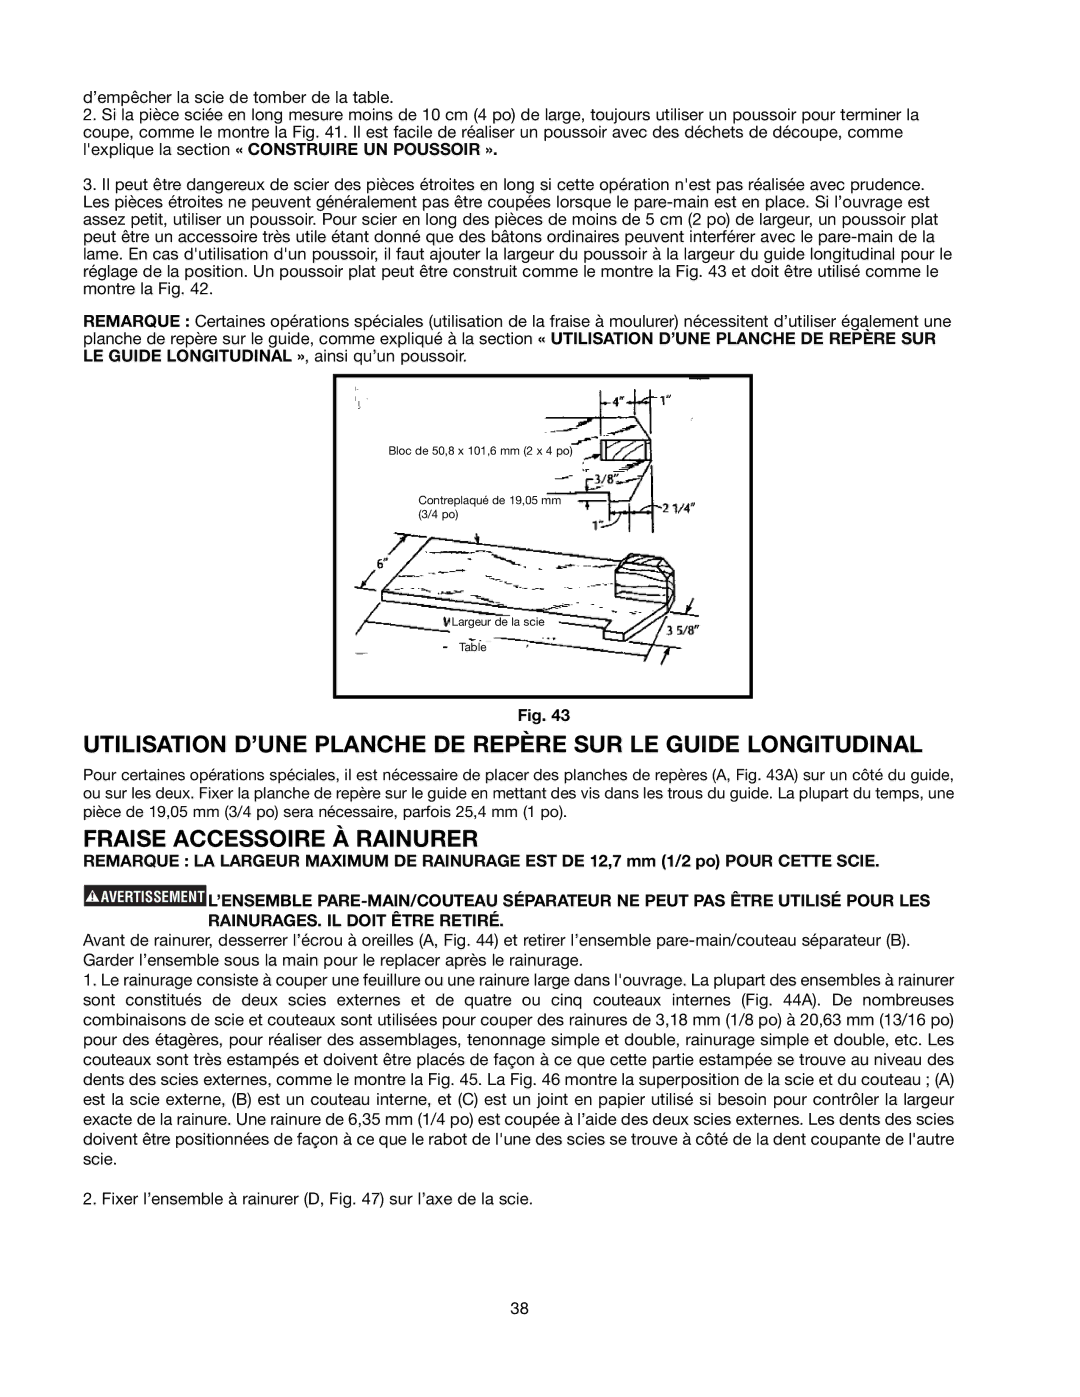
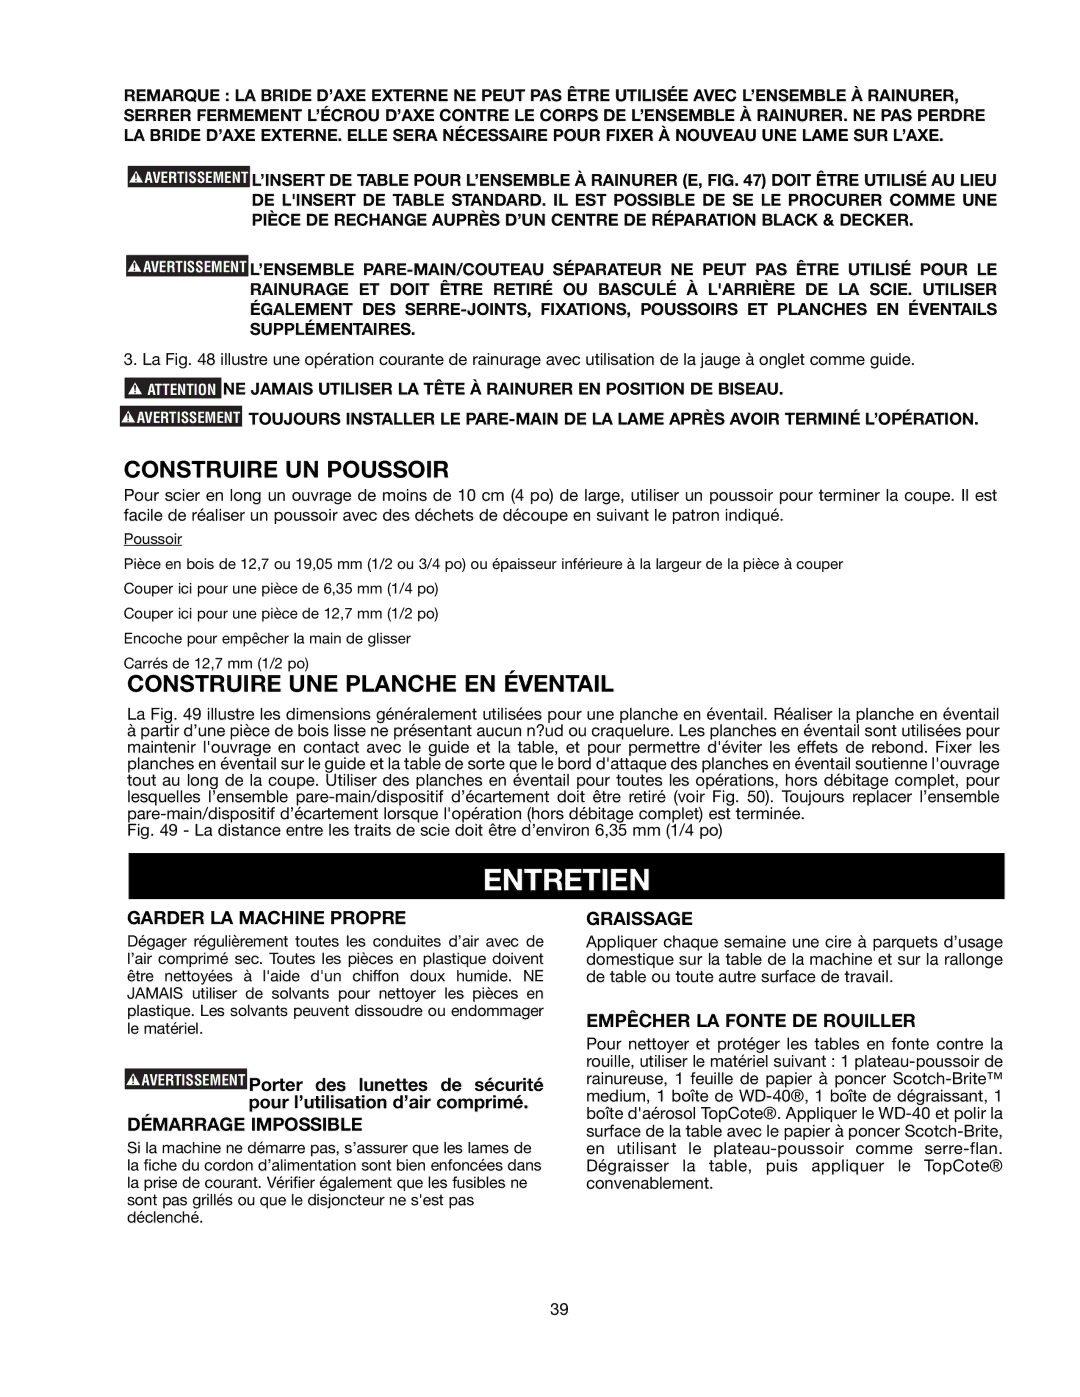
1.Dadoing is cutting a rabbet or wide groove into the work. Most dado head sets are made up of two outside saws and four or five inside cutters, (Fig. 44A). Various combinations of saws and cutters are used to cut grooves from 1/8to 13/16for use in shelving, making joints, tenoning, grooving, etc. The cutters are heavily swaged and must be arranged so that this heavy portion falls in the gullets of the outside saws, as shown in Fig.

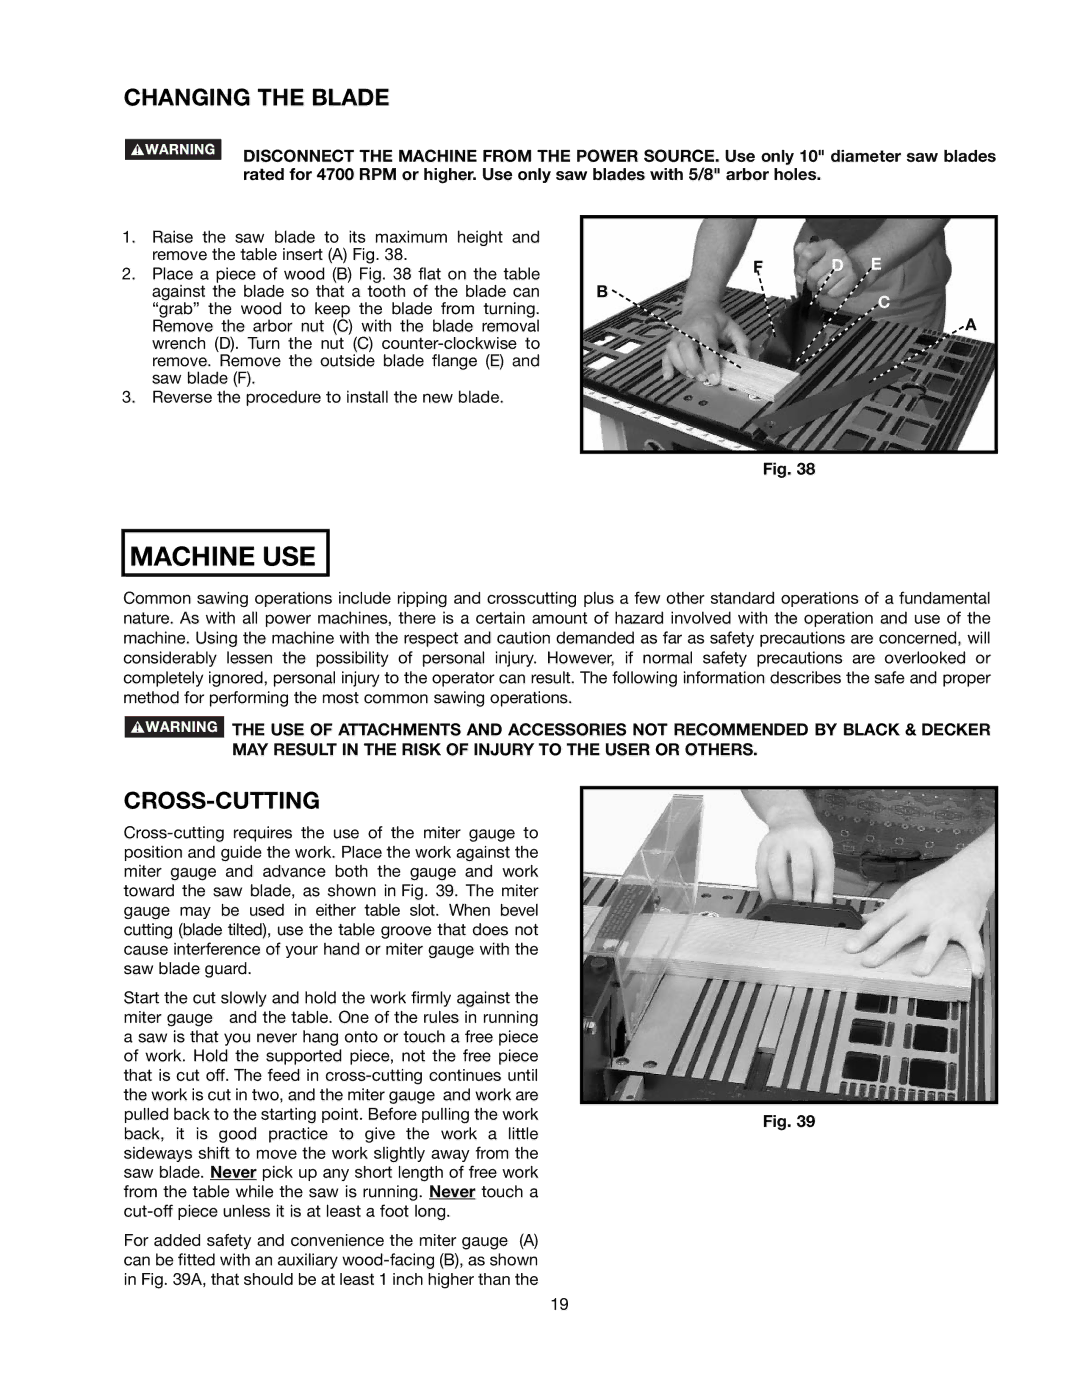
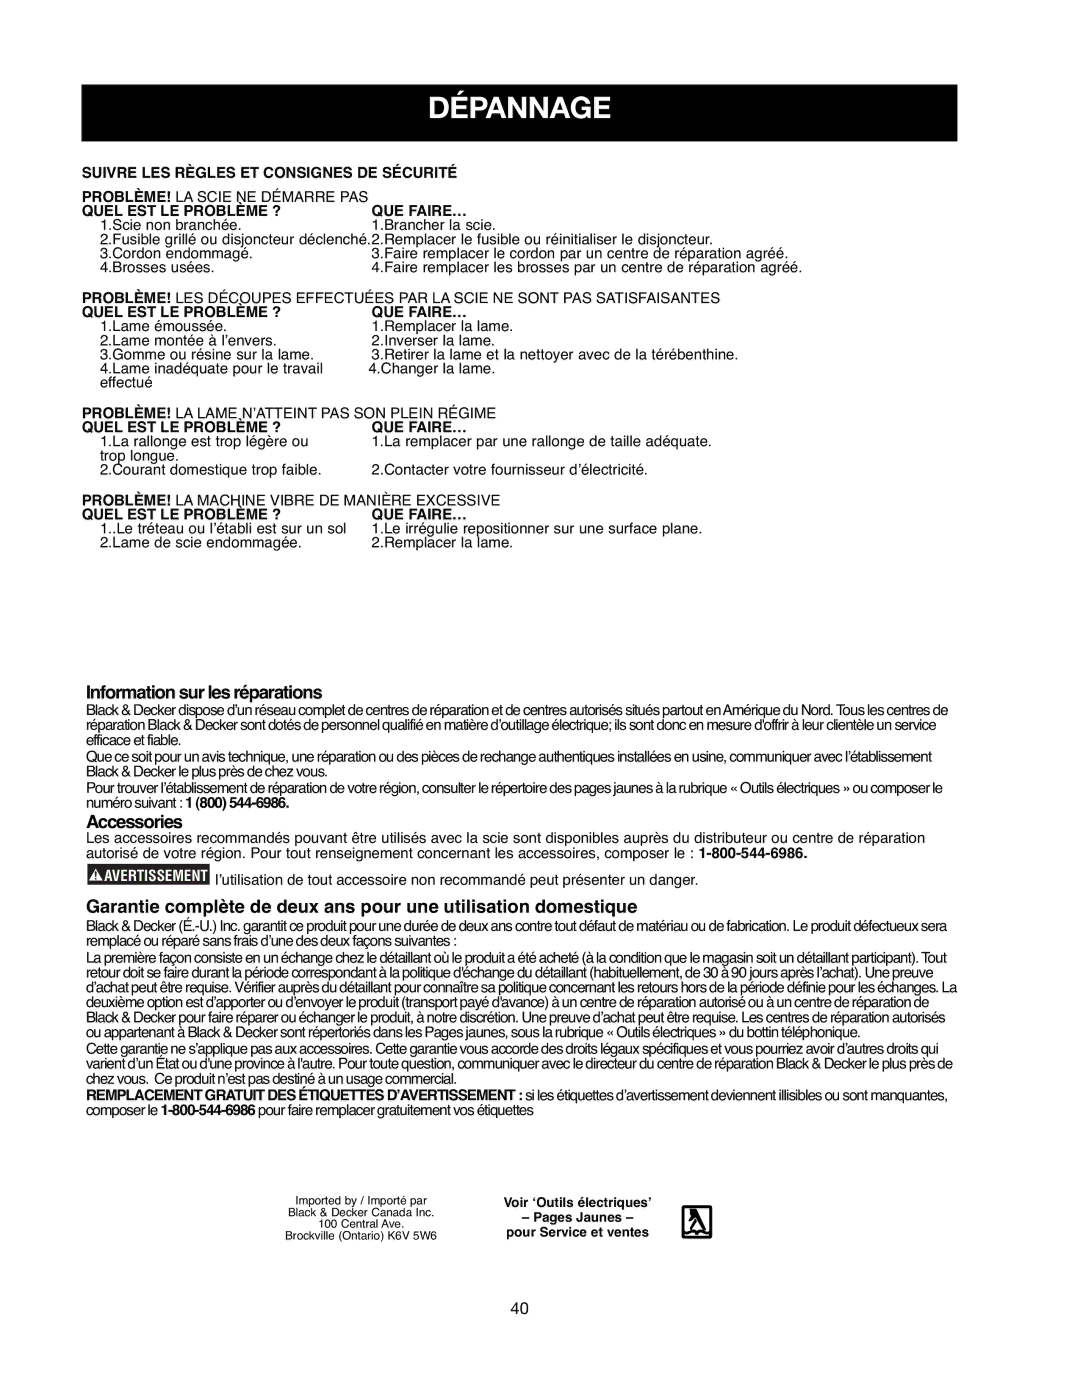
45.The saw and cutter overlap is shown in Fig. 46, (A) being the outside saw, (B) an inside cutter, and (C) a paper washer or washers, used as needed to control the exact width of groove. A 1/4groove is cut by using the two outside saws. The teeth of the saws should be positioned so that the raker on one saw is beside the cutting teeth on the other saw.

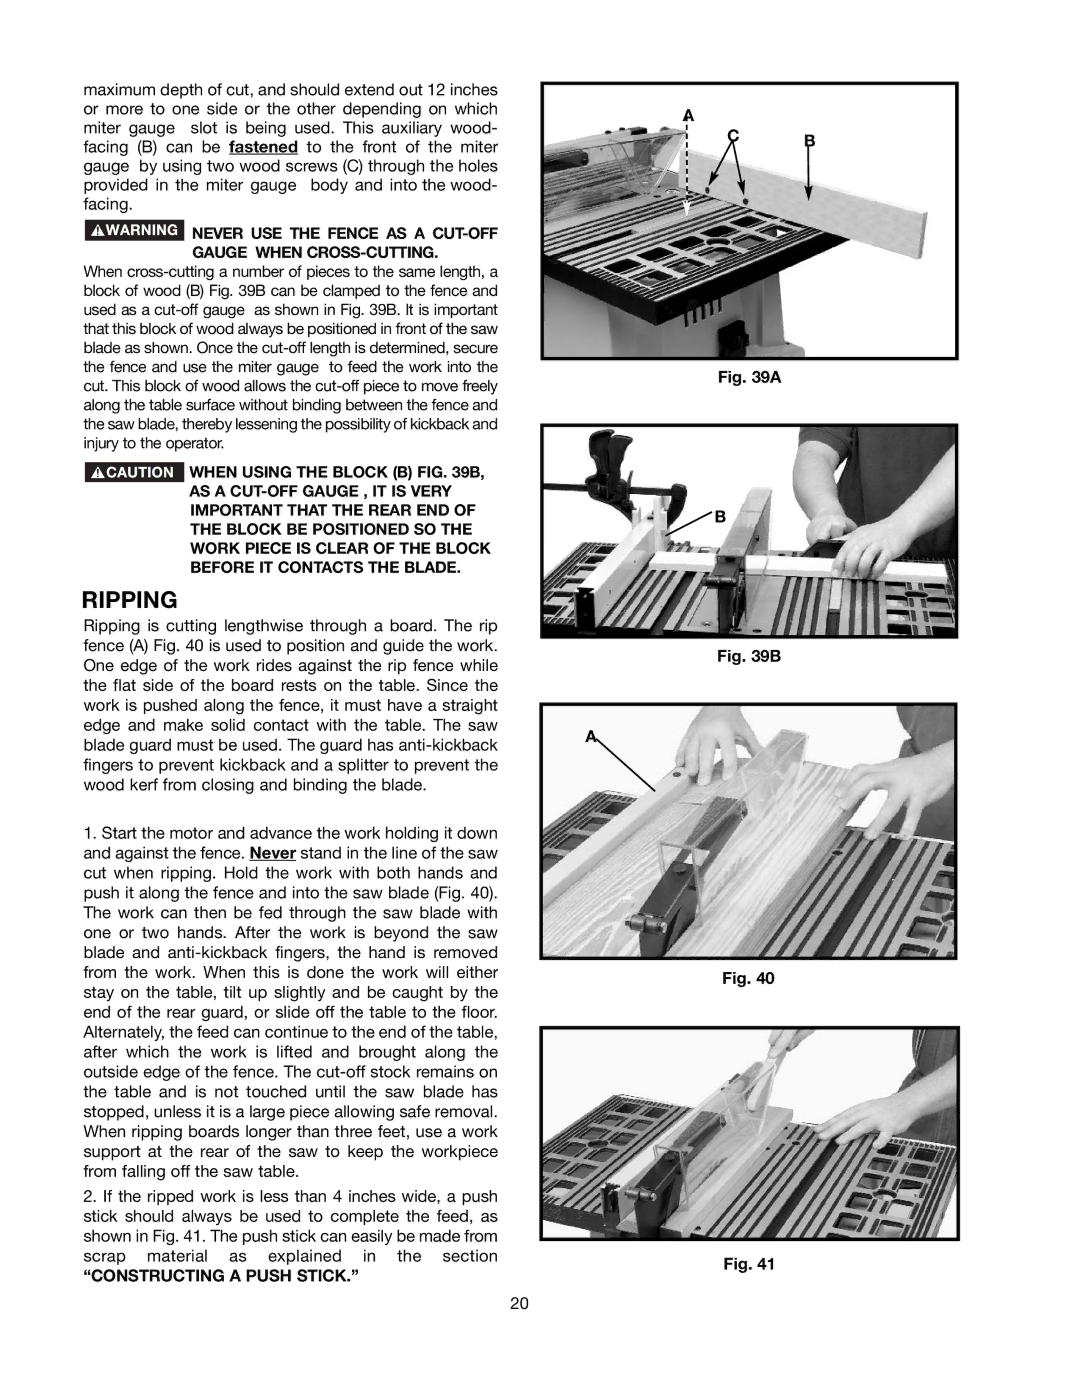
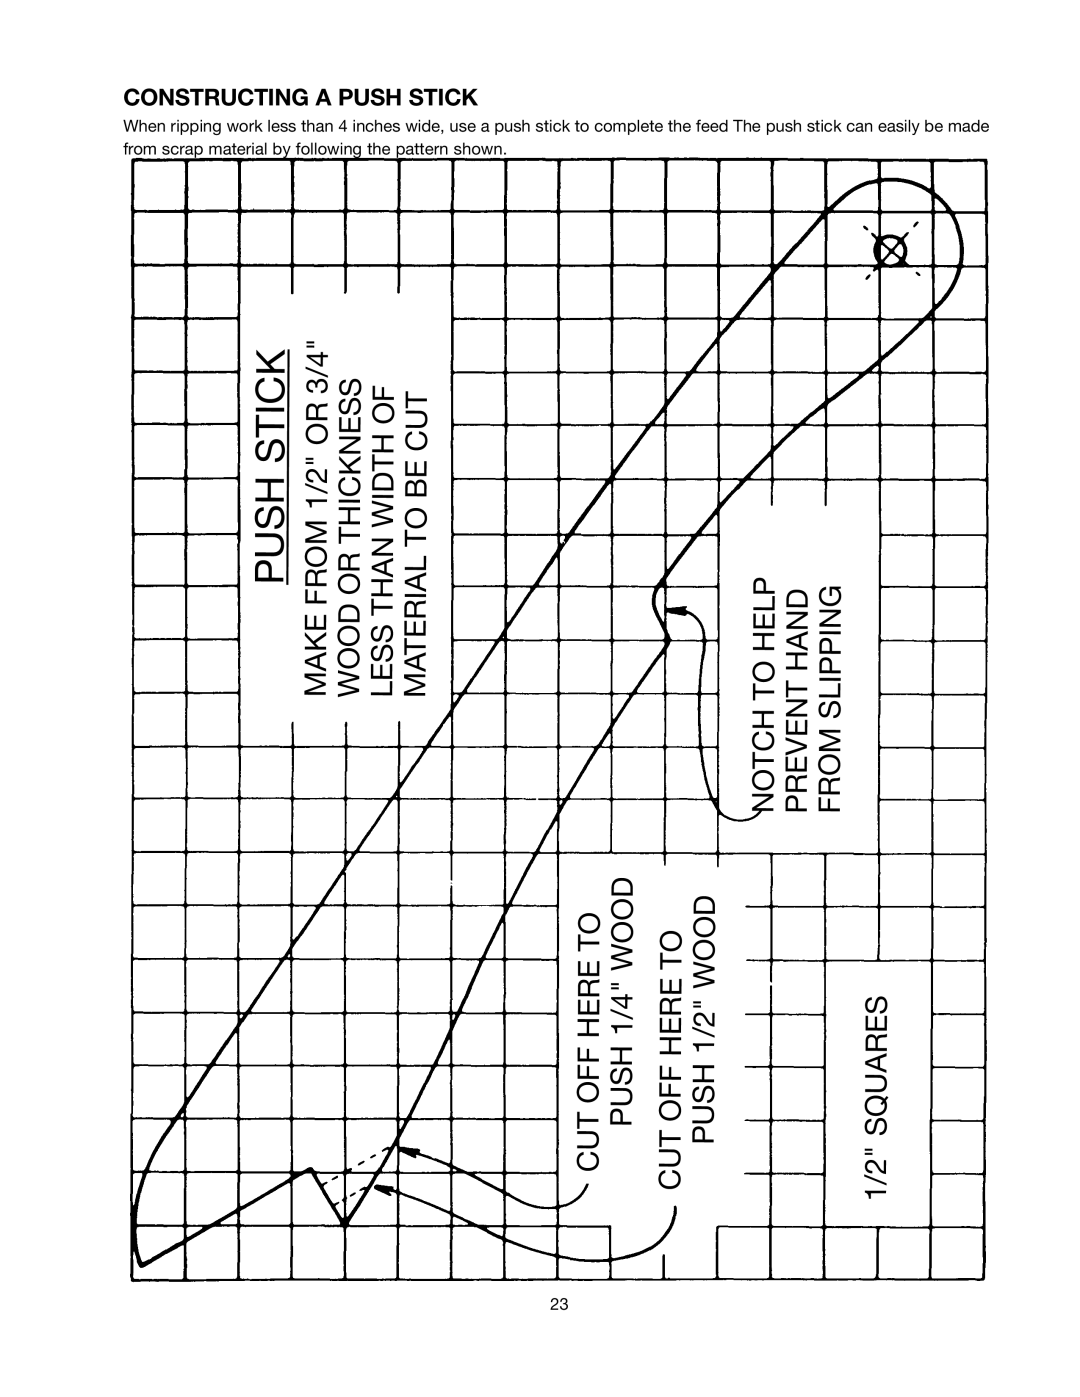
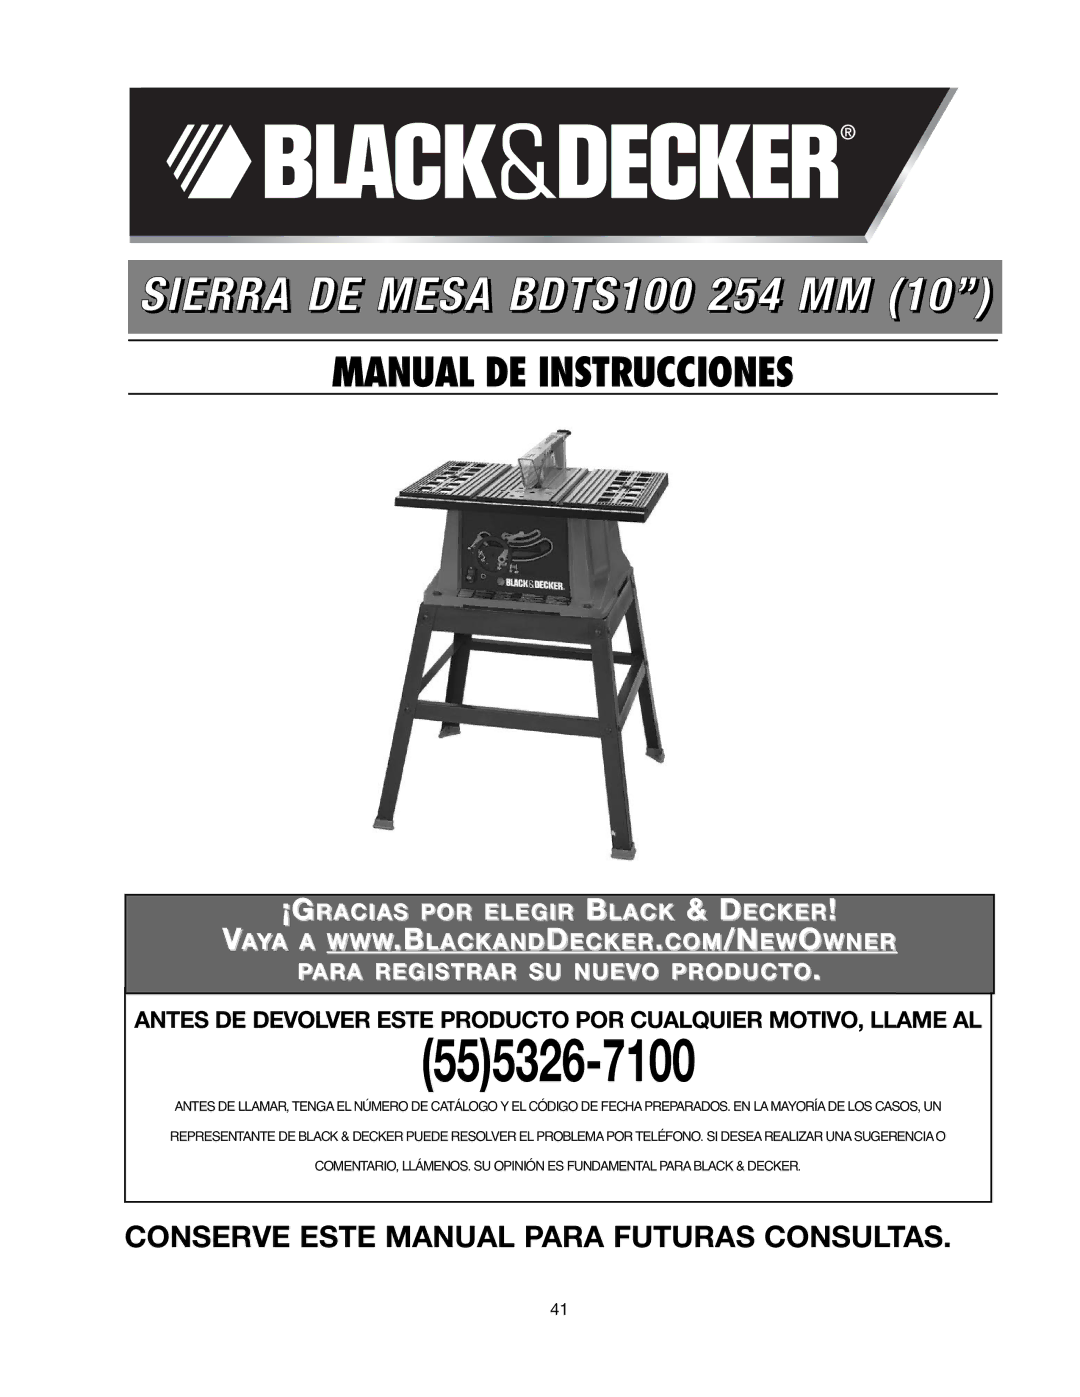
2.Attach the dado head set (D) Fig. 47, to the saw arbor.

NOTE: THE OUTSIDE ARBOR FLANGE CAN NOT BE USED WITH THE DADO HEAD SET, TIGHTEN THE ARBOR NUT AGAINST THE DADO HEAD SET BODY. DO NOT LOSE THE OUTSIDE ARBOR FLANGE. IT WILL BE NEEDED WHEN REATTACHING A BLADE TO THE ARBOR.

THE DADO HEAD SET TABLE INSERT

(E)FIG. 47, MUST BE USED IN PLACE OF THE STANDARD TABLE INSERT. THIS IS AVAILABLE AS A SERVICE PART THROUGH A BLACK & DECKER SERVICE CENTER.

THE BLADE GUARD AND SPLITTER ASSEMBLY CANNOT BE USED WHEN DADOING AND MUST BE REMOVED OR SWUNG TO THE REAR OF THE SAW. AUXILIARY JIGS, FIXTURES, PUSH STICKS AND FEATHER BOARDS SHOULD ALSO BE USED.

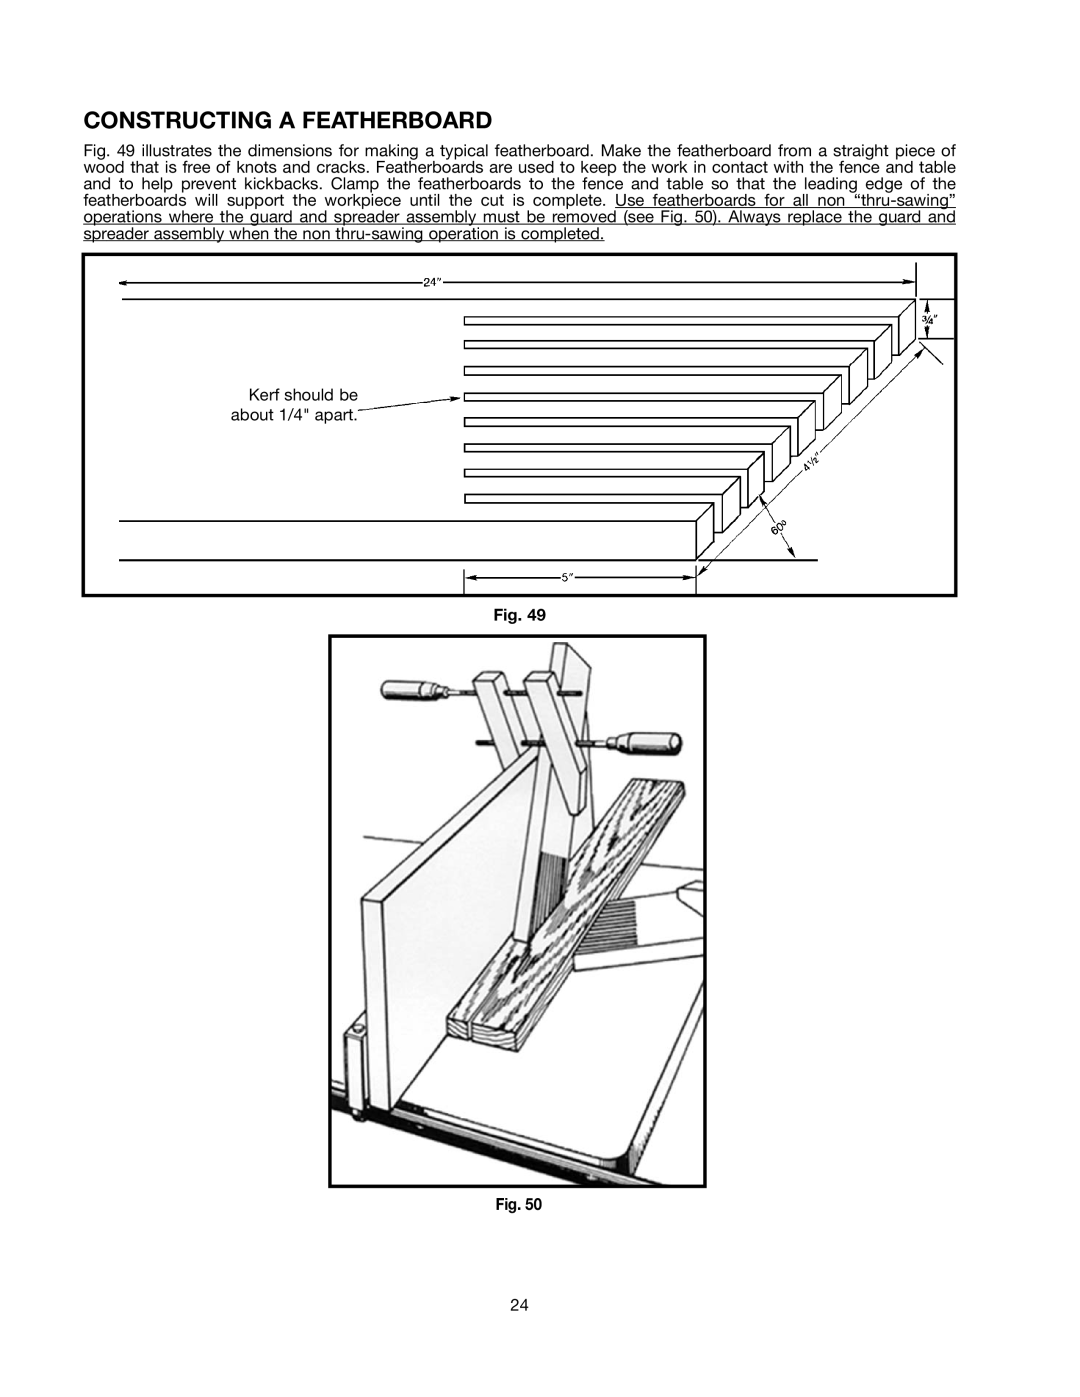
3.Fig. 48, shows a typical dado operation using the miter gauge as a guide.

NEVER USE THE DADO HEAD IN A BEVEL POSITION.

ALWAYS INSTALL BLADE GUARD AFTER OPERATION IS COMPLETED.

Fig. 44A

B

AC

Fig. 45

Fig. 46

E

D

Fig. 47

Fig. 48

22

Image 22
Contents BDTS100 10 254MM Table SAW Before Returning this Product For ANY Reason Please CallImportant Safety Instructions Table of ContentsSafety Guidelines Definitions California Proposition General Safety Rules USE of this Tool can GenerateAdditional Safety Rules for Table Saws Failure to Follow These Rules MAY Result in Serious InjuryMotor Specifications Power ConnectionsGrounding Instructions Carton Contents Functional DescriptionParts Assembly Tools Required AssemblyUnpacking and Cleaning Elevating and Supporting Surfaces for a SAW with no StandAssembling Stand SAW to StandAttaching Blade Height Adjusting Handwheel Attaching Blade Guard and Splitter AssemblyOn the screw L Fig Miter Gauge Attaching Miter Gauge HolderAssembling RIP Fence Illustrates the miter gauge D inserted into the holderOperation Locking Switch in the OFF PositionBlade Height Adjustment Starting and Stopping SAW45 Degree Positive Stop Adjustments Blade Tilt AdjustmentTo Adjust Positive Stop AT 45 Degrees RIP Fence Operation Adjustments Table Insert AdjustmentMiter Gauge Operation Adjustments Adjusting Blade Parallel to Miter Gauge SlotsChanging the Blade CROSS-CUTTINGRipping Constructing a Push StickUsing Auxiliary Wood Facing on RIP Fence Accessory Dado CutterheadDado Head SET Table Insert Pushstick Constructing a Push StickConstructing a Featherboard Maintenance TroubleshootingBanc DE Scie BDTS100 254 MM 10 PO Lignes Directrices EN Matière DE Sécurité Définitions Table DES MatièresDirectives DE Sécurité Importantes Proposition 65 DE LA CalifornieRègles Générales DE Sécurité Directives DE Sécurité ImportantesRègles DE Sécurité Supplémentaires Pour LES Bancs DE Scie Conserver CES DirectivesCaractéristiques Techniques DU Moteur Connexions ÉlectriquesDirectives DE Mise À LA Terre Contenu DU Carton Rallonges ÉlectriquesDescription Fonctionnelle AVANT-PROPOSDésemballage ET Nettoyage AssemblageOutils Nécessaires Pour L’ASSEMBLAGE Fixation DU Volant Servant À Régler LA Hauteur DE LA Lame Assemblage DU SocleScie SUR Socle Fixation DE L’ENSEMBLE PARE-MAIN/COUTEAU SéparateurFixation DU Support DE LA Jauge À Onglet FonctionnementJauge À Onglet Assemblage DU Guide LongitudinalRéglage DE LA Hauteur DE LA Lame Verrouiller L’INTERRUPTEUR EN Position D’ARRETProtection Contre LES Surcharges Réglage DE L’INCLINAISON DE LA LameUtilisation DE LA Jauge À Onglet ET Réglages Réglage DE Linsert DE TableChangement DE LA Lame Tronçonnage Sciage EN LongFraise Accessoire À Rainurer Construire UN Poussoir EntretienConstruire UNE Planche EN Éventail Dépannage Quel EST LE Problème ? QUE FAIRE…555326-7100 Normas DE Seguridad Definiciones ÍndiceInstrucciones Importantes Sobre Seguridad LA Propuesta 65 DE CaliforniaNormas Generales DE Seguridad Instrucciones Importantes Sobre SeguridadNormas DE Seguridad Adicionales Para LAS Sierras DE Mesa Mantenga LOS BRAZOS, LAS Manos y LOS Dedos lejos de la hojaEspecificaciones DEL Motor Conexiones EléctricasInstrucciones DE Conexión a Tierra Cables Prolongadores Descripción DE LAS FuncionesContenido DE LA Caja IntroducciónHerramientas Necesarias Para EL Montaje MontajeDesembalaje Y Limpieza Superficies DE Apoyo Y Elevación Para UNA Sierra SIN BaseSierra a LA Base Montaje DE LA BaseColocación DEL Volante Para Ajustar LA Altura DE LA Hoja Calibrador DE Inglete Colocación DEL Ensamble DE Guarda DE LA Hoja Y HedidorColocación DEL Sujetador DEL Calibrador DE Inglete Operación Ajuste DEL Inserto Para Mesa Ajustes DE Topes Positivos a 90 Y 45 GradosOperación DE LA Guía DE Corte Y Ajustes Ajustar UN Tope Positivo a 45 GradosOperación DEL Calibrador DE Inglete Y Ajustes Cambio DE LA HojaCorte Longitudinal Corte TransversalVara Para Empujar Construcción DE UN Palo DE Empujar Cabezal Portacuchilla Accesorio Para RanurasConstrucción DE UNA Tabla DE Canto Biselado Detección DE Problemas MantenimientoInformación de mantenimiento Para Otras Localidades Llame AL 55 5326