Galaxy
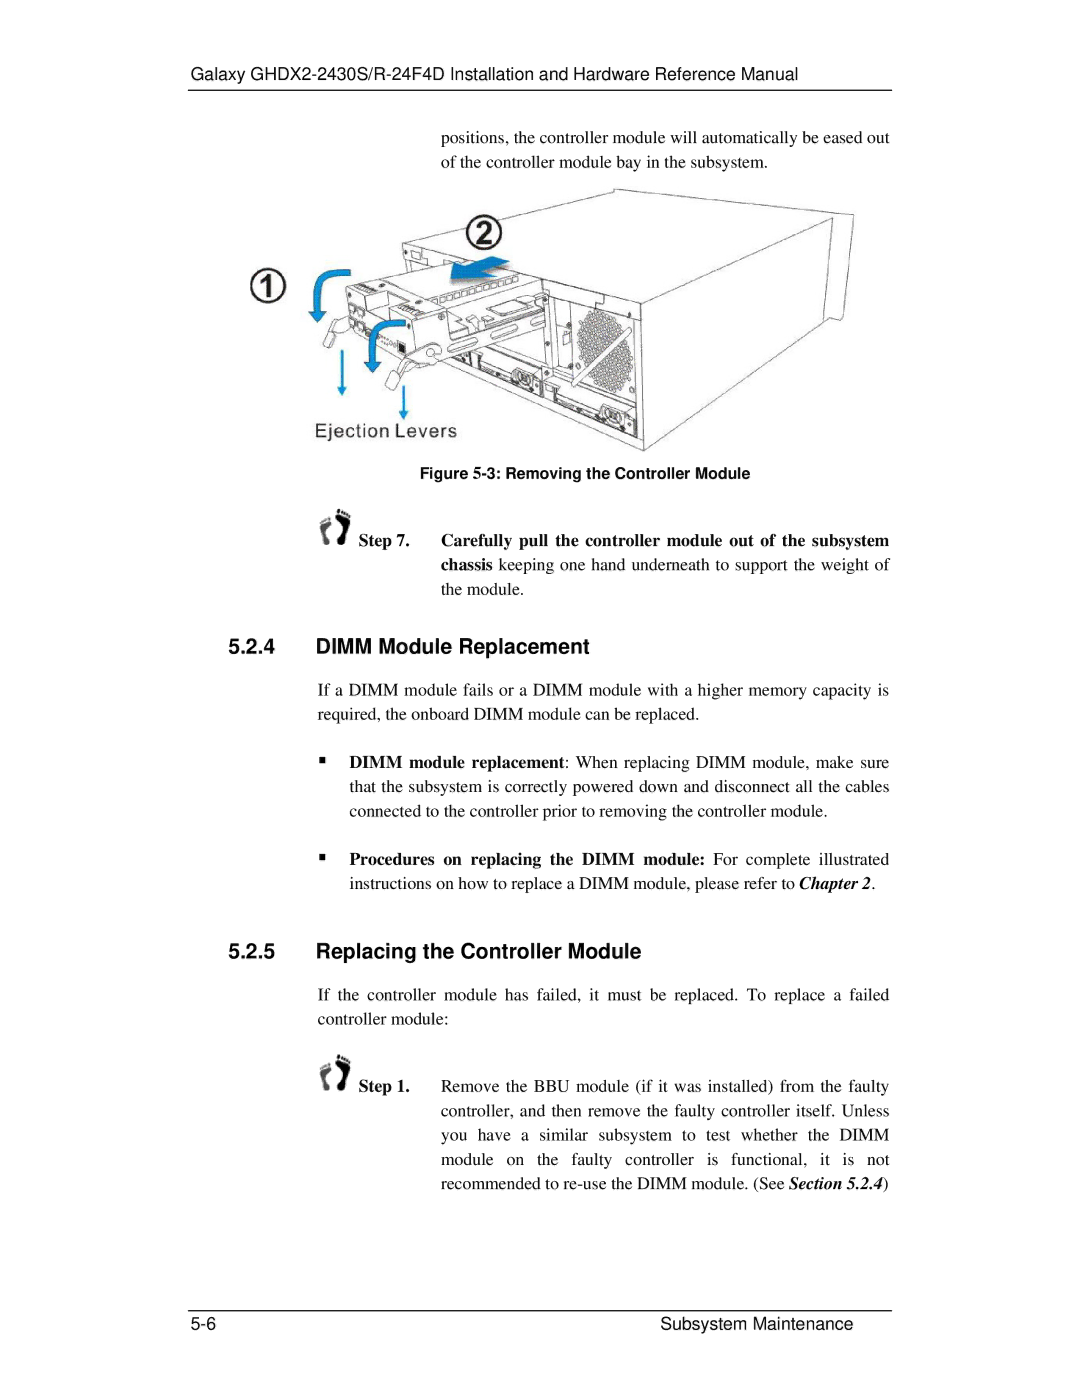
positions, the controller module will automatically be eased out of the controller module bay in the subsystem.
Figure 5-3: Removing the Controller Module
![]() Step 7. Carefully pull the controller module out of the subsystem chassis keeping one hand underneath to support the weight of the module.
Step 7. Carefully pull the controller module out of the subsystem chassis keeping one hand underneath to support the weight of the module.
5.2.4DIMM Module Replacement
If a DIMM module fails or a DIMM module with a higher memory capacity is required, the onboard DIMM module can be replaced.
DIMM module replacement: When replacing DIMM module, make sure that the subsystem is correctly powered down and disconnect all the cables connected to the controller prior to removing the controller module.
Procedures on replacing the DIMM module: For complete illustrated instructions on how to replace a DIMM module, please refer to Chapter 2.
5.2.5Replacing the Controller Module
If the controller module has failed, it must be replaced. To replace a failed controller module:
![]() Step 1. Remove the BBU module (if it was installed) from the faulty controller, and then remove the faulty controller itself. Unless you have a similar subsystem to test whether the DIMM module on the faulty controller is functional, it is not recommended to
Step 1. Remove the BBU module (if it was installed) from the faulty controller, and then remove the faulty controller itself. Unless you have a similar subsystem to test whether the DIMM module on the faulty controller is functional, it is not recommended to
Subsystem Maintenance |