Chapter 2 Hardware Installation
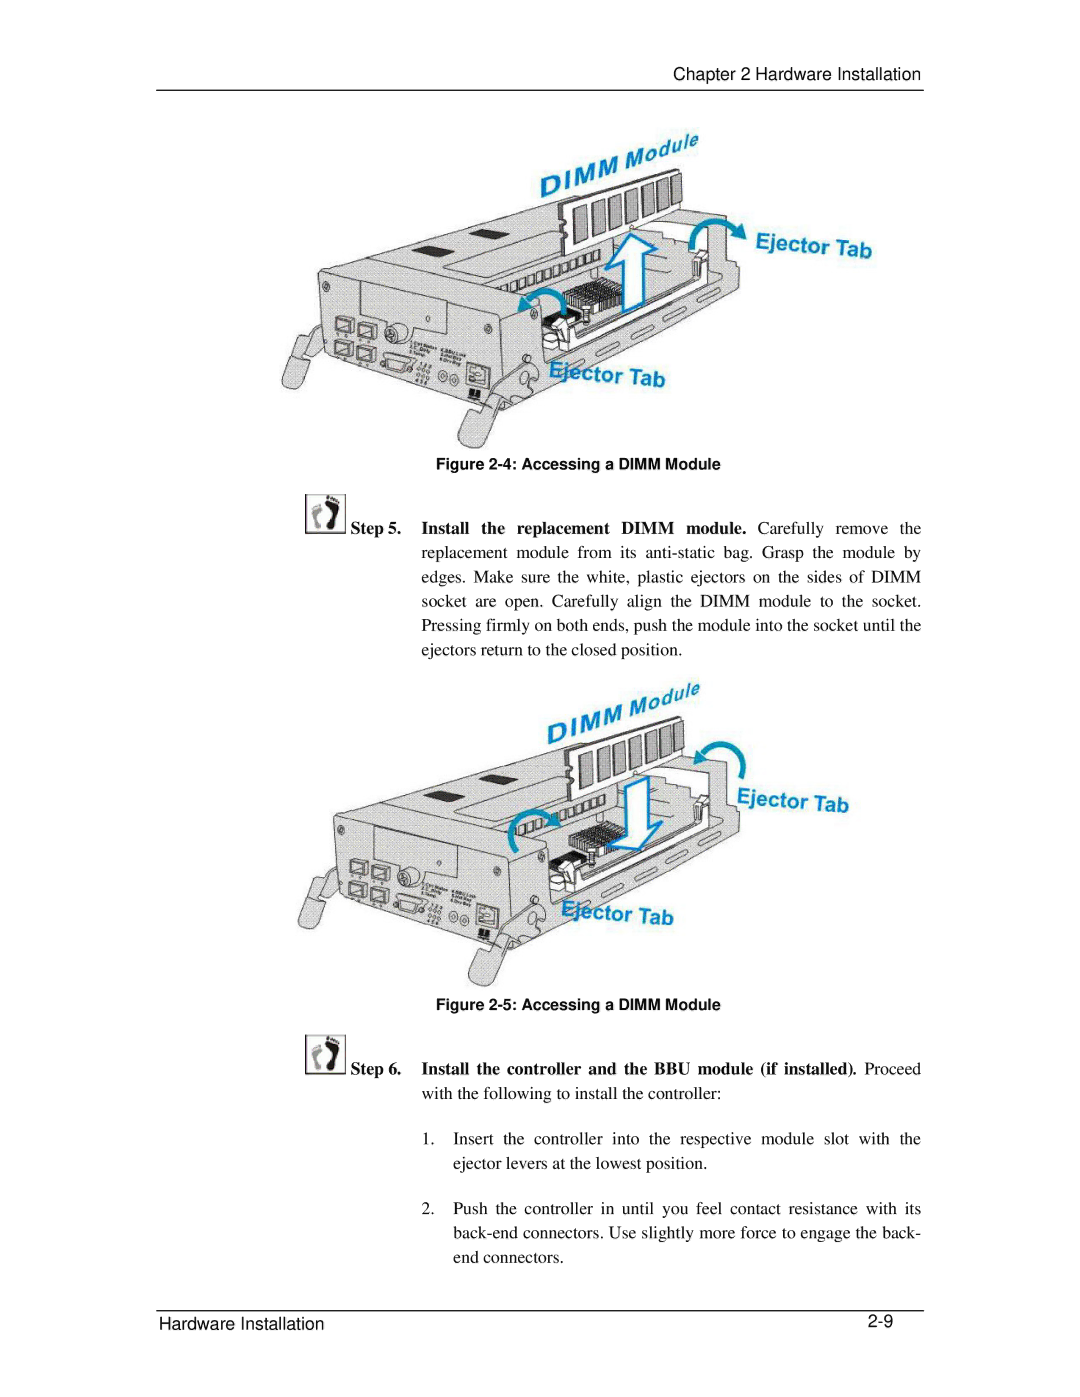
Figure 2-4: Accessing a DIMM Module
![]() Step 5. Install the replacement DIMM module. Carefully remove the replacement module from its
Step 5. Install the replacement DIMM module. Carefully remove the replacement module from its
Figure 2-5: Accessing a DIMM Module
![]() Step 6. Install the controller and the BBU module (if installed). Proceed with the following to install the controller:
Step 6. Install the controller and the BBU module (if installed). Proceed with the following to install the controller:
1.Insert the controller into the respective module slot with the ejector levers at the lowest position.
2.Push the controller in until you feel contact resistance with its
Hardware Installation |