Chapter 2 Hardware Installation
![]() Step 6. Use the included crosshead round screws (#9 in the packing list) to secure two (2) end brackets (#3 or #4) to the back of the subsystem.
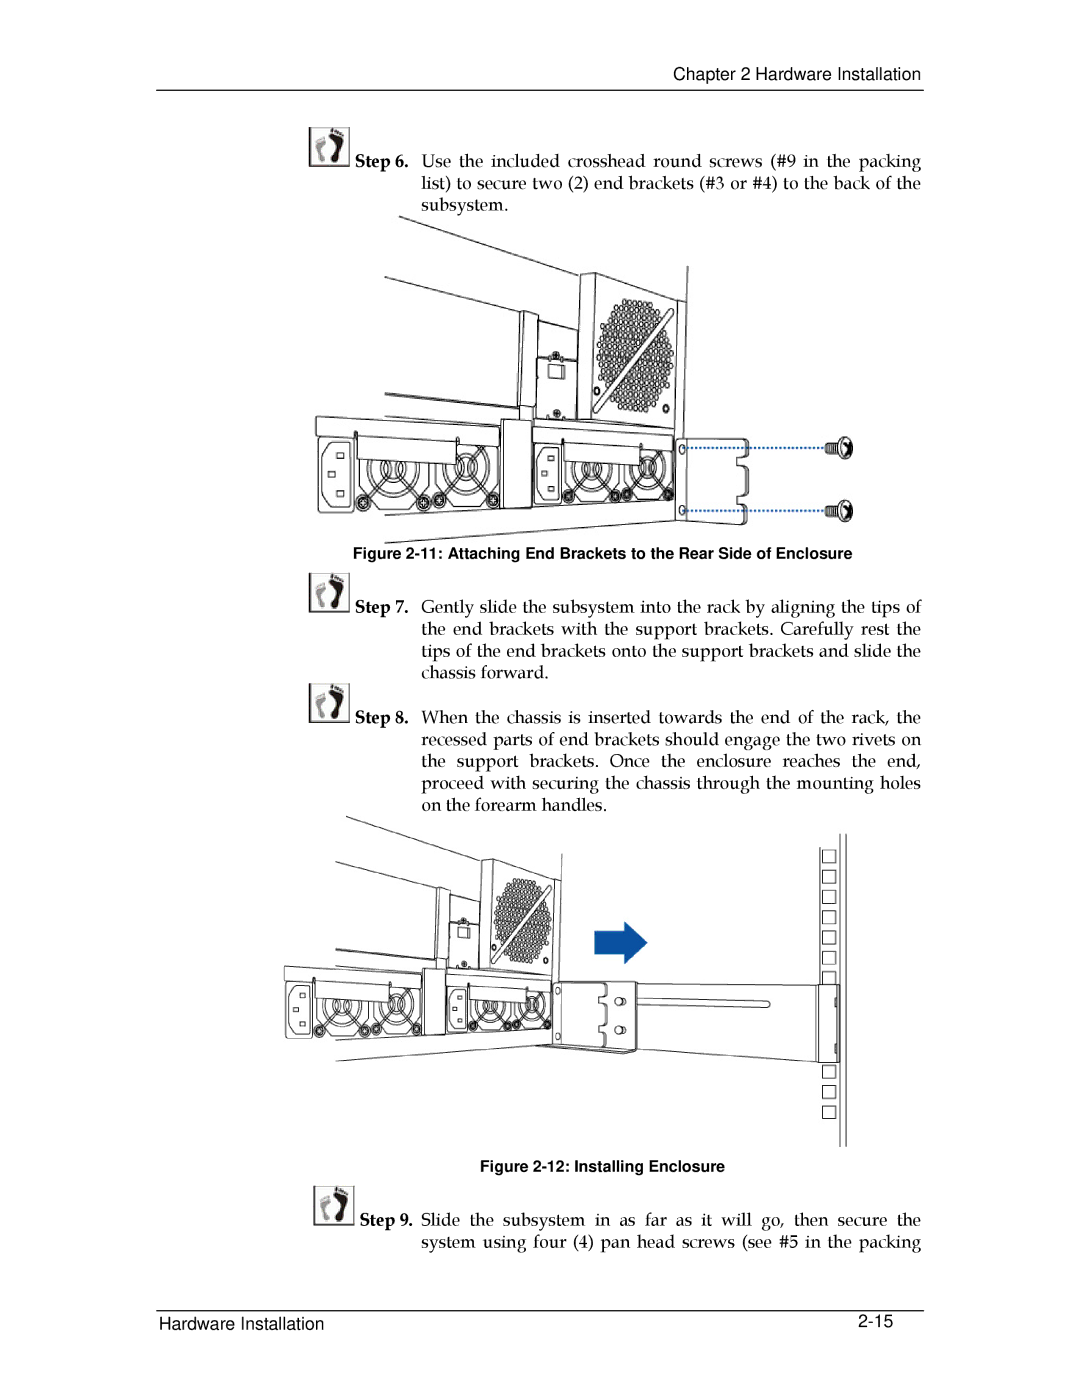
Step 6. Use the included crosshead round screws (#9 in the packing list) to secure two (2) end brackets (#3 or #4) to the back of the subsystem.
Figure 2-11: Attaching End Brackets to the Rear Side of Enclosure
![]() Step 7. Gently slide the subsystem into the rack by aligning the tips of the end brackets with the support brackets. Carefully rest the tips of the end brackets onto the support brackets and slide the chassis forward.
Step 7. Gently slide the subsystem into the rack by aligning the tips of the end brackets with the support brackets. Carefully rest the tips of the end brackets onto the support brackets and slide the chassis forward.
![]() Step 8. When the chassis is inserted towards the end of the rack, the recessed parts of end brackets should engage the two rivets on the support brackets. Once the enclosure reaches the end, proceed with securing the chassis through the mounting holes on the forearm handles.
Step 8. When the chassis is inserted towards the end of the rack, the recessed parts of end brackets should engage the two rivets on the support brackets. Once the enclosure reaches the end, proceed with securing the chassis through the mounting holes on the forearm handles.
Figure 2-12: Installing Enclosure
![]() Step 9. Slide the subsystem in as far as it will go, then secure the system using four (4) pan head screws (see #5 in the packing
Step 9. Slide the subsystem in as far as it will go, then secure the system using four (4) pan head screws (see #5 in the packing
Hardware Installation |
