14.2 The Complete Calibration Procedure
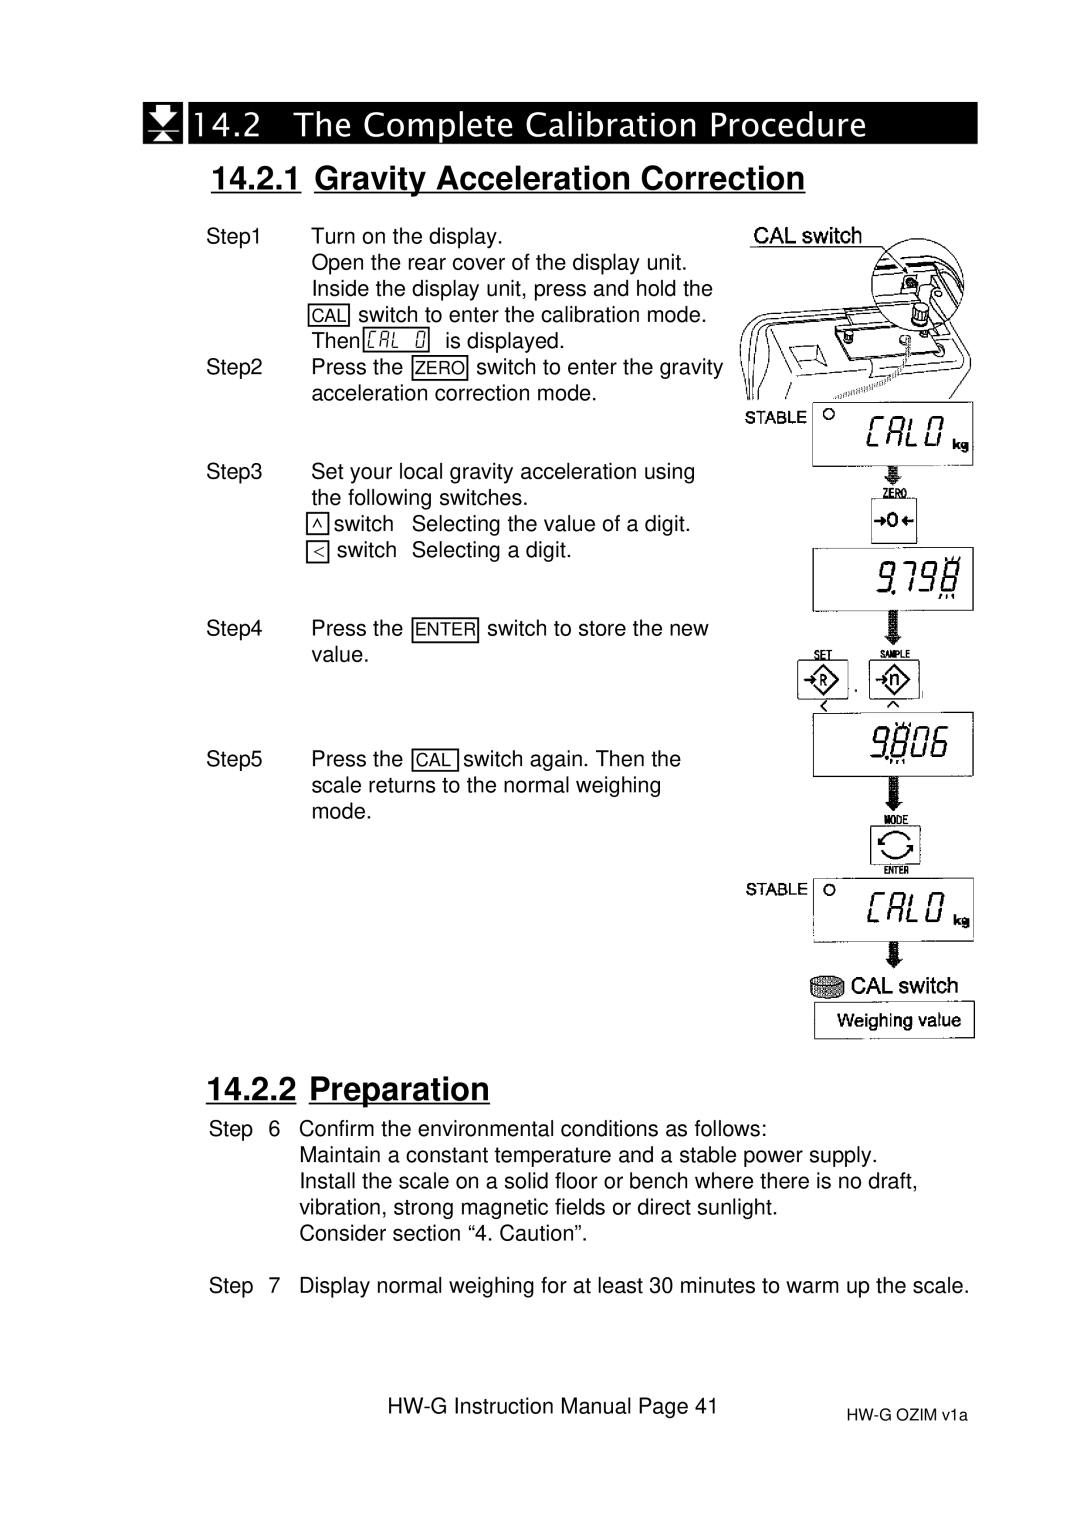
14.2.1 Gravity Acceleration Correction
Step1 | Turn on the display. | |||||||
| Open the rear cover of the display unit. | |||||||
| Inside the display unit, press and hold the | |||||||
|
| switch to enter the calibration mode. | ||||||
| CAL | |||||||
| Then | Cal 0 | is displayed. | |||||
Step2 | Press the |
|
|
| switch to enter the gravity | |||
ZERO | ||||||||
| acceleration |
| correction mode. | |||||
Step3 | Set your local gravity acceleration using | |||||||
| the following switches. | |||||||
| ^ switch | Selecting the value of a digit. | ||||||
| < switch | Selecting a digit. | ||||||
Step4 | Press the |
|
|
|
| switch to store the new | ||
ENTER | ||||||||
| value. |
|
|
|
|
| ||
Step5 | Press the |
|
| switch again. Then the | ||||
CAL | ||||||||
| scale returns to the normal weighing | |||||||
| mode. |
|
|
|
|
| ||
14.2.2 Preparation
Step | 6 | Confirm the environmental conditions as follows: |
|
| Maintain a constant temperature and a stable power supply. |
|
| Install the scale on a solid floor or bench where there is no draft, |
|
| vibration, strong magnetic fields or direct sunlight. |
|
| Consider section “4. Caution”. |
Step | 7 | Display normal weighing for at least 30 minutes to warm up the scale. |