EtherHub 1500 System User’s Guide
Selections Available
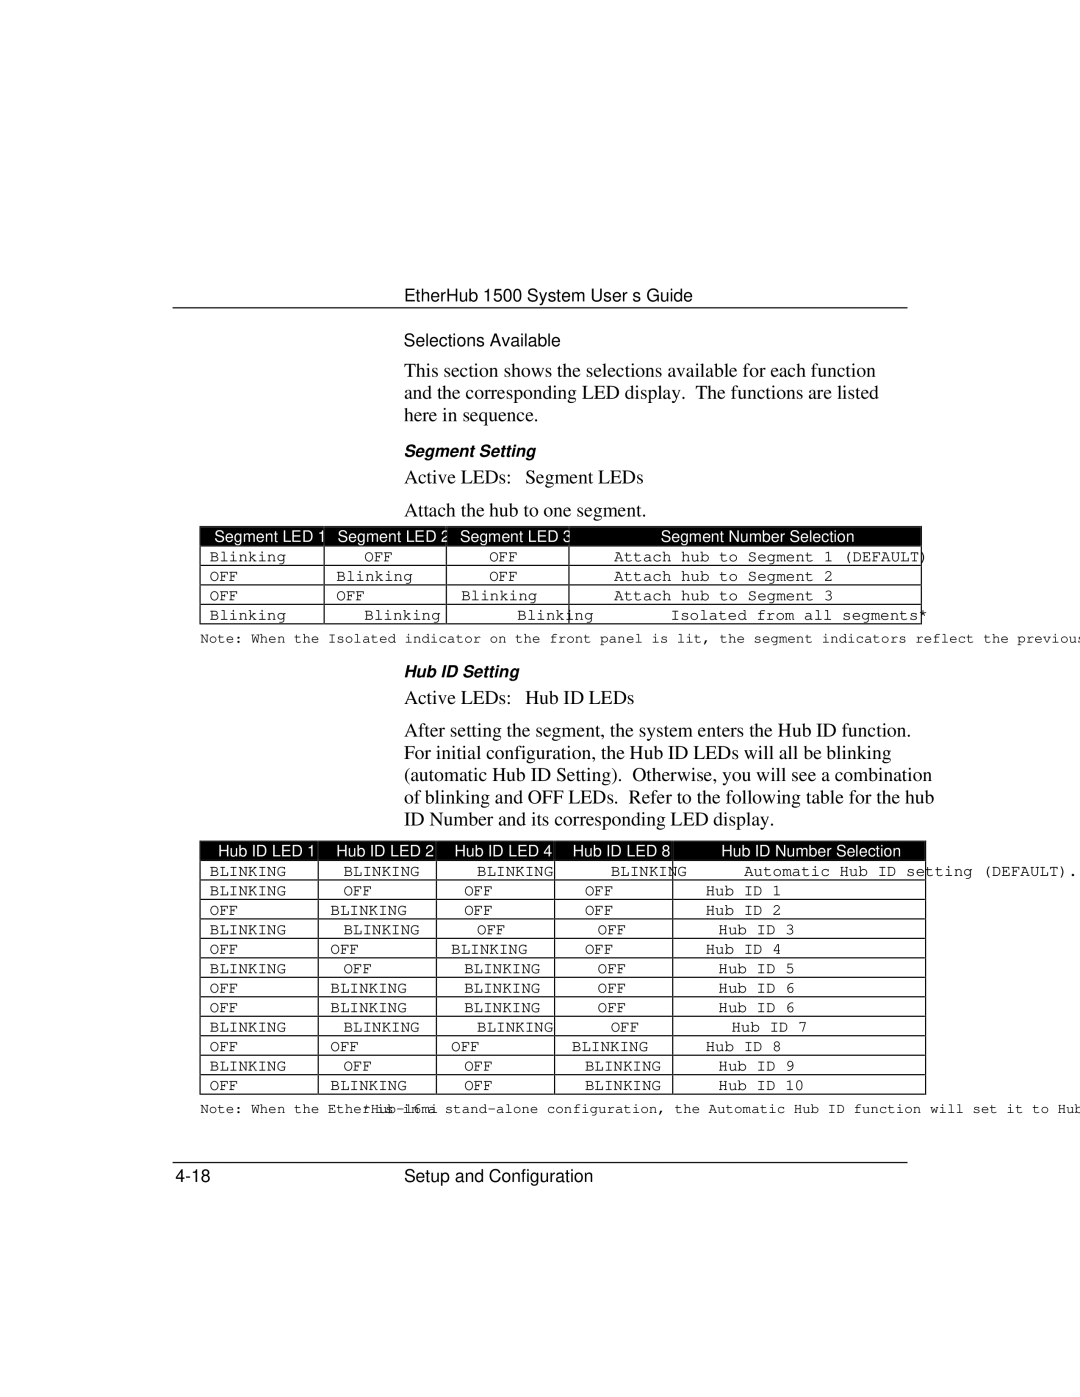
This section shows the selections available for each function and the corresponding LED display. The functions are listed here in sequence.
Segment Setting
Active LEDs: Segment LEDs
Attach the hub to one segment.
Segment LED 1
Blinking
OFF
OFF
Blinking
Segment LED 2
OFF
Blinking
OFF
Blinking
Segment LED 3
OFF
OFF
Blinking
Blinking
Segment Number Selection
Attach hub to Segment 1 (DEFAULT)
Attach hub to Segment 2
Attach hub to Segment 3
Isolated from all segments*
Note: When the Isolated indicator on the front panel is lit, the segment indicators reflect the previous setting and should be ignored.
Hub ID Setting
Active LEDs: Hub ID LEDs
After setting the segment, the system enters the Hub ID function. For initial configuration, the Hub ID LEDs will all be blinking (automatic Hub ID Setting). Otherwise, you will see a combination of blinking and OFF LEDs. Refer to the following table for the hub ID Number and its corresponding LED display.
Hub ID LED 1
BLINKING
BLINKING
OFF
BLINKING
OFF
BLINKING
OFF
OFF
BLINKING
OFF
BLINKING
OFF
Hub ID LED 2
BLINKING
OFF
BLINKING
BLINKING
OFF
OFF
BLINKING
BLINKING
BLINKING
OFF
OFF
BLINKING
Hub ID LED 4
BLINKING
OFF
OFF
OFF
BLINKING
BLINKING
BLINKING
BLINKING
BLINKING
OFF
OFF
OFF
Hub ID LED 8
BLINKING
OFF
OFF
OFF
OFF
OFF
OFF
OFF
OFF
BLINKING
BLINKING
BLINKING
Hub ID Number Selection
Automatic Hub ID setting (DEFAULT).
Hub ID 1
Hub ID 2
Hub ID 3
Hub ID 4
Hub ID 5
Hub ID 6
Hub ID 6
Hub ID 7
Hub ID 8
Hub ID 9
Hub ID 10
Note: When the
Setup and Configuration |