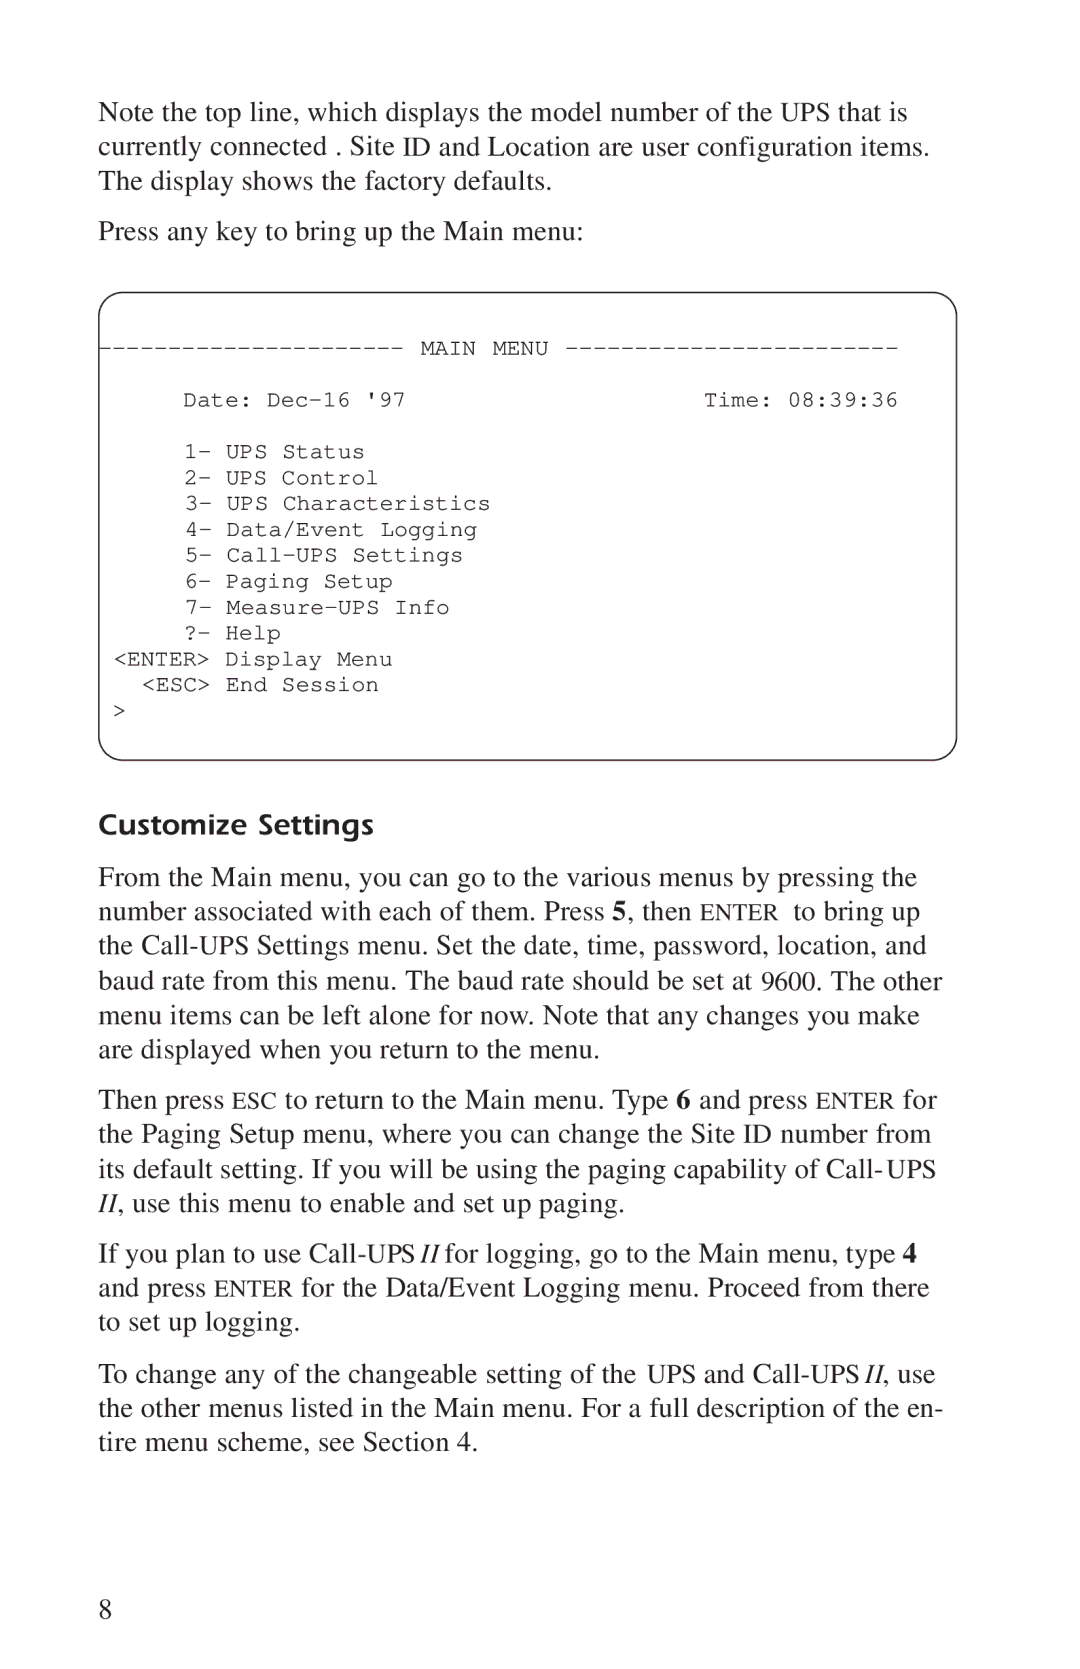
Note the top line, which displays the model number of the UPS that is currently connected . Site ID and Location are user configuration items. The display shows the factory defaults.
Press any key to bring up the Main menu:
MAIN | MENU | ||
Date: | Time: 08:39:36 | ||
1- | UPS | Status |
|
2- | UPS | Control |
|
3- UPS Characteristics
4- Data/Event Logging
5-
6- Paging Setup
7-
<ENTER> Display Menu
<ESC> End Session
>
Customize Settings
From the Main menu, you can go to the various menus by pressing the number associated with each of them. Press 5, then ENTER to bring up the
Then press ESC to return to the Main menu. Type 6 and press ENTER for the Paging Setup menu, where you can change the Site ID number from its default setting. If you will be using the paging capability of Call- UPS II, use this menu to enable and set up paging.
If you plan to use
To change any of the changeable setting of the UPS and
8