Replacing the Chassis
1.Position the chassis into the rear housing. Line up the screw holes at the top with the rear housing.
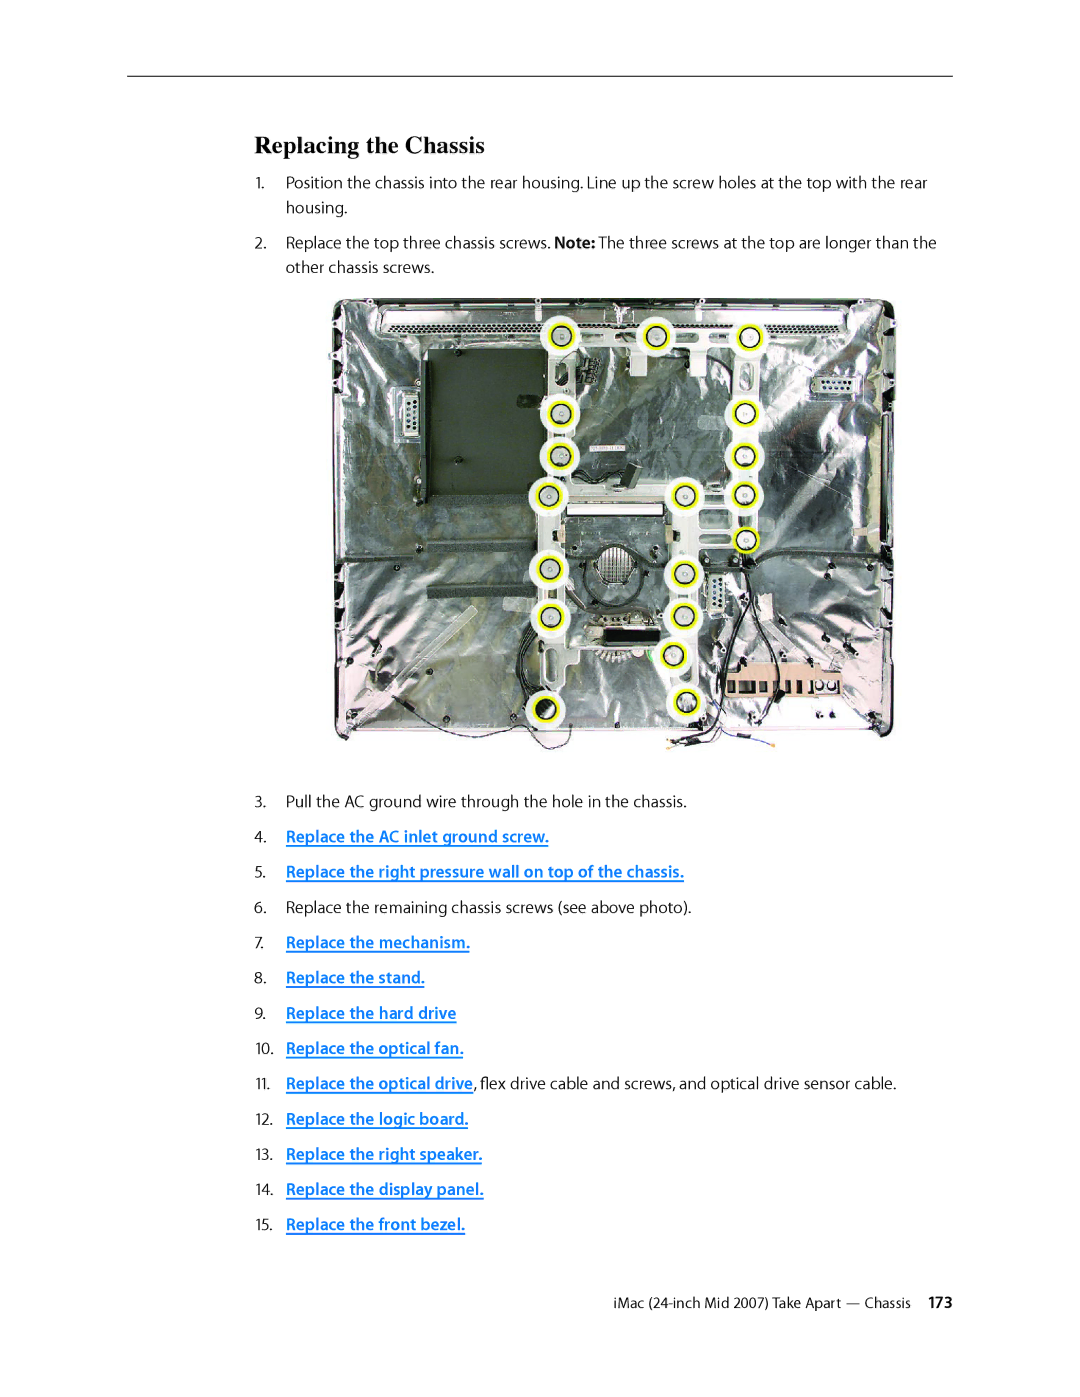
2.Replace the top three chassis screws. Note: The three screws at the top are longer than the other chassis screws.
3.Pull the AC ground wire through the hole in the chassis.
4.Replace the AC inlet ground screw.
5.Replace the right pressure wall on top of the chassis.
6.Replace the remaining chassis screws (see above photo).
7.Replace the mechanism.
8.Replace the stand.
9.Replace the hard drive
10.Replace the optical fan.
11.Replace the optical drive, flex drive cable and screws, and optical drive sensor cable.
12.Replace the logic board.
13.Replace the right speaker.