Chapter 3 Installing and Configuring Route Switch Processors and Supervisor Engines
Installing a Supervisor Engine or Route Switch Processor
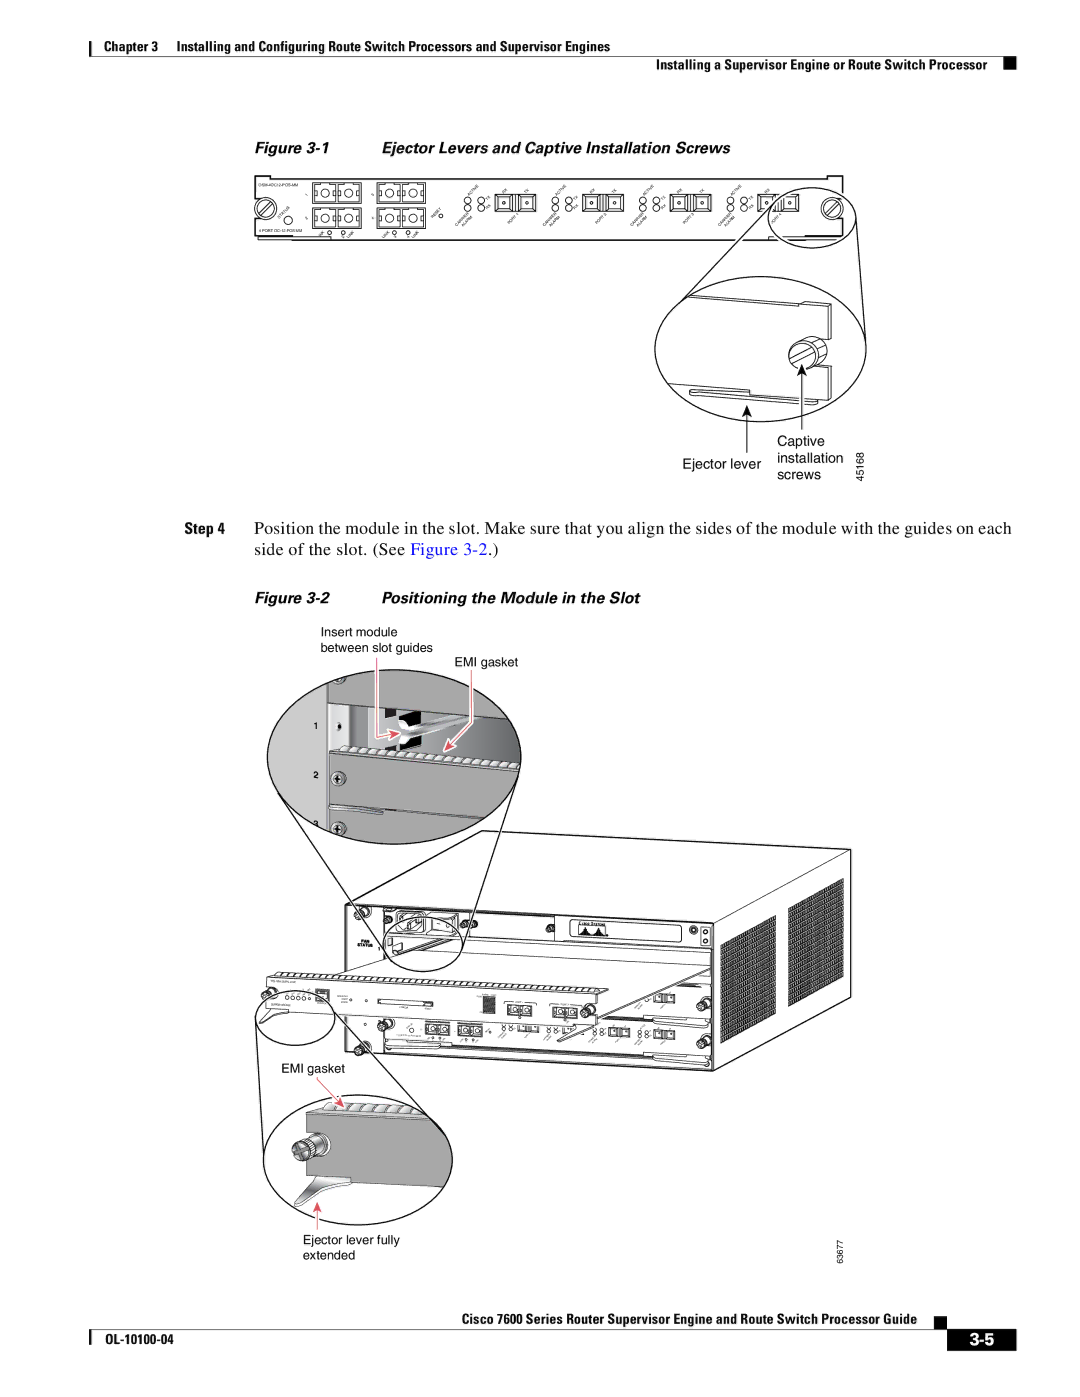
Figure 3-1 Ejector Levers and Captive Installation Screws
|
|
|
| |
| 1 |
|
|
|
STATUS | 2 |
|
|
|
4 PORT | LINK |
|
| LINK |
| 1 | 2 |
3
4
LINK | 3 | 4 | LINK |
| ACTIVE | RX |
| TX |
|
| TX |
|
|
RESET |
| RX |
|
|
CARRIERALARM |
| PORT | 1 |
ACTIVE | RX |
| TX |
| TX |
|
|
CARRIERALARM | RX | PORT |
|
| 2 |
ACTIVE | RX |
| TX |
| TX |
|
|
CARRIERALARM | RX | PORT |
|
| 3 |
ACTIVE | RX |
| TX |
| TX |
|
|
CARRIERALARM | RX | PORT |
|
| 4 |
Captive
Ejector lever installation screws
45168
Step 4 Position the module in the slot. Make sure that you align the sides of the module with the guides on each side of the slot. (See Figure
Figure 3-2 Positioning the Module in the Slot
Insert module between slot guides
EMI gasket
3![]()
1
2![]()
36![]()
SUPERVISOR2
| CONSOLE |
| PORT |
CONSOLE | MODE |
| |
PCMCIA | EJECT |
| |
4 PORT |
|
Switch Load 100%
PORT 1
PORT 2
1%
EMI gasket
Ejector lever fully extended
63677
Cisco 7600 Series Router Supervisor Engine and Route Switch Processor Guide
