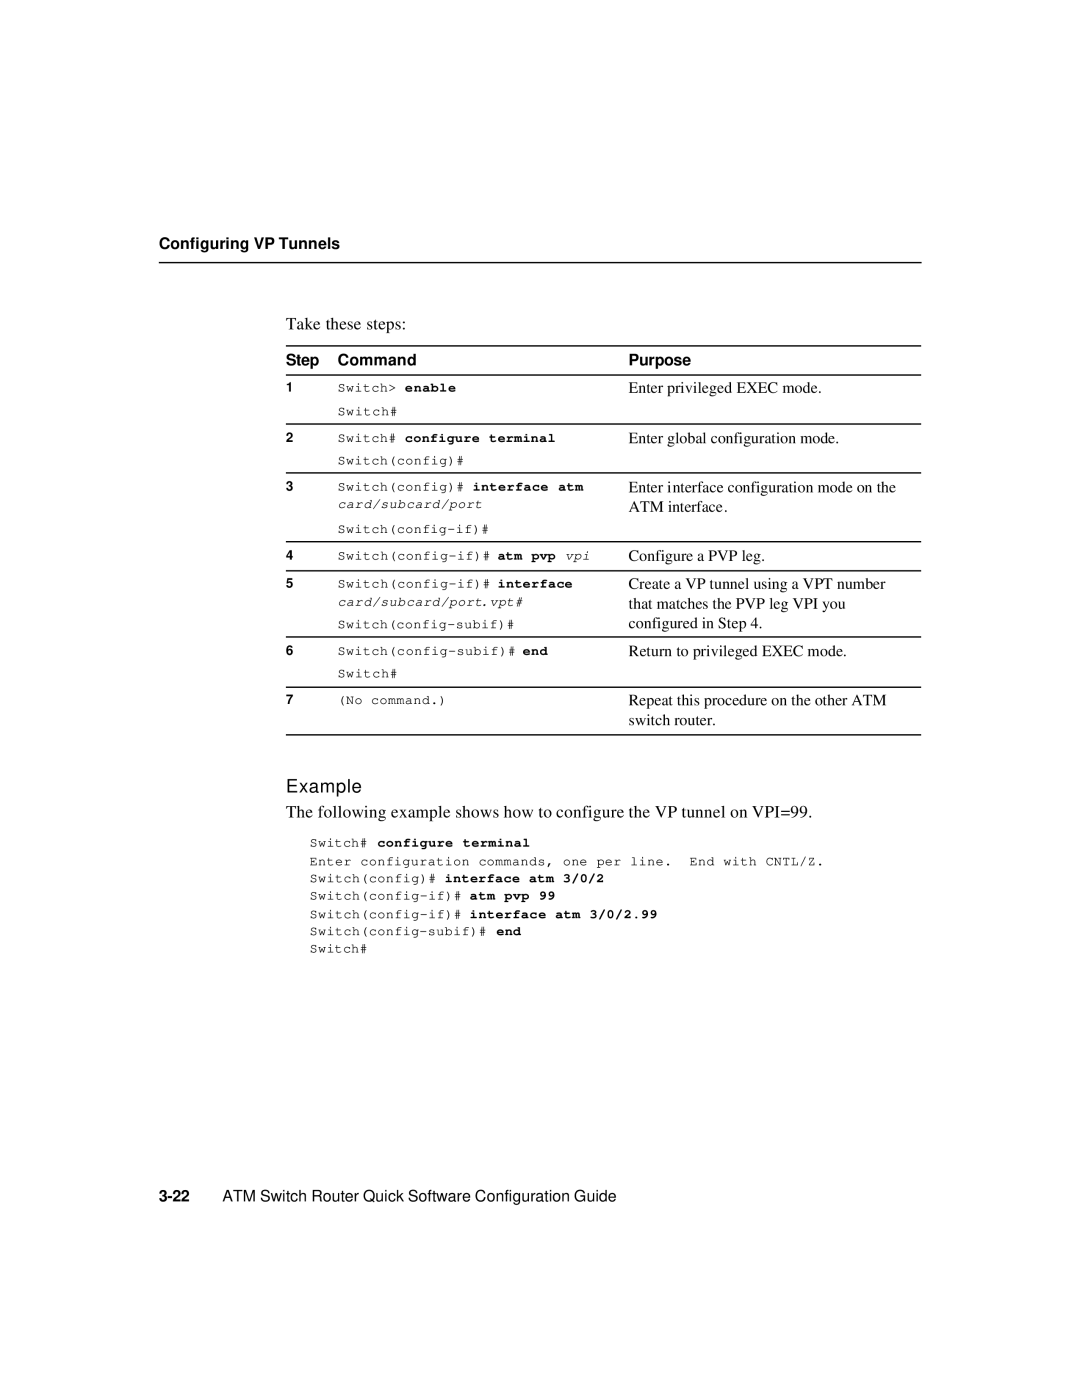
Configuring VP Tunnels
Take these steps:
Step Command
1Switch> enable Switch#
2Switch# configure terminal Switch(config)#
3Switch(config)# interface atm card/subcard/port
4
5
6
7(No command.)
Purpose
Enter privileged EXEC mode.
Enter global configuration mode.
Enter interface configuration mode on the ATM interface.
Configure a PVP leg.
Create a VP tunnel using a VPT number that matches the PVP leg VPI you configured in Step 4.
Return to privileged EXEC mode.
Repeat this procedure on the other ATM switch router.
Example
The following example shows how to configure the VP tunnel on VPI=99.
Switch# configure terminal
Enter configuration commands, one per line. End with CNTL/Z.
Switch(config)# interface atm 3/0/2
Switch(config-if)# interface atm 3/0/2.99
Switch#