Chapter 2 Feature Card and Carrier Card Guidelines
Removing and Installing Populated Carrier Cards
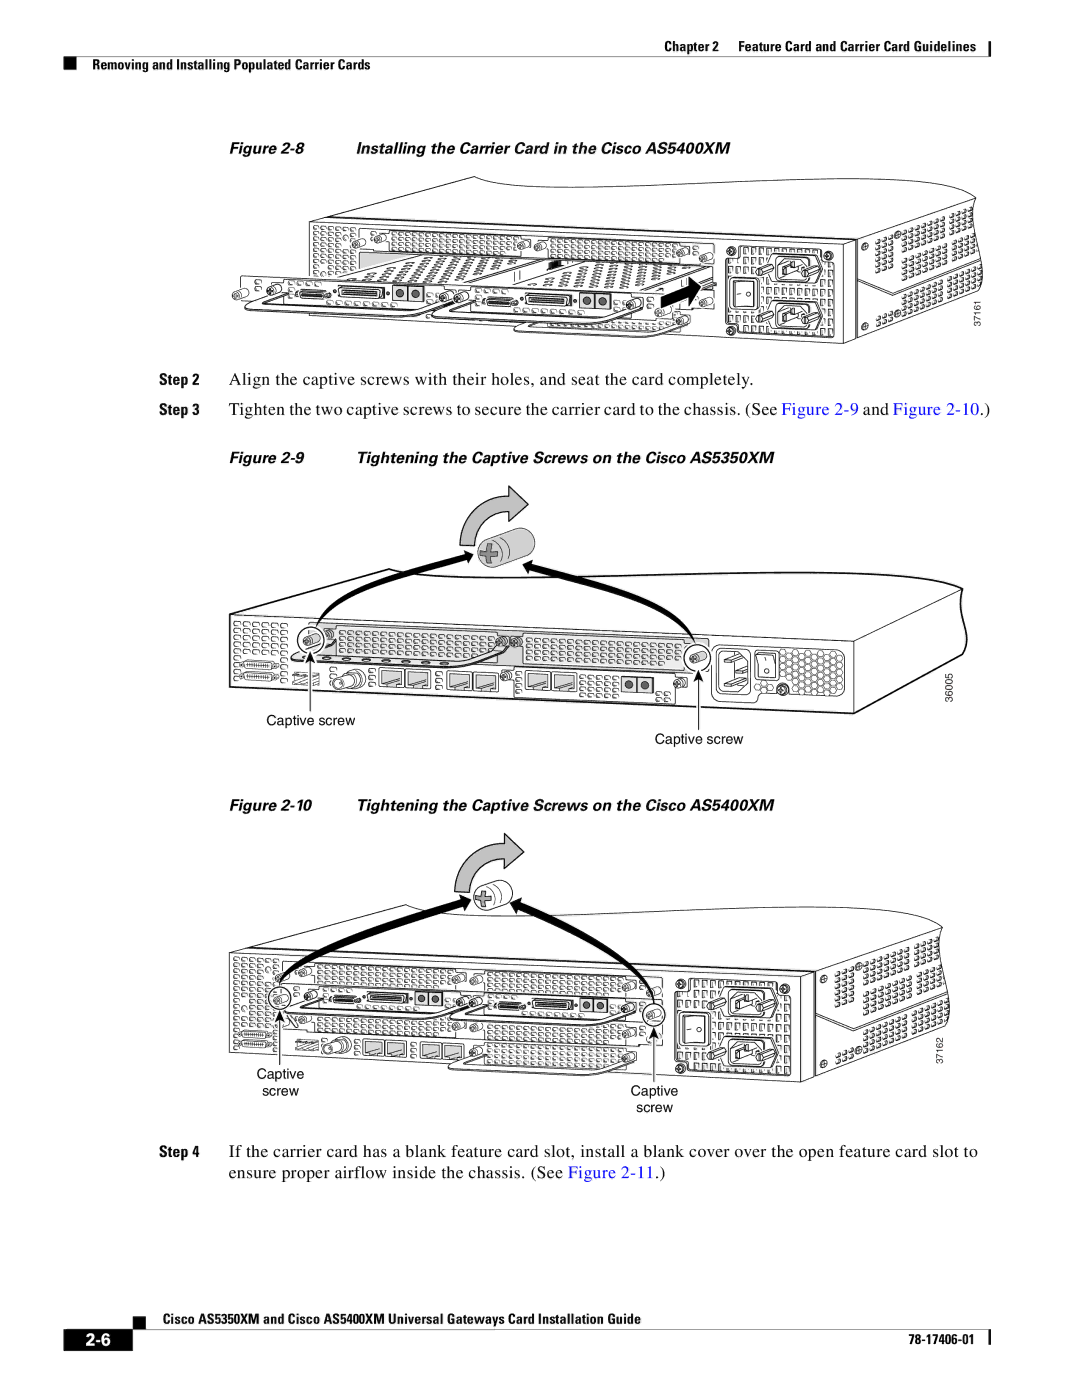
Figure 2-8 Installing the Carrier Card in the Cisco AS5400XM
|
| 37161 |
Step 2 | Align the captive screws with their holes, and seat the card completely. | |
Step 3 | Tighten the two captive screws to secure the carrier card to the chassis. (See Figure | |
| Figure | Tightening the Captive Screws on the Cisco AS5350XM |
36005
Captive screw
Captive screw
Figure 2-10 Tightening the Captive Screws on the Cisco AS5400XM
Captive
screwCaptive screw
37162
Step 4 If the carrier card has a blank feature card slot, install a blank cover over the open feature card slot to ensure proper airflow inside the chassis. (See Figure
Cisco AS5350XM and Cisco AS5400XM Universal Gateways Card Installation Guide
| ||
|