Chapter 6 Voice Feature Card
Online Insertion and Removal of the Voice Feature Card
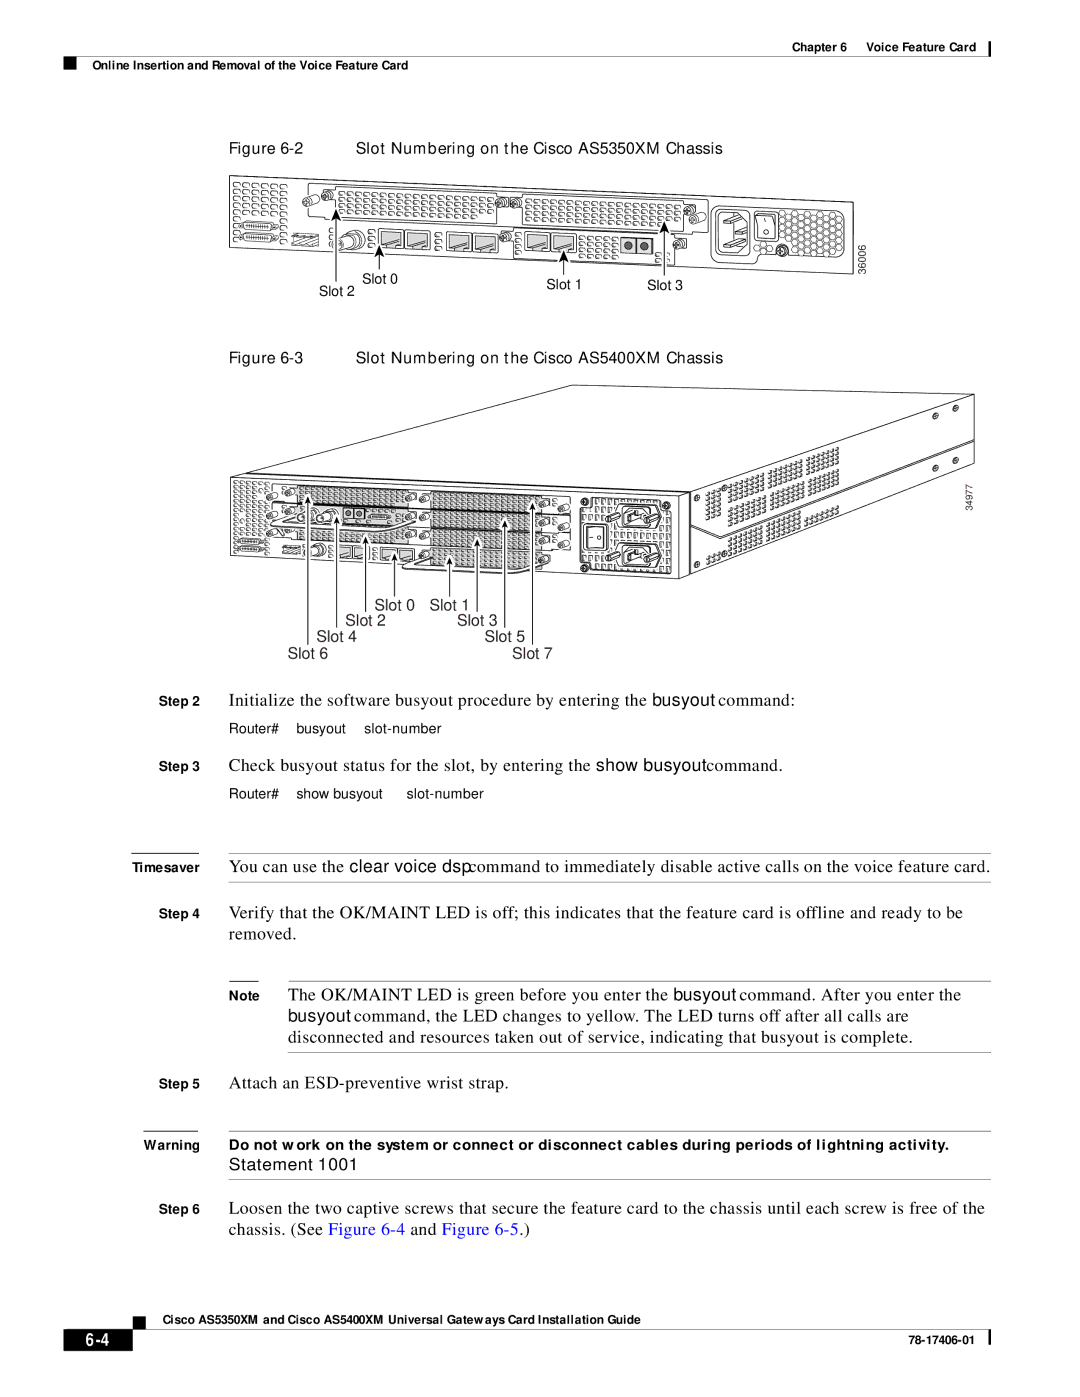
Figure 6-2 Slot Numbering on the Cisco AS5350XM Chassis
|
|
|
|
|
|
|
| |
|
|
|
|
|
|
|
| |
|
|
|
|
|
|
|
| |
|
|
|
|
|
|
|
| |
|
| Slot 0 |
|
|
|
| ||
Slot 2 | Slot 1 | Slot 3 | ||||||
|
| |||||||
|
|
|
|
|
| |||
![]() 36006
36006
Figure 6-3 Slot Numbering on the Cisco AS5400XM Chassis
|
|
|
|
|
|
|
|
|
|
|
|
|
|
|
|
|
|
|
|
|
|
|
|
|
|
|
|
|
|
|
|
|
| Slot 0 | Slot 1 |
|
| ||
| Slot | 2 |
| Slot | 3 |
| |
Slot | 4 |
|
| Slot | 5 | ||
34977
| Slot 6 | Slot 7 | |
Step 2 | Initialize the software busyout procedure by entering the busyout command: | ||
| Router# | busyout |
|
Step 3 | Check busyout status for the slot, by entering the show busyout command. | ||
| Router# | show busyout |
|
Timesaver You can use the clear voice dsp command to immediately disable active calls on the voice feature card.
Step 4 Verify that the OK/MAINT LED is off; this indicates that the feature card is offline and ready to be removed.
Note The OK/MAINT LED is green before you enter the busyout command. After you enter the busyout command, the LED changes to yellow. The LED turns off after all calls are disconnected and resources taken out of service, indicating that busyout is complete.
Step 5 Attach an
Warning Do not work on the system or connect or disconnect cables during periods of lightning activity.
Statement 1001
Step 6 Loosen the two captive screws that secure the feature card to the chassis until each screw is free of the chassis. (See Figure
Cisco AS5350XM and Cisco AS5400XM Universal Gateways Card Installation Guide
| ||
|