Overview
3.In the From fields in the Interval pane on the right, enter the beginning date and time for the historical call reference period.
4.In the To fields, enter the ending date and time for the historical call reference period.
5.Highlight the last two statistics queries in the Statistics pane as shown in Figure 19.
6.Clear the Use 30 minutes interval check box.
7.Enter the following directory path in the Directory field:
C:\Program Files\Cisco\WFO_WFM\reports
8.Select the Unified CCX DSN from the DSN field.
9.Enter the Unified CCX user ID and password.
10.Click Test connection to verify the connection is working.
11.Click Go to capture the historical call data. The reports are created and saved to the folder C:\Program Files\Cisco\WFO_WFM\reports.
12.When the hourglass disappears, click Quit to exit the Capture Agent window.
13.Choose Collector > Quit to exit Odysoft ODBC Collector.
Capturing Agent Historical Call Data
To capture agent historical call data:
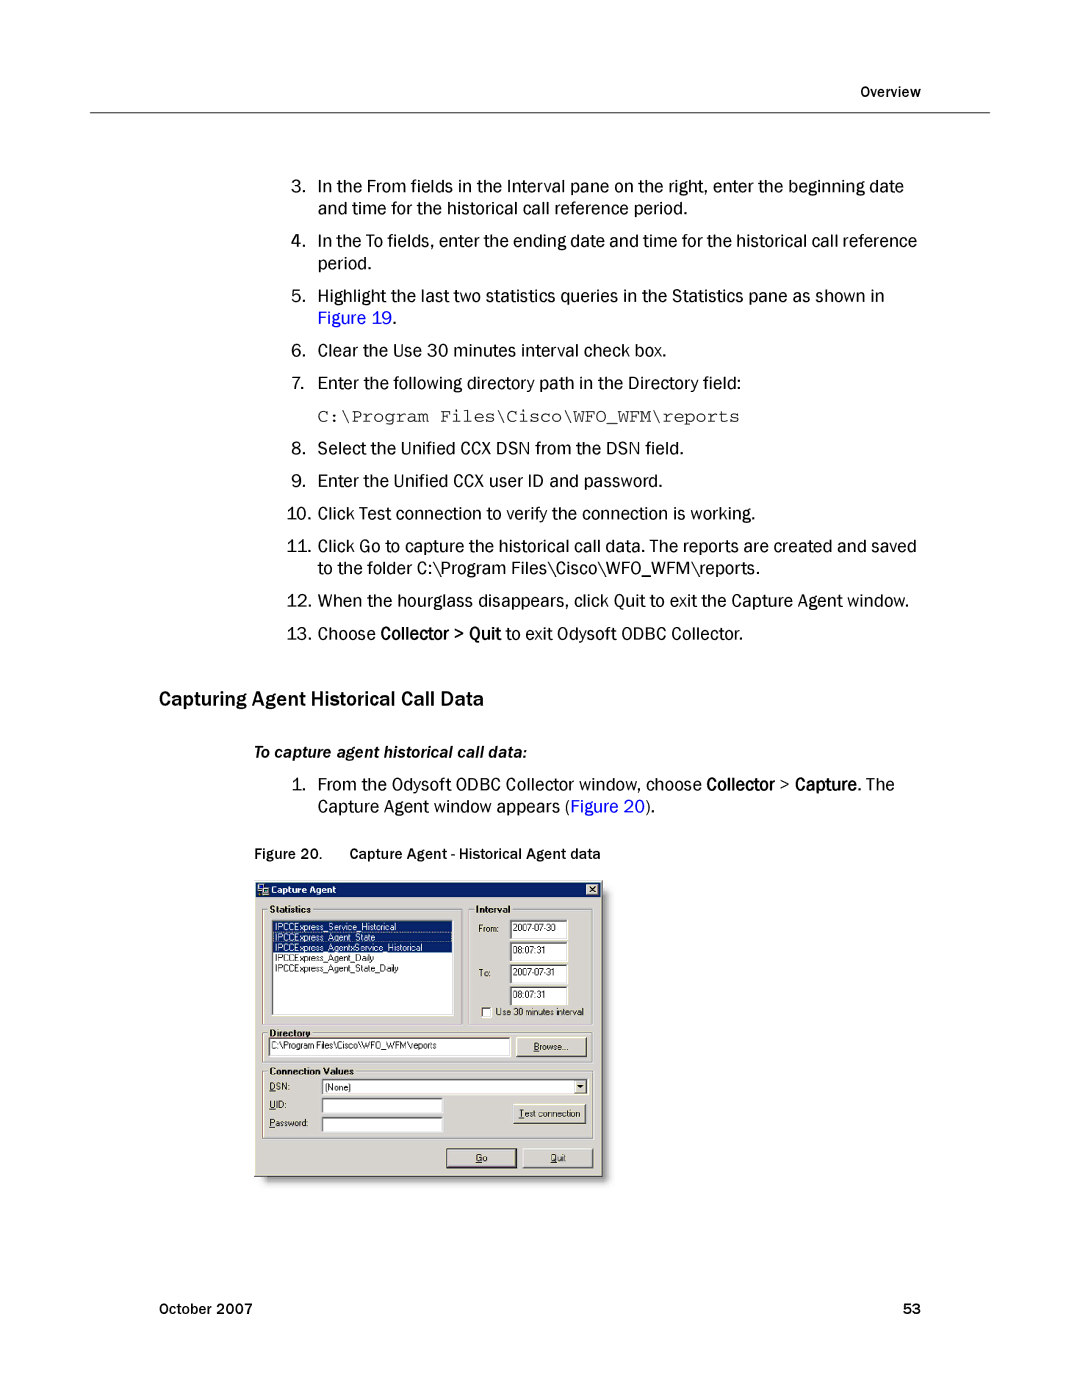
1.From the Odysoft ODBC Collector window, choose Collector > Capture. The Capture Agent window appears (Figure 20).
Figure 20. Capture Agent - Historical Agent data
October 2007 | 53 |