Chapter 2 Installing and Booting the Cisco SFS 3012R Server Switch
Mounting the Cisco SFS 3012R Server Switch on a Rack
Step 3 Attach the shelf rails to either side of the Cisco SFS 3012R Server Switch chassis as follows:
a.Unpack the shelf assembly kit (ordered and shipped separately).
b.Identify the shelf rails labeled TS360/SFS 3012.
c.Attach the rails to the chassis with the four screws provided, as shown in Figure
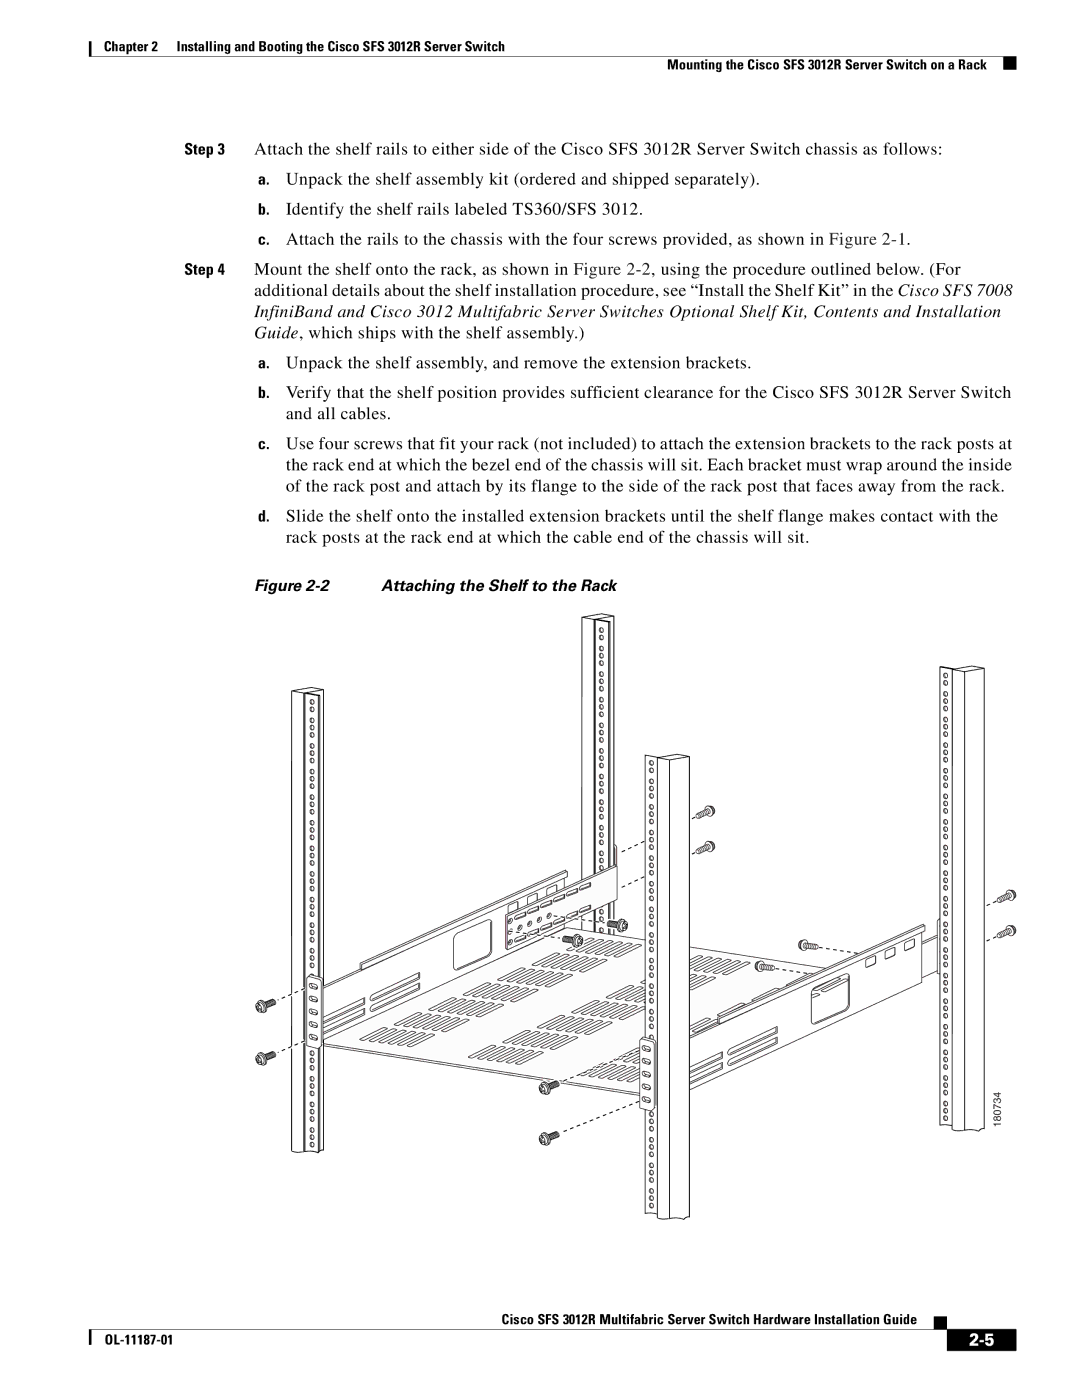
Step 4 Mount the shelf onto the rack, as shown in Figure
a.Unpack the shelf assembly, and remove the extension brackets.
b.Verify that the shelf position provides sufficient clearance for the Cisco SFS 3012R Server Switch and all cables.
c.Use four screws that fit your rack (not included) to attach the extension brackets to the rack posts at the rack end at which the bezel end of the chassis will sit. Each bracket must wrap around the inside of the rack post and attach by its flange to the side of the rack post that faces away from the rack.
d.Slide the shelf onto the installed extension brackets until the shelf flange makes contact with the rack posts at the rack end at which the cable end of the chassis will sit.
Figure 2-2 Attaching the Shelf to the Rack
180734
Cisco SFS 3012R Multifabric Server Switch Hardware Installation Guide
|
| ||
|
|