Chapter 2 Installing and Booting the Cisco SFS 3012R Server Switch
Mounting the Cisco SFS 3012R Server Switch on a Rack
e.Secure the shelf end to the post with four screws (not included) that fit your rack, but do not tighten the screws.
Note When you install the shelf assembly, do not fully tighten the screws at the cable end of the shelf. When you slide the chassis onto the shelf, you might need to reposition the shelf to align the holes in the
f.Secure the extension brackets to the shelf with the screws provided. The screw heads must face inside the shelf.
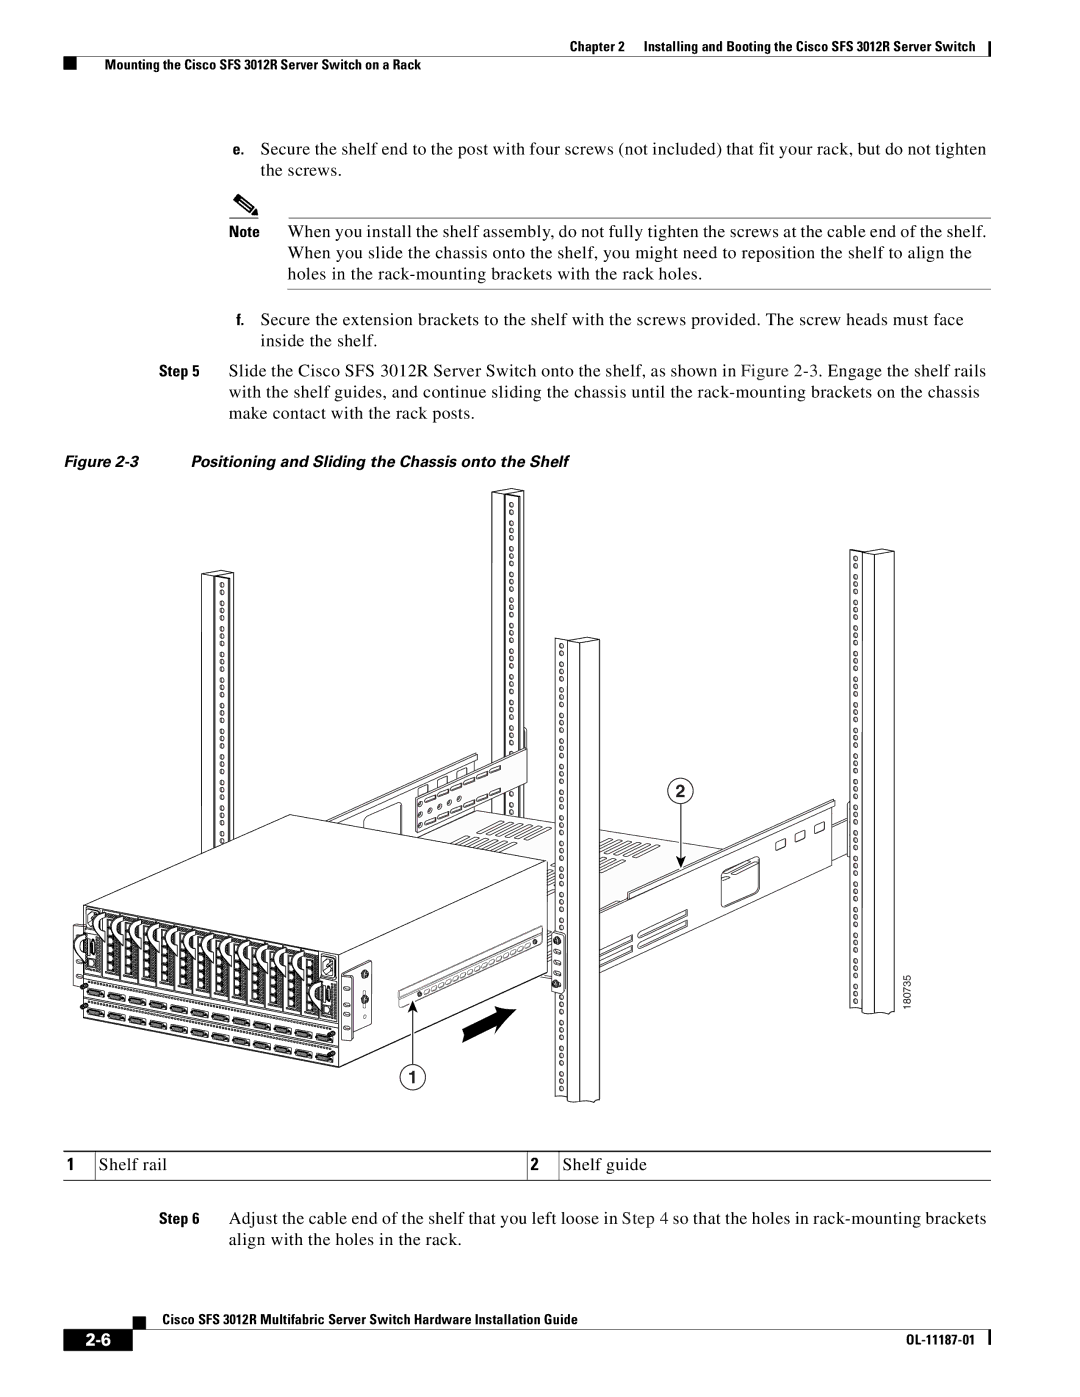
Step 5 Slide the Cisco SFS 3012R Server Switch onto the shelf, as shown in Figure
Figure 2-3 Positioning and Sliding the Chassis onto the Shelf
2
180735
1
1
Shelf rail
2
Shelf guide
Step 6 Adjust the cable end of the shelf that you left loose in Step 4 so that the holes in
Cisco SFS 3012R Multifabric Server Switch Hardware Installation Guide
|
| |
|
