Chapter 4 Viewing and Updating the Software Image
Updating the Software Image
Step 4 Click the Copy button to copy the file onto the controller of the sever switch. Wait until the transfer is complete. The window will automatically refresh to show the latest copied image file.
Step 5 Activate the image. After downloading the image file to the chassis controller, it must be installed to become active.
Before activating the image, ensure that the following conditions are true:
•The file name has the .img extension.
•All cards have an
a.Click on the desired .img file in the File Management window.
b.Click the Install button.
c.Click Yes to the warning asking if you wish to proceed.
Note If you do not have enough available memory to install an additional image, delete an old image. See the “Deleting an Image with the Element Manager GUI” section on page
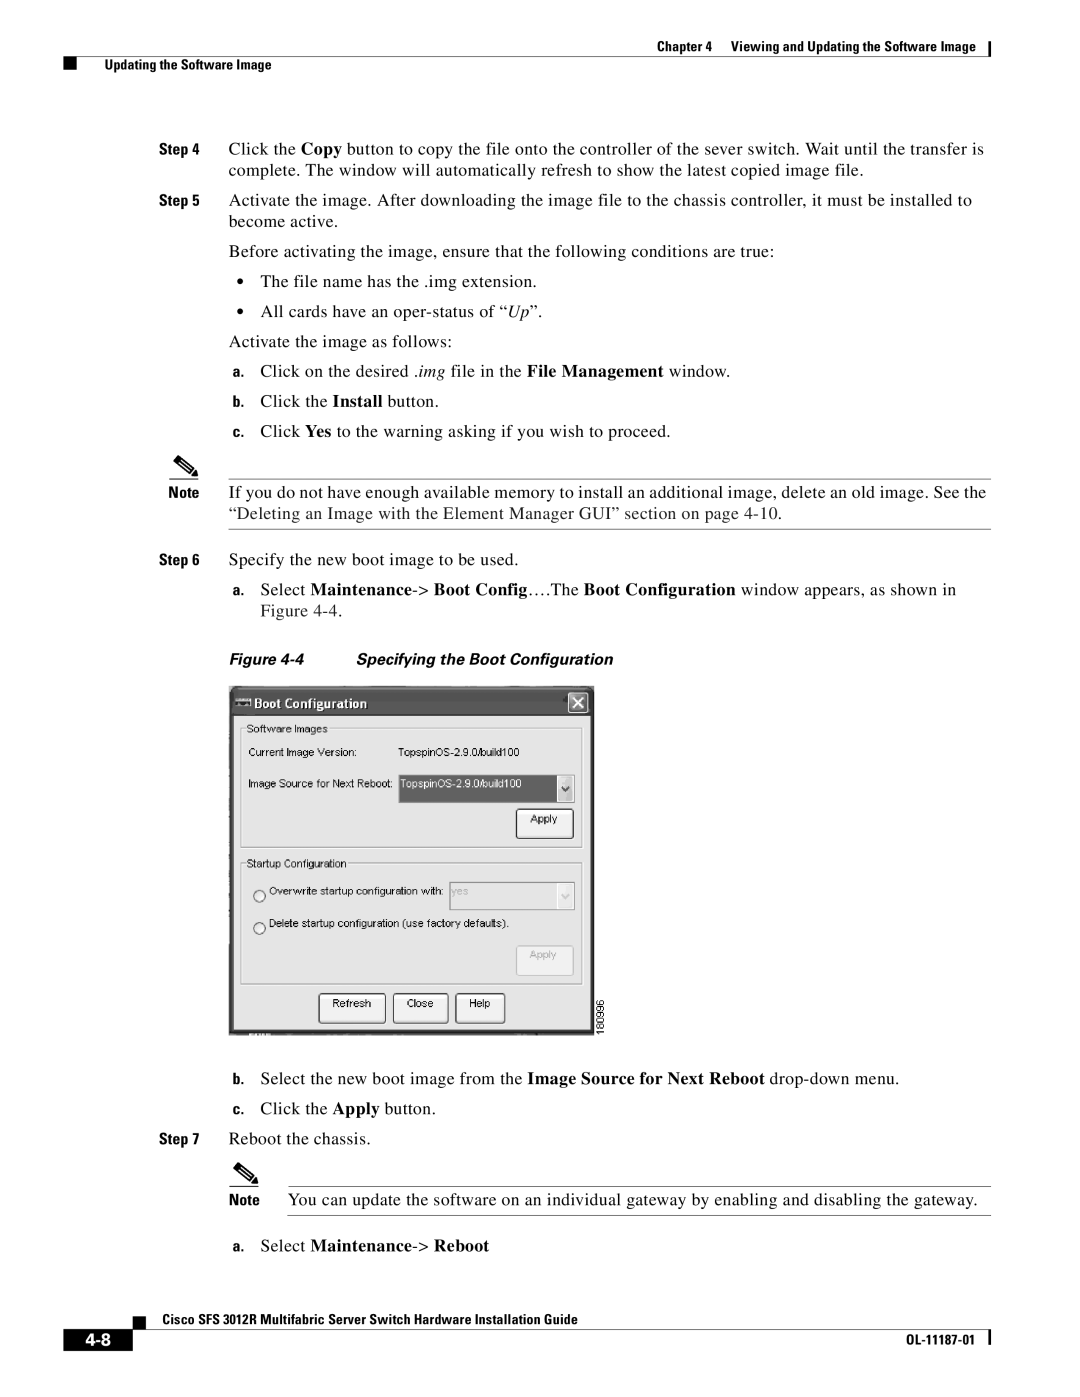
Step 6 Specify the new boot image to be used.
a.Select
Figure 4-4 Specifying the Boot Configuration
b.Select the new boot image from the Image Source for Next Reboot
c.Click the Apply button.
Step 7 Reboot the chassis.
Note You can update the software on an individual gateway by enabling and disabling the gateway.
a.Select Maintenance-> Reboot
Cisco SFS 3012R Multifabric Server Switch Hardware Installation Guide
|
| |
|
