Chapter 2 Installing and Booting the Cisco SFS 3012R Server Switch
Mounting the Cisco SFS 3012R Server Switch on a Rack
Mounting the Cisco SFS 3012R Server Switch on a Rack
Warning Two people are required to lift the chassis. Grasp the chassis underneath the lower edge and lift with both hands. To prevent injury, keep your back straight and lift with your legs, not your back. To prevent damage to the chassis and components, never attempt to lift the chassis with the handles on the power supplies or on the interface processors, or by the plastic panels on the front of the chassis. These handles were not designed to support the weight of the chassis. Statement 5
Warning To prevent bodily injury when mounting or servicing this unit in a rack, you must take special precautions to ensure that the system remains stable. The following guidelines are provided to ensure your safety:
•This unit should be mounted at the bottom of the rack if it is the only unit in the rack.
•When mounting this unit in a partially filled rack, load the rack from the bottom to the top with the heaviest component at the bottom of the rack.
•If the rack is provided with stabilizing devices, install the stabilizers before mounting or servicing the unit in the rack. Statement 1006
To install the Cisco SFS 3012R Server Switch on a rack, perform the following steps:
Step 1 Open the plastic bag that contains the mounting hardware.
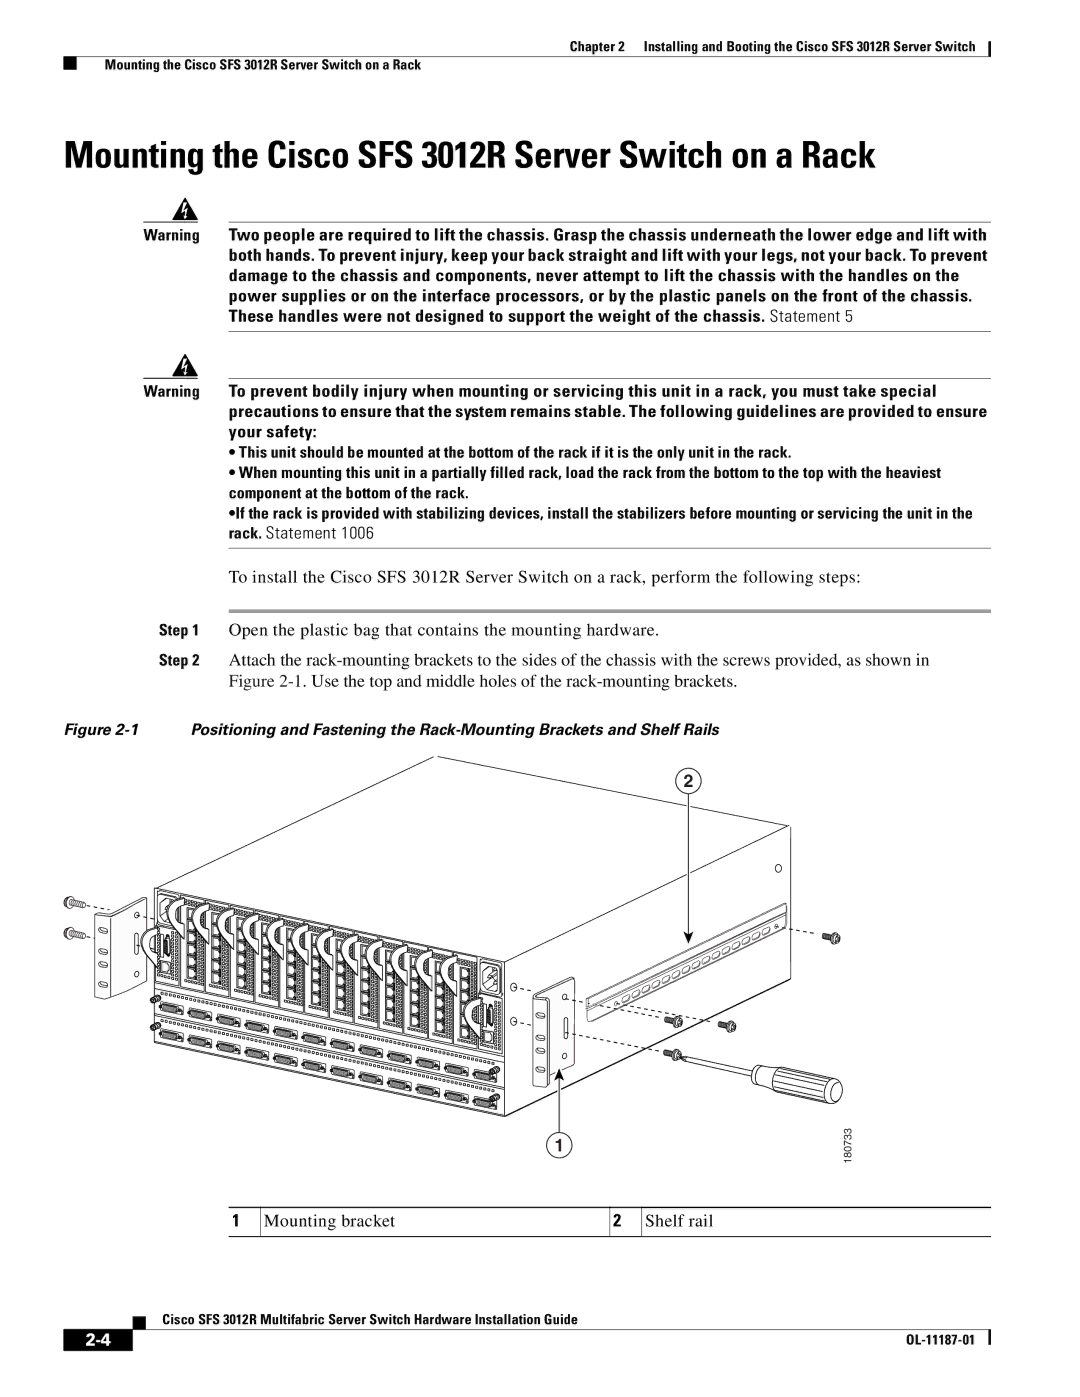
Step 2 Attach the
Figure 2-1 Positioning and Fastening the Rack-Mounting Brackets and Shelf Rails
2
1
1 | Mounting bracket | 2 | Shelf rail |
|
|
|
|
180733
Cisco SFS 3012R Multifabric Server Switch Hardware Installation Guide
|
| |
|