In Windows environments, network printers can be configured for direct printing or shared printing. Both network printing options require the installation of printer software and the creation of a network port.
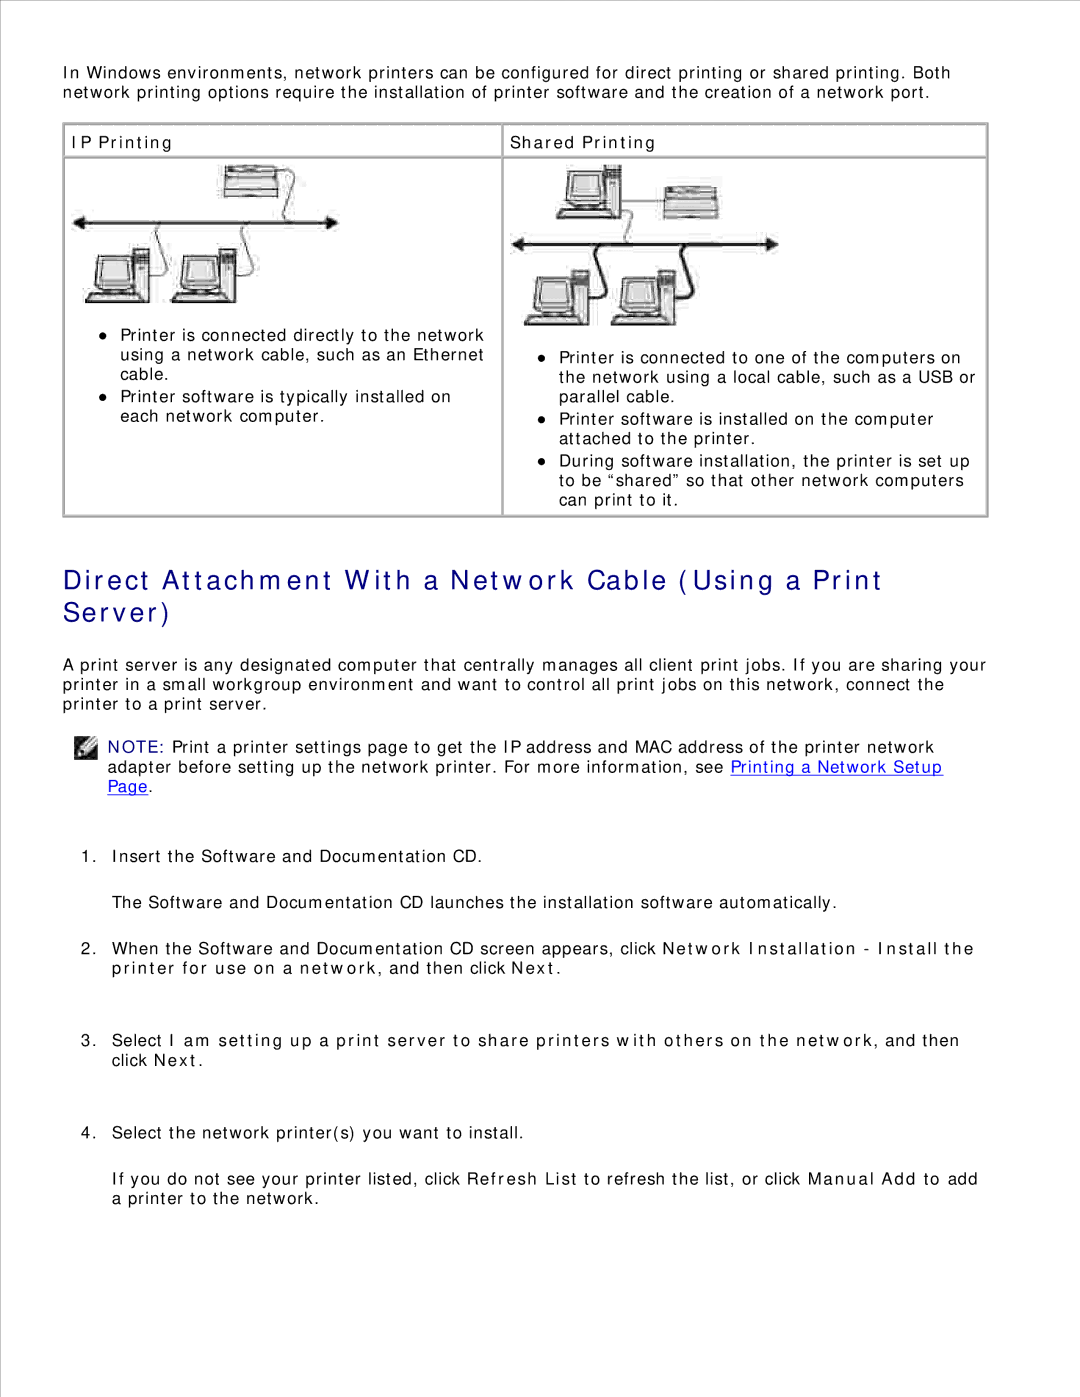
IP Printing
Shared Printing
Printer is connected directly to the network using a network cable, such as an Ethernet cable.
Printer software is typically installed on each network computer.
Printer is connected to one of the computers on the network using a local cable, such as a USB or parallel cable.
Printer software is installed on the computer attached to the printer.
During software installation, the printer is set up to be “shared” so that other network computers can print to it.
Direct Attachment With a Network Cable (Using a Print
Server)
A print server is any designated computer that centrally manages all client print jobs. If you are sharing your printer in a small workgroup environment and want to control all print jobs on this network, connect the printer to a print server.
NOTE: Print a printer settings page to get the IP address and MAC address of the printer network adapter before setting up the network printer. For more information, see Printing a Network Setup Page.
1.Insert the Software and Documentation CD.
The Software and Documentation CD launches the installation software automatically.
2.When the Software and Documentation CD screen appears, click Network Installation - Install the printer for use on a network, and then click Next.
3.Select I am setting up a print server to share printers with others on the network, and then click Next.
4.Select the network printer(s) you want to install.
If you do not see your printer listed, click Refresh List to refresh the list, or click Manual Add to add a printer to the network.