NOTICE: Before touching anything inside your computer, ground yourself by touching an unpainted metal surface, such as the metal at the back of the computer. While you work, periodically touch an unpainted metal surface to dissipate any static electricity that could harm internal components.
6.Open the computer cover.
7.Remove the microprocessor airflow shroud (for the Dell Precision 650 computer, see "Microprocessor Airflow Shroud" or for the Dell Precision 450 computer, see "Microprocessor Airflow Shroud").
NOTICE: If you are installing a microprocessor upgrade kit from Dell, discard the original heat sink. If you are not installing a microprocessor upgrade kit from Dell, reuse the original heat sink when you install your new microprocessor.
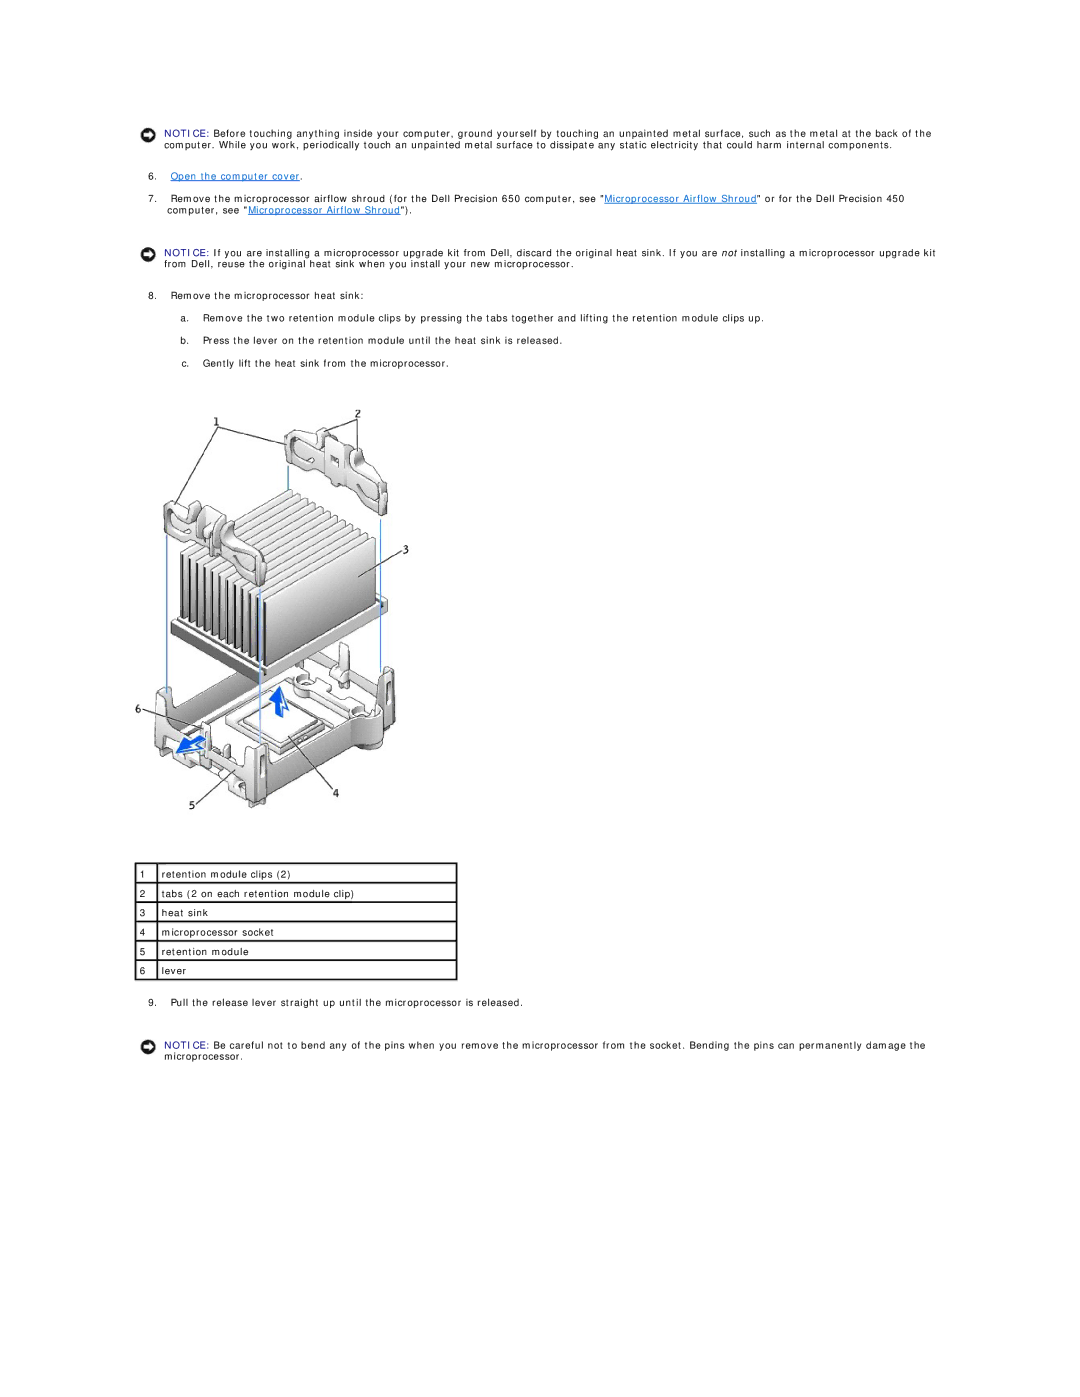
8.Remove the microprocessor heat sink:
a.Remove the two retention module clips by pressing the tabs together and lifting the retention module clips up.
b.Press the lever on the retention module until the heat sink is released.
c.Gently lift the heat sink from the microprocessor.
1 | retention module clips (2) |
|
|
2 | tabs (2 on each retention module clip) |
|
|
3 | heat sink |
|
|
4 | microprocessor socket |
|
|
5 | retention module |
|
|
6 | lever |
|
|
9.Pull the release lever straight up until the microprocessor is released.
NOTICE: Be careful not to bend any of the pins when you remove the microprocessor from the socket. Bending the pins can permanently damage the microprocessor.