The IRM2 Chassis View
To do so:
1.Select Repeater from the Chassis View menu; drag down to Restart... and release.
The IRM2 will be restarted as if it had just been powered up.
Configuring the Front Panel Repeater Port Association
!
CAUTION
Using the Port Association option for the IRM2, you can set which of the IRM2’s front panel ports will act as a repeater interface for a connected network segment.
Before selecting this option, be sure that you will not disrupt network activity. If you disconnect the segment with which you are communicating with the IRM2, you will lose contact with the device, and you will have to reset the original port association through local management.
To change the port association:
1.Click on Port 1 or Port 2 on Board 1 (the IRM2 module). The Port
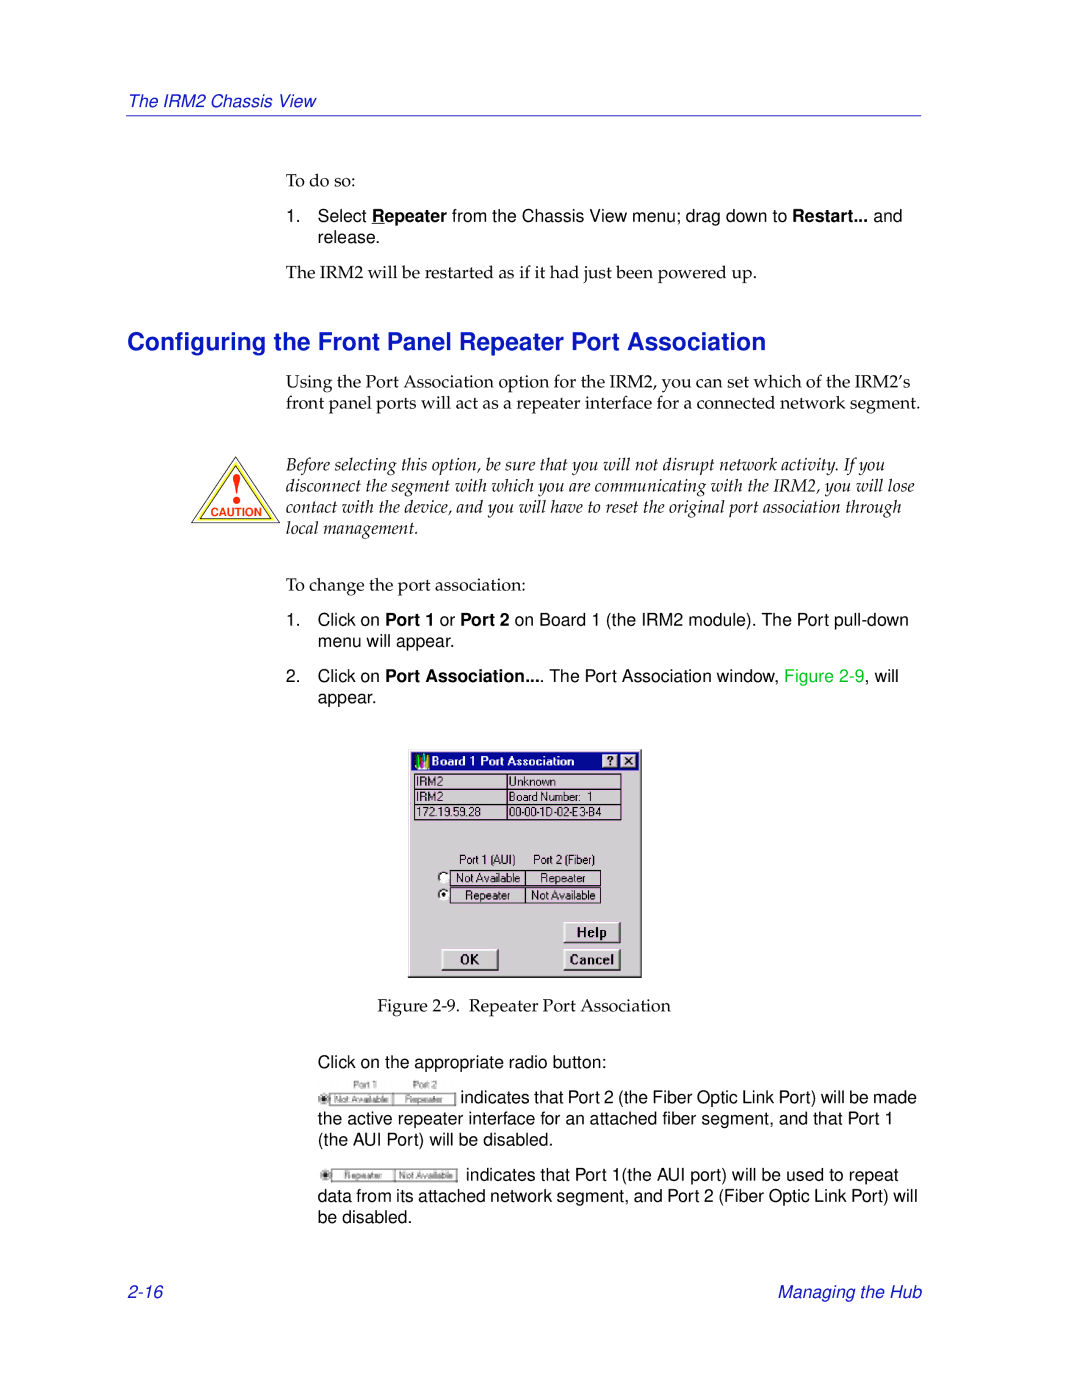
2.Click on Port Association.... The Port Association window, Figure
Figure 2-9. Repeater Port Association
Click on the appropriate radio button:
![]() indicates that Port 2 (the Fiber Optic Link Port) will be made the active repeater interface for an attached fiber segment, and that Port 1 (the AUI Port) will be disabled.
indicates that Port 2 (the Fiber Optic Link Port) will be made the active repeater interface for an attached fiber segment, and that Port 1 (the AUI Port) will be disabled.
![]() indicates that Port 1(the AUI port) will be used to repeat data from its attached network segment, and Port 2 (Fiber Optic Link Port) will be disabled.
indicates that Port 1(the AUI port) will be used to repeat data from its attached network segment, and Port 2 (Fiber Optic Link Port) will be disabled.
Managing the Hub |