1. MOUNTING
Flush mounting
Use the optional flush mount kit
Name: Flush mount kit
Type:
Code No.:
No. | Name | Type | Code No. | Qty |
|
|
|
|
|
1 | Mount plate | 4 | ||
|
|
|
|
|
2 | Hex nut | M5 | 4 | |
|
|
|
|
|
3 | Wing screw | M5x40 | 4 | |
|
|
|
|
|
4 | Pan head screw | M4x12 | 4 | |
|
|
|
|
|
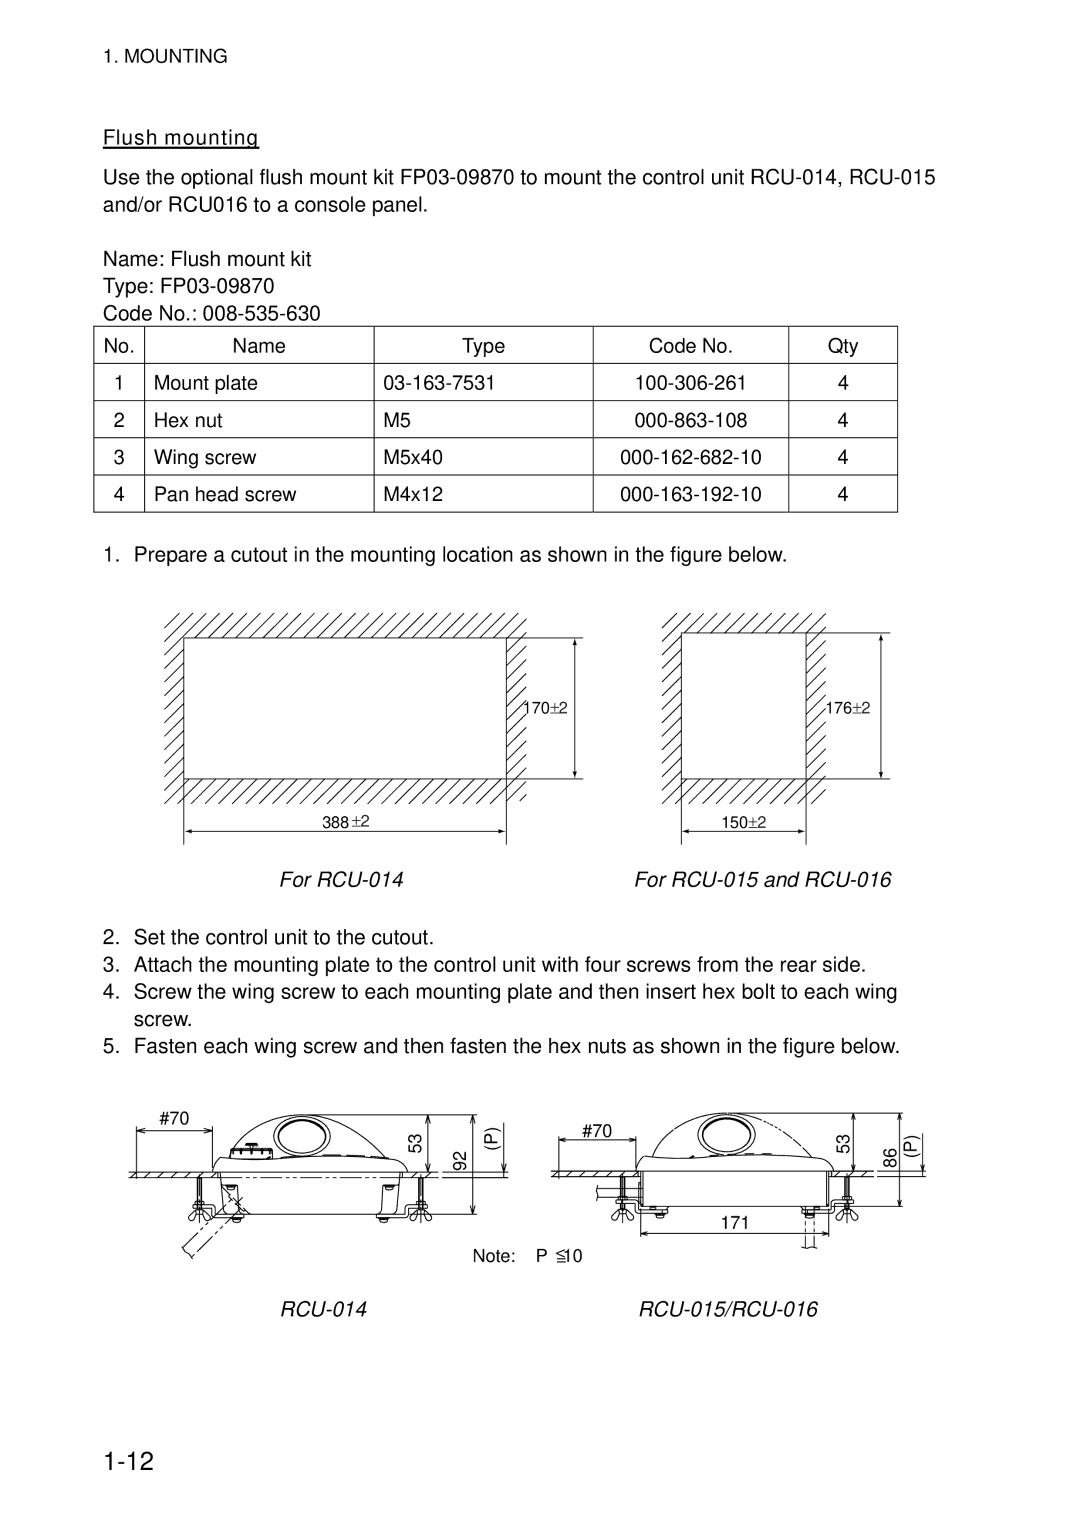
1. Prepare a cutout in the mounting location as shown in the figure below.
388±2
170±2
176±2
150±2
For | For |
2.Set the control unit to the cutout.
3.Attach the mounting plate to the control unit with four screws from the rear side.
4.Screw the wing screw to each mounting plate and then insert hex bolt to each wing screw.
5.Fasten each wing screw and then fasten the hex nuts as shown in the figure below.
#70 | 92 (P) | #70 | |
53 | |||
|
171
Note: P <=10
53 | 86 (P) |
|
|