1. MOUNTING
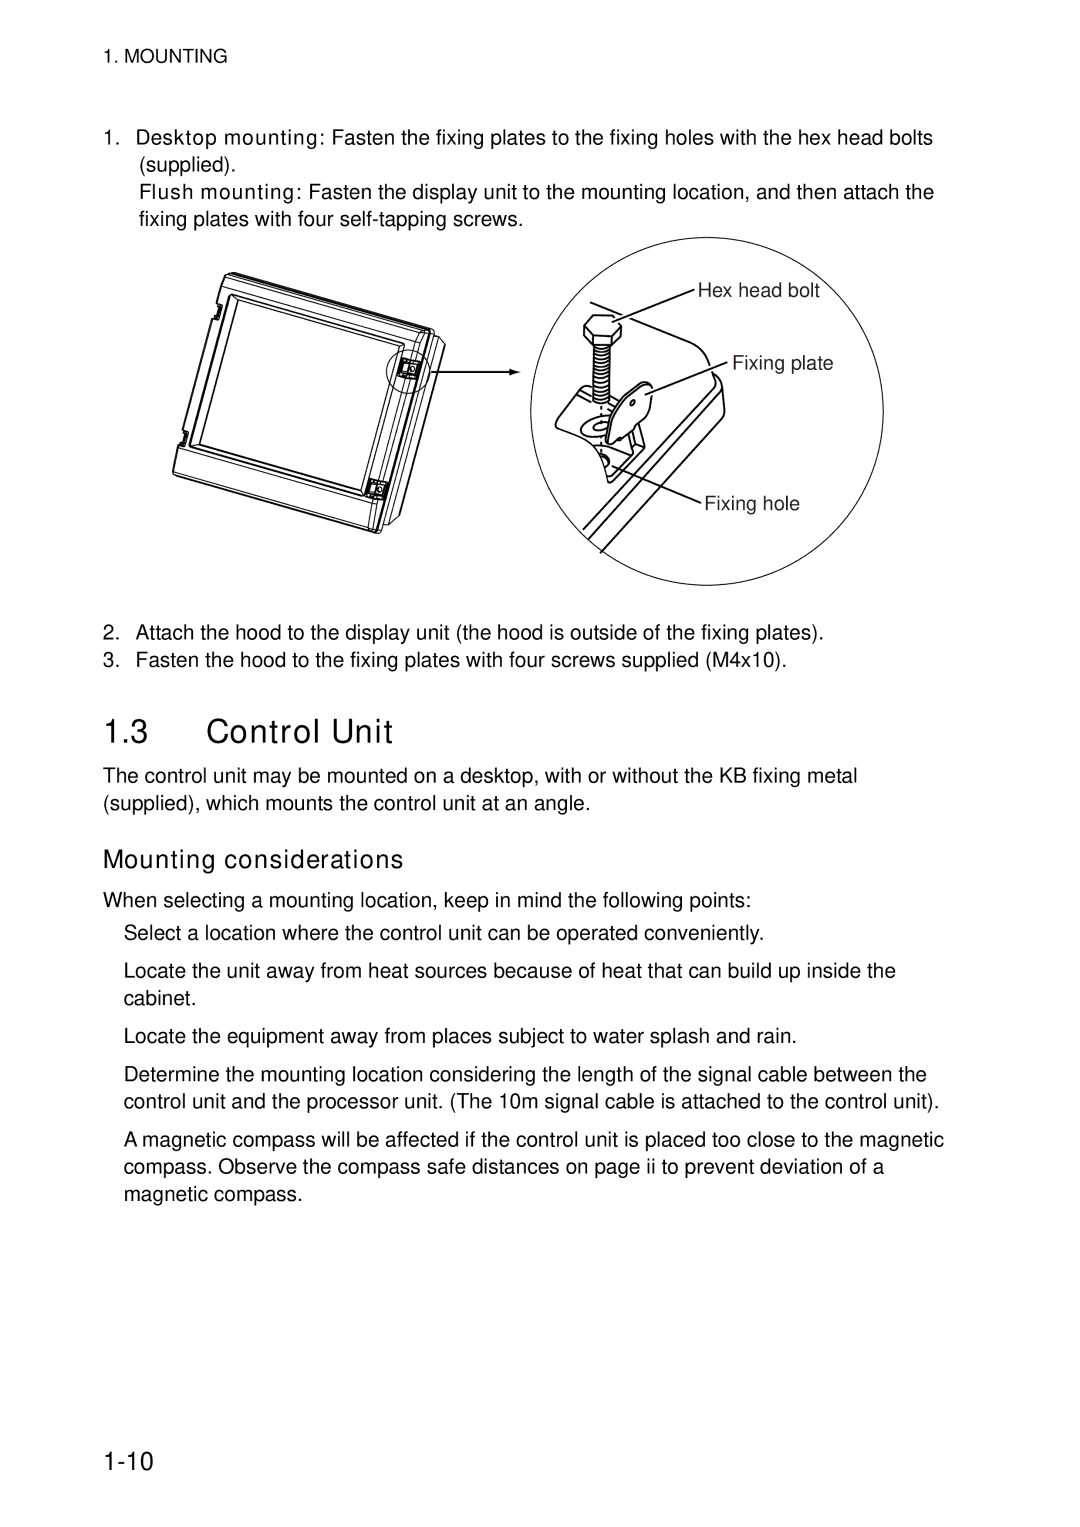
1.Desktop mounting: Fasten the fixing plates to the fixing holes with the hex head bolts (supplied).
Flush mounting: Fasten the display unit to the mounting location, and then attach the fixing plates with four
![]() Hex head bolt
Hex head bolt
![]() Fixing plate
Fixing plate
![]() Fixing hole
Fixing hole
2.Attach the hood to the display unit (the hood is outside of the fixing plates).
3.Fasten the hood to the fixing plates with four screws supplied (M4x10).
1.3Control Unit
The control unit may be mounted on a desktop, with or without the KB fixing metal (supplied), which mounts the control unit at an angle.
Mounting considerations
When selecting a mounting location, keep in mind the following points:
•Select a location where the control unit can be operated conveniently.
•Locate the unit away from heat sources because of heat that can build up inside the cabinet.
•Locate the equipment away from places subject to water splash and rain.
•Determine the mounting location considering the length of the signal cable between the control unit and the processor unit. (The 10m signal cable is attached to the control unit).
•A magnetic compass will be affected if the control unit is placed too close to the magnetic compass. Observe the compass safe distances on page ii to prevent deviation of a magnetic compass.