Automatic Assembly Editing
Tip:
See the Videotape Editing section of the Reference Guide for more information on editing.
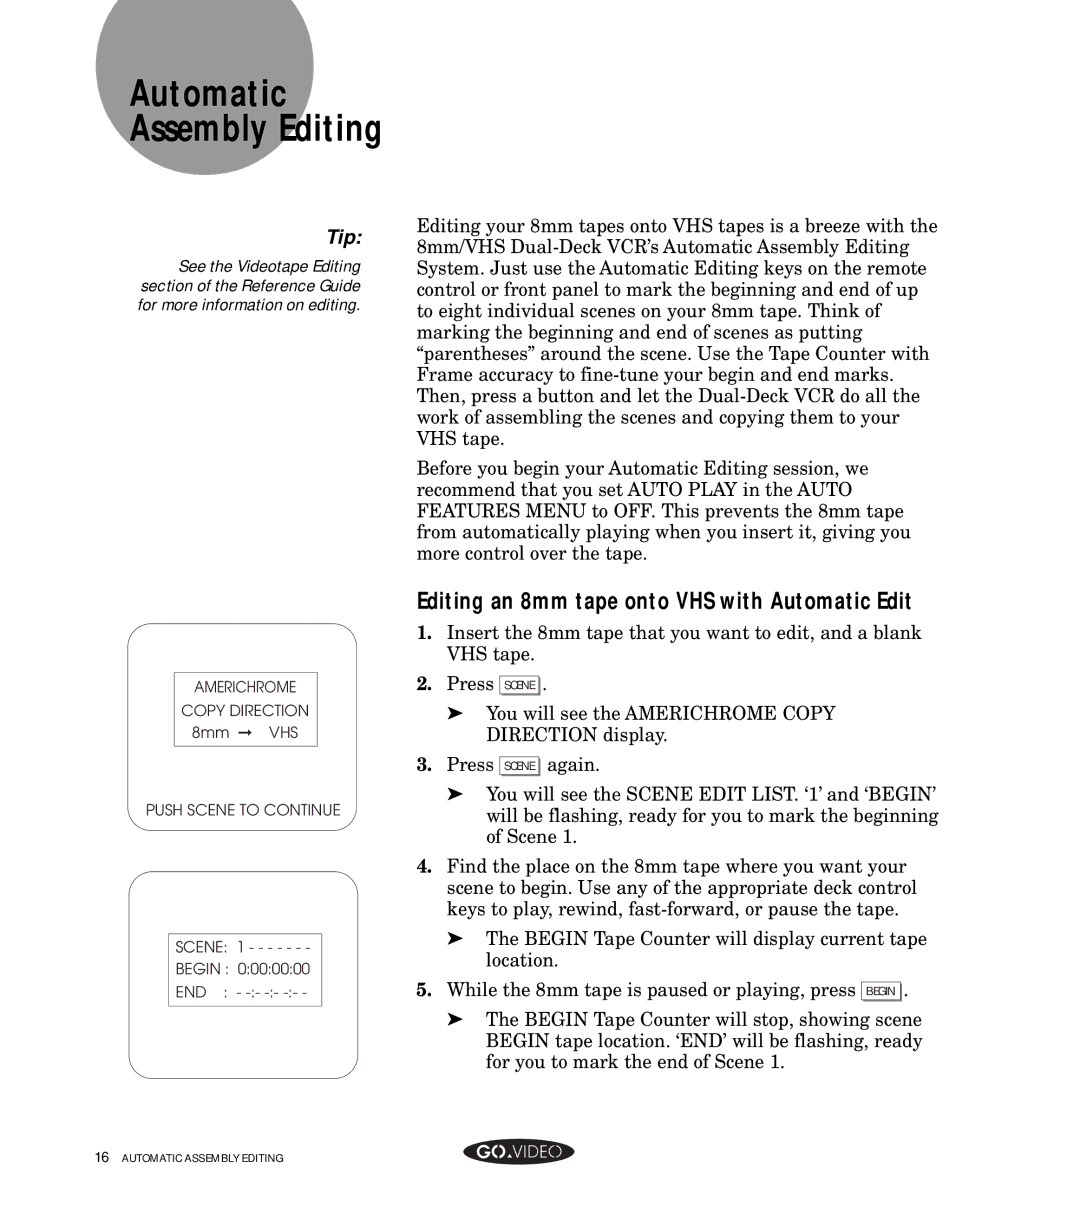
AMERICHROME
COPY DIRECTION
8mm ➞ VHS
PUSH SCENE TO CONTINUE
SCENE: 1 - - - - - - -
BEGIN : 0:00:00:00
END : -
Editing your 8mm tapes onto VHS tapes is a breeze with the 8mm/VHS
Before you begin your Automatic Editing session, we recommend that you set AUTO PLAY in the AUTO FEATURES MENU to OFF. This prevents the 8mm tape from automatically playing when you insert it, giving you more control over the tape.
Editing an 8mm tape onto VHS with Automatic Edit
1. | Insert the 8mm tape that you want to edit, and a blank |
| VHS tape. |
2. | Press SCENE . |
| ➤ You will see the AMERICHROME COPY |
| DIRECTION display. |
3. | Press SCENE again. |
| ➤ You will see the SCENE EDIT LIST. ‘1’ and ‘BEGIN’ |
| will be flashing, ready for you to mark the beginning |
| of Scene 1. |
4. | Find the place on the 8mm tape where you want your |
| scene to begin. Use any of the appropriate deck control |
| keys to play, rewind, |
| ➤ The BEGIN Tape Counter will display current tape |
| location. |
5. | While the 8mm tape is paused or playing, press BEGIN . |
| ➤ The BEGIN Tape Counter will stop, showing scene |
| BEGIN tape location. ‘END’ will be flashing, ready |
| for you to mark the end of Scene 1. |
16AUTOMATIC ASSEMBLY EDITING