▲ ▲ ▲ ▲ ▲ ▲ ▲ ▲
Tip:
If you don’t see a blue screen and a menu, look on the front panel display for the word ‘VCR’ in red. It should be under ‘CH’. If it’s not there, press the TV/VCR key on your remote control to enter VCR mode.
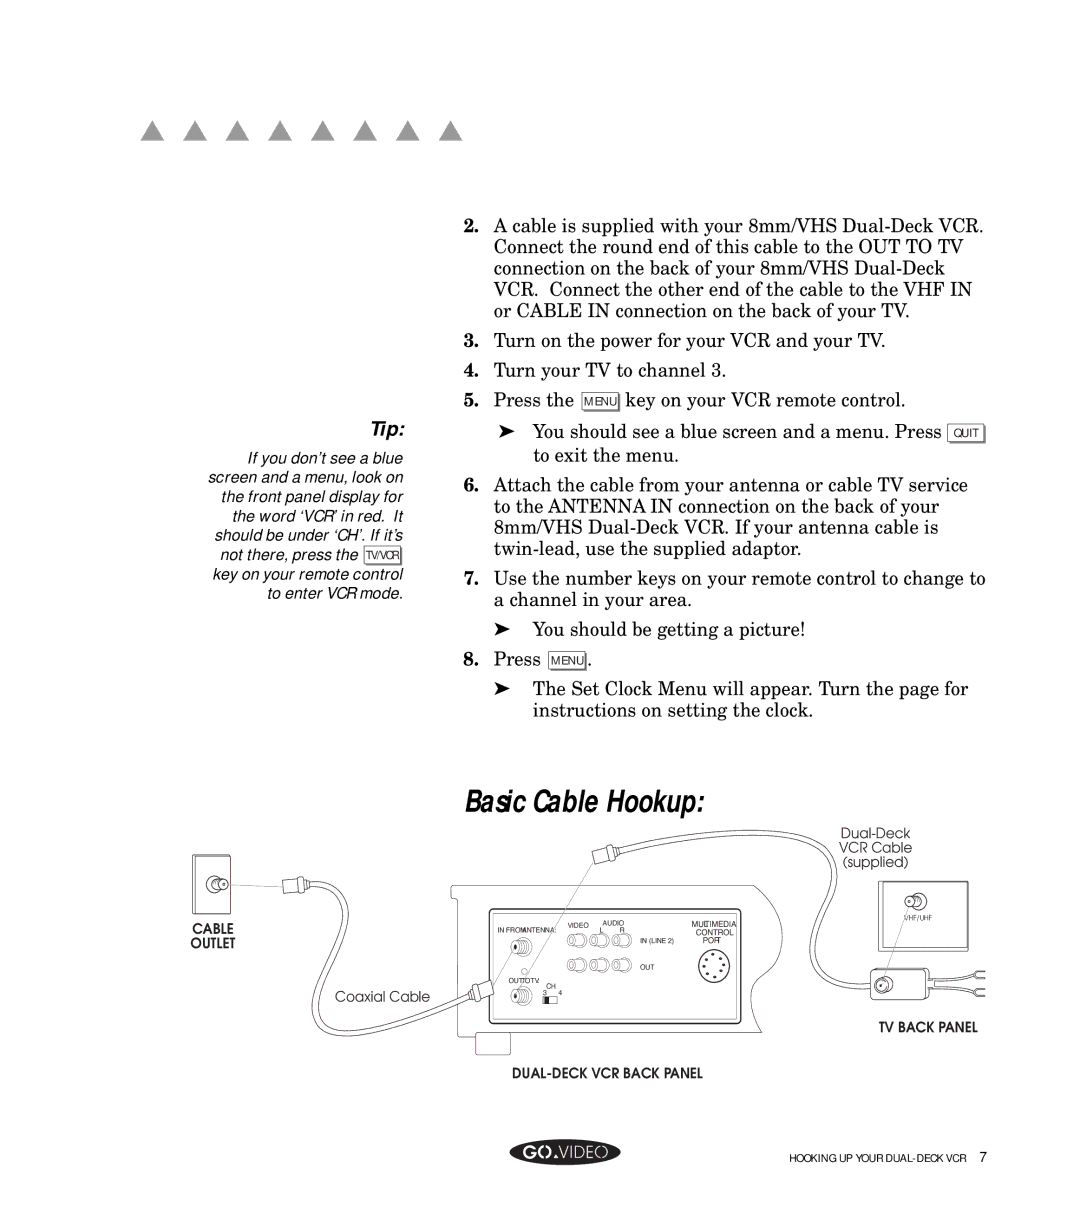
2. | A cable is supplied with your 8mm/VHS |
| Connect the round end of this cable to the OUT TO TV |
| connection on the back of your 8mm/VHS |
| VCR. Connect the other end of the cable to the VHF IN |
| or CABLE IN connection on the back of your TV. |
3. | Turn on the power for your VCR and your TV. |
4. | Turn your TV to channel 3. |
5. | Press the MENU key on your VCR remote control. |
| ➤ You should see a blue screen and a menu. Press QUIT |
| to exit the menu. |
6. | Attach the cable from your antenna or cable TV service |
| to the ANTENNA IN connection on the back of your |
| 8mm/VHS |
| |
7. | Use the number keys on your remote control to change to |
| a channel in your area. |
| ➤ You should be getting a picture! |
8. | Press MENU . |
| ➤ The Set Clock Menu will appear. Turn the page for |
| instructions on setting the clock. |
Basic Cable Hookup:
CABLE
OUTLET
Coaxial Cable
VCR Cable
(supplied)
VHF/UHF
IN FROMANTENNA: | VIDEO | AUDIO | MULTIMEDIA | |
| L | R | CONTROL | |
|
|
| IN (LINE 2) | PORT |
|
|
| OUT |
|
OUTTOTV: |
|
|
|
|
CH | 4 |
|
|
|
3 |
|
|
| |
TV BACK PANEL
HOOKING UP YOUR
