▲ ▲ ▲ ▲ ▲ ▲ ▲ ▲
As you mentally break your 8mm tape up into segments, write down the Tape Counter positions for the beginning and end of each segment, and what is happening in the segment.
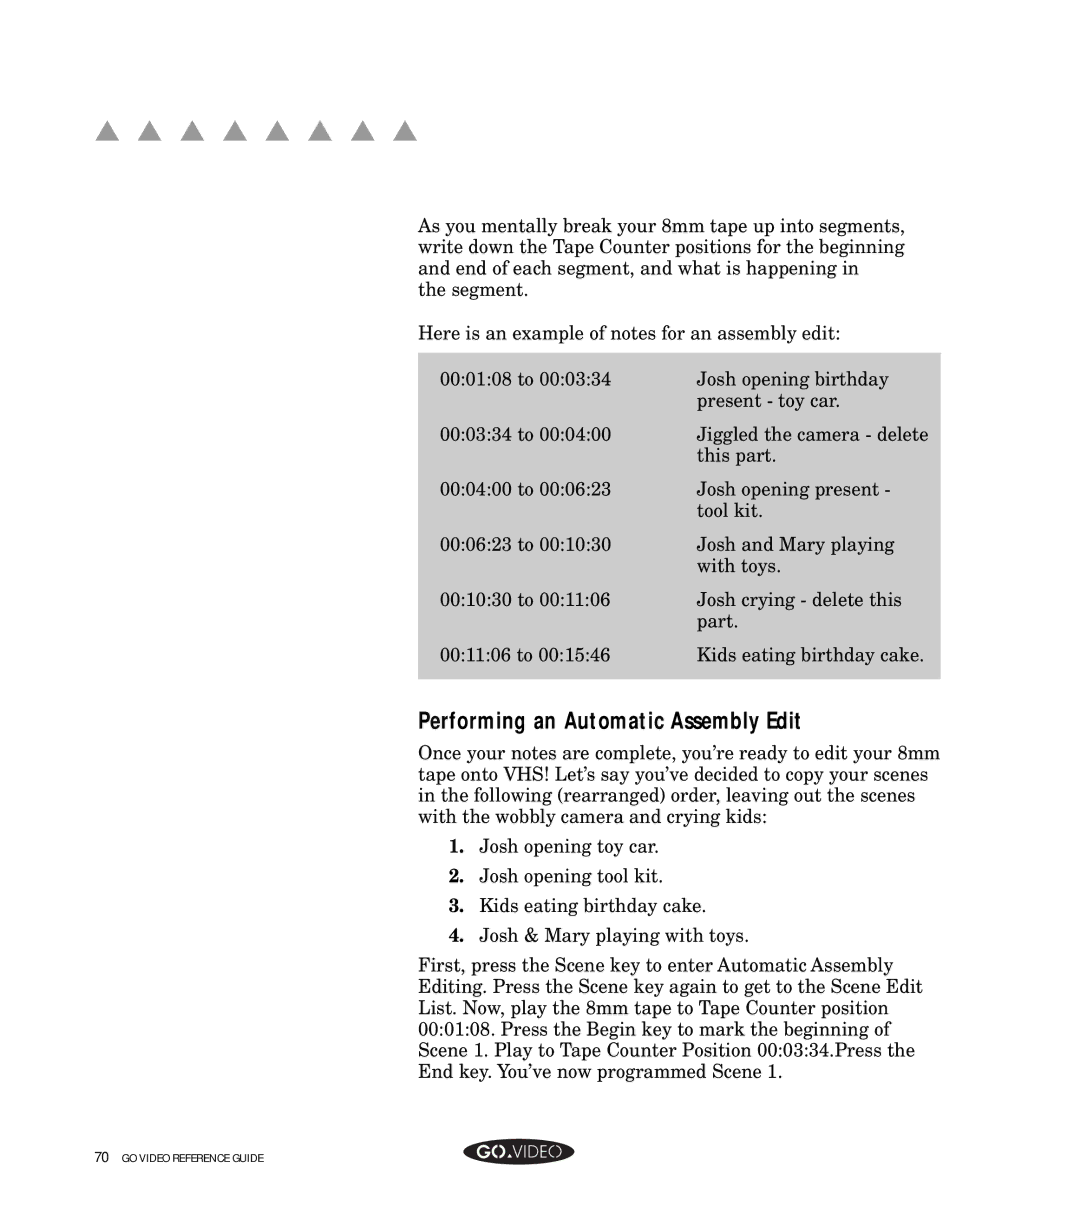
Here is an example of notes for an assembly edit:
00:01:08 to 00:03:34 | Josh opening birthday |
| present - toy car. |
00:03:34 to 00:04:00 | Jiggled the camera - delete |
| this part. |
00:04:00 to 00:06:23 | Josh opening present - |
| tool kit. |
00:06:23 to 00:10:30 | Josh and Mary playing |
| with toys. |
00:10:30 to 00:11:06 | Josh crying - delete this |
| part. |
00:11:06 to 00:15:46 | Kids eating birthday cake. |
|
|
Performing an Automatic Assembly Edit
Once your notes are complete, you’re ready to edit your 8mm tape onto VHS! Let’s say you’ve decided to copy your scenes in the following (rearranged) order, leaving out the scenes with the wobbly camera and crying kids:
1.Josh opening toy car.
2.Josh opening tool kit.
3.Kids eating birthday cake.
4.Josh & Mary playing with toys.
First, press the Scene key to enter Automatic Assembly Editing. Press the Scene key again to get to the Scene Edit List. Now, play the 8mm tape to Tape Counter position 00:01:08. Press the Begin key to mark the beginning of Scene 1. Play to Tape Counter Position 00:03:34.Press the End key. You’ve now programmed Scene 1.