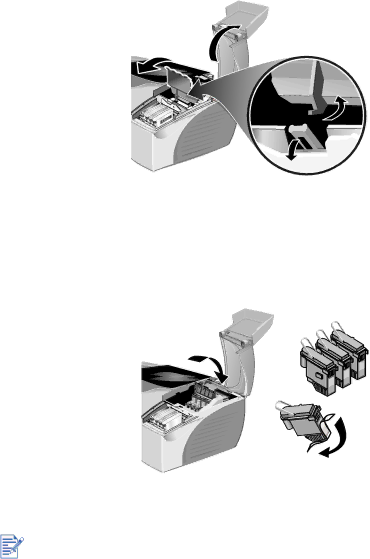
3Lift and push the printhead access latch toward the back of the printer.
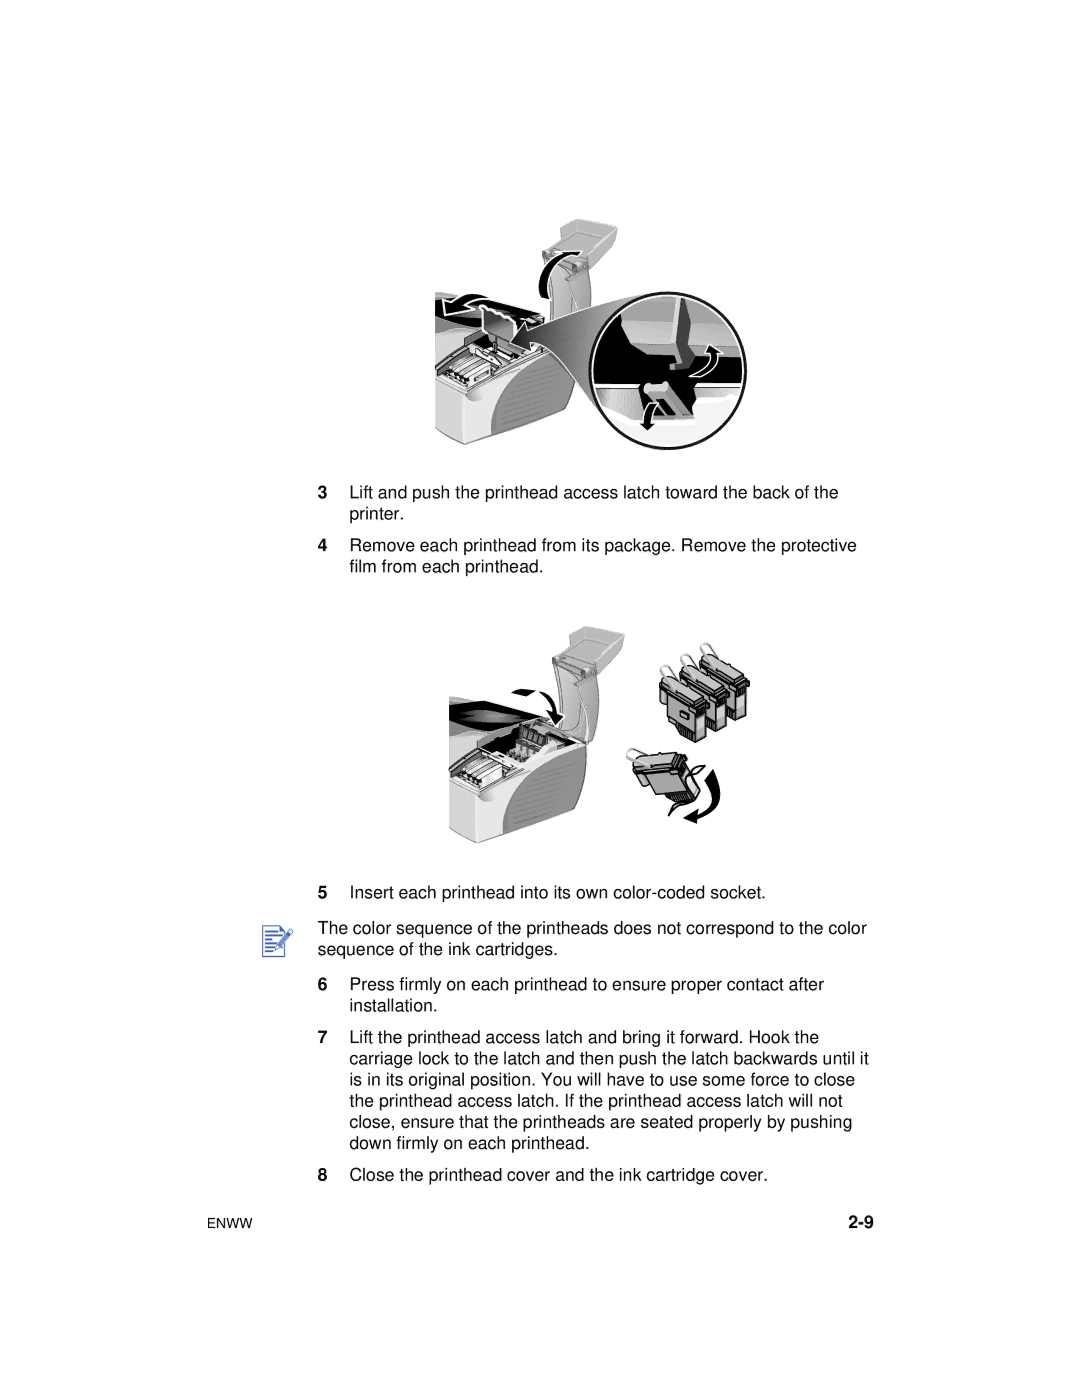
4Remove each printhead from its package. Remove the protective film from each printhead.
5Insert each printhead into its own
The color sequence of the printheads does not correspond to the color sequence of the ink cartridges.
6Press firmly on each printhead to ensure proper contact after installation.
7Lift the printhead access latch and bring it forward. Hook the carriage lock to the latch and then push the latch backwards until it is in its original position. You will have to use some force to close the printhead access latch. If the printhead access latch will not close, ensure that the printheads are seated properly by pushing down firmly on each printhead.
8Close the printhead cover and the ink cartridge cover.
ENWW |
