Installing or Replacing a Disk Drive in the IA Blade
Removing a System Disk Drive
Before you remove a disk drive, you must power off the IRU or system according to the instructions in the “Powering the System On and Off” on page 51.
To remove a disk drive, follow these steps:
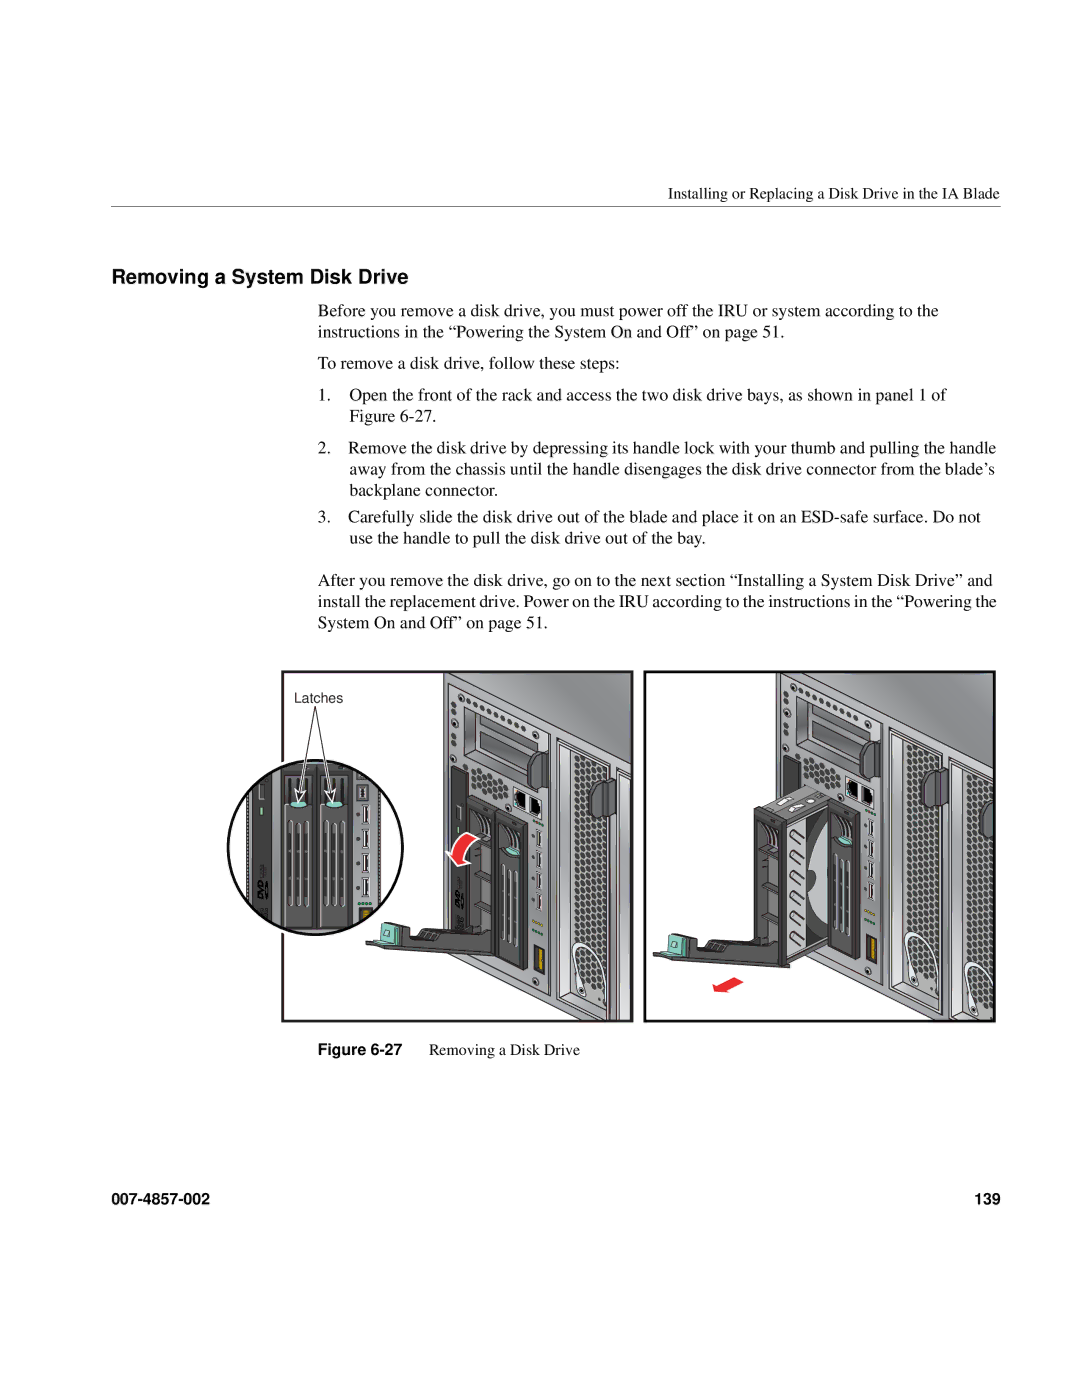
1.Open the front of the rack and access the two disk drive bays, as shown in panel 1 of Figure
2.Remove the disk drive by depressing its handle lock with your thumb and pulling the handle away from the chassis until the handle disengages the disk drive connector from the blade’s backplane connector.
3.Carefully slide the disk drive out of the blade and place it on an
After you remove the disk drive, go on to the next section “Installing a System Disk Drive” and install the replacement drive. Power on the IRU according to the instructions in the “Powering the System On and Off” on page 51.
Latches
COMPACT![]()
COMPACT |
Figure 6-27 Removing a Disk Drive
139 |