- Open the drawers to expose the chas- sis trim.
-Center the extrusions.
-If using the optional top attaching brack- ets, place the extrusion under the at- taching brackets.
-Remove extrusion backing paper to ex- pose the adhesive.
-Carefully place the extrusion on the trim and press.
-Finish pushing dishwasher into opening.
MOUNTING THE DISHWASHER
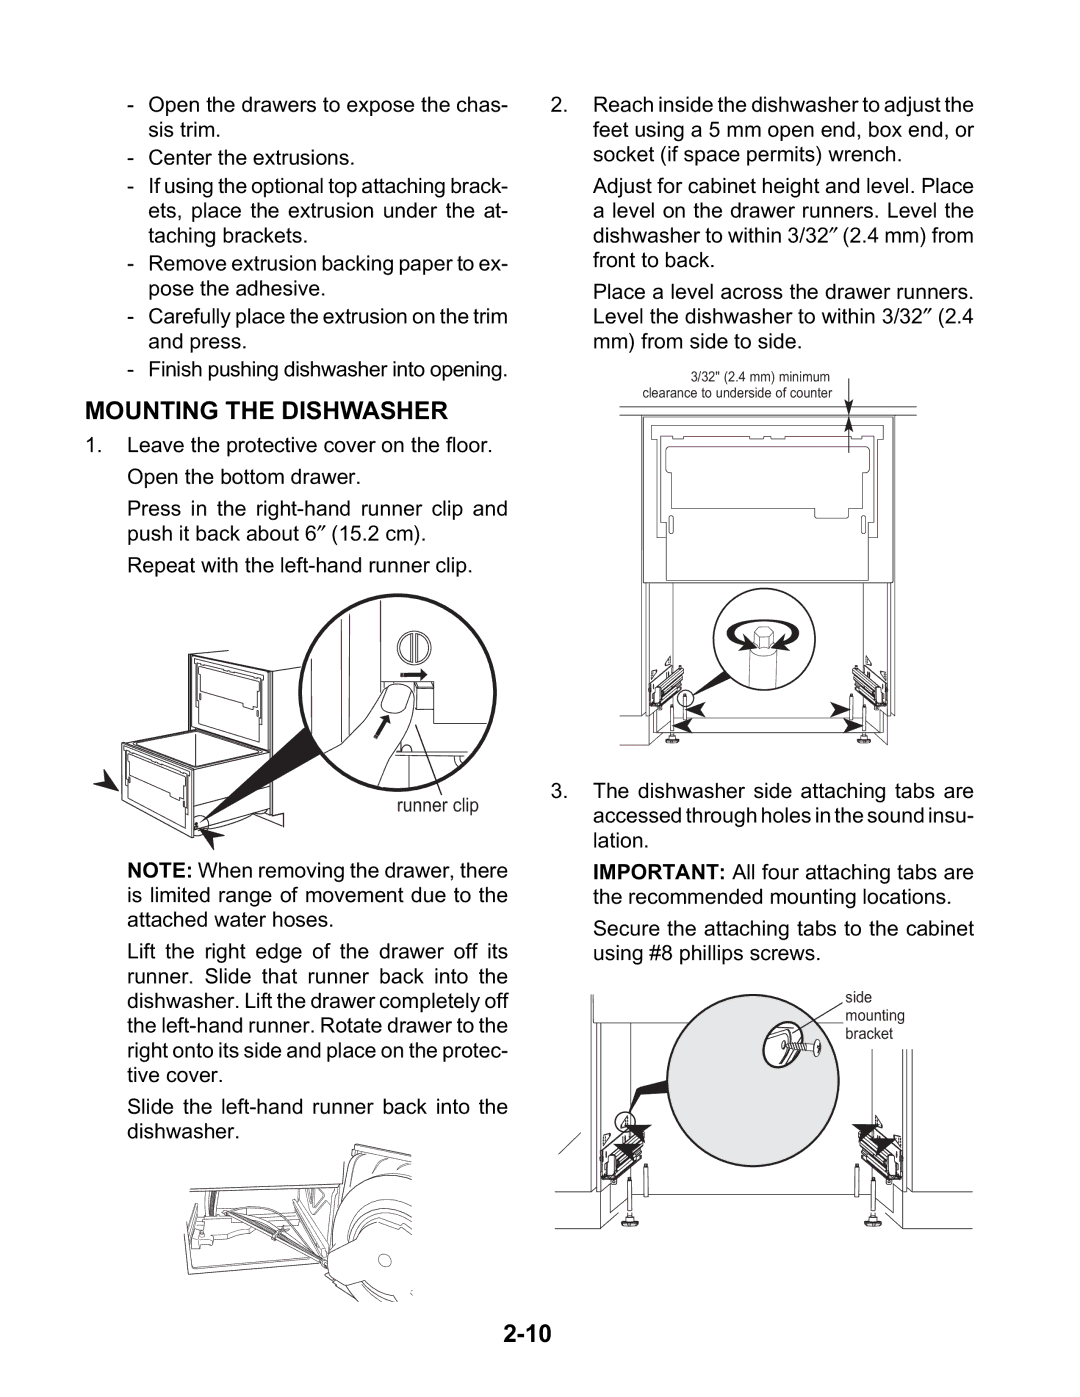
1.Leave the protective cover on the floor. Open the bottom drawer.
Press in the
Repeat with the
runner clip
NOTE: When removing the drawer, there is limited range of movement due to the attached water hoses.
Lift the right edge of the drawer off its runner. Slide that runner back into the dishwasher. Lift the drawer completely off the
Slide the
2.Reach inside the dishwasher to adjust the feet using a 5 mm open end, box end, or socket (if space permits) wrench.
Adjust for cabinet height and level. Place
a level on the drawer runners. Level the dishwasher to within 3/32″ (2.4 mm) from front to back.
Place a level across the drawer runners. Level the dishwasher to within 3/32″ (2.4 mm) from side to side.
3/32" (2.4 mm) minimum clearance to underside of counter
3.The dishwasher side attaching tabs are accessed through holes in the sound insu- lation.
IMPORTANT: All four attaching tabs are the recommended mounting locations.
Secure the attaching tabs to the cabinet using #8 phillips screws.
side mounting bracket
