4026-0XX
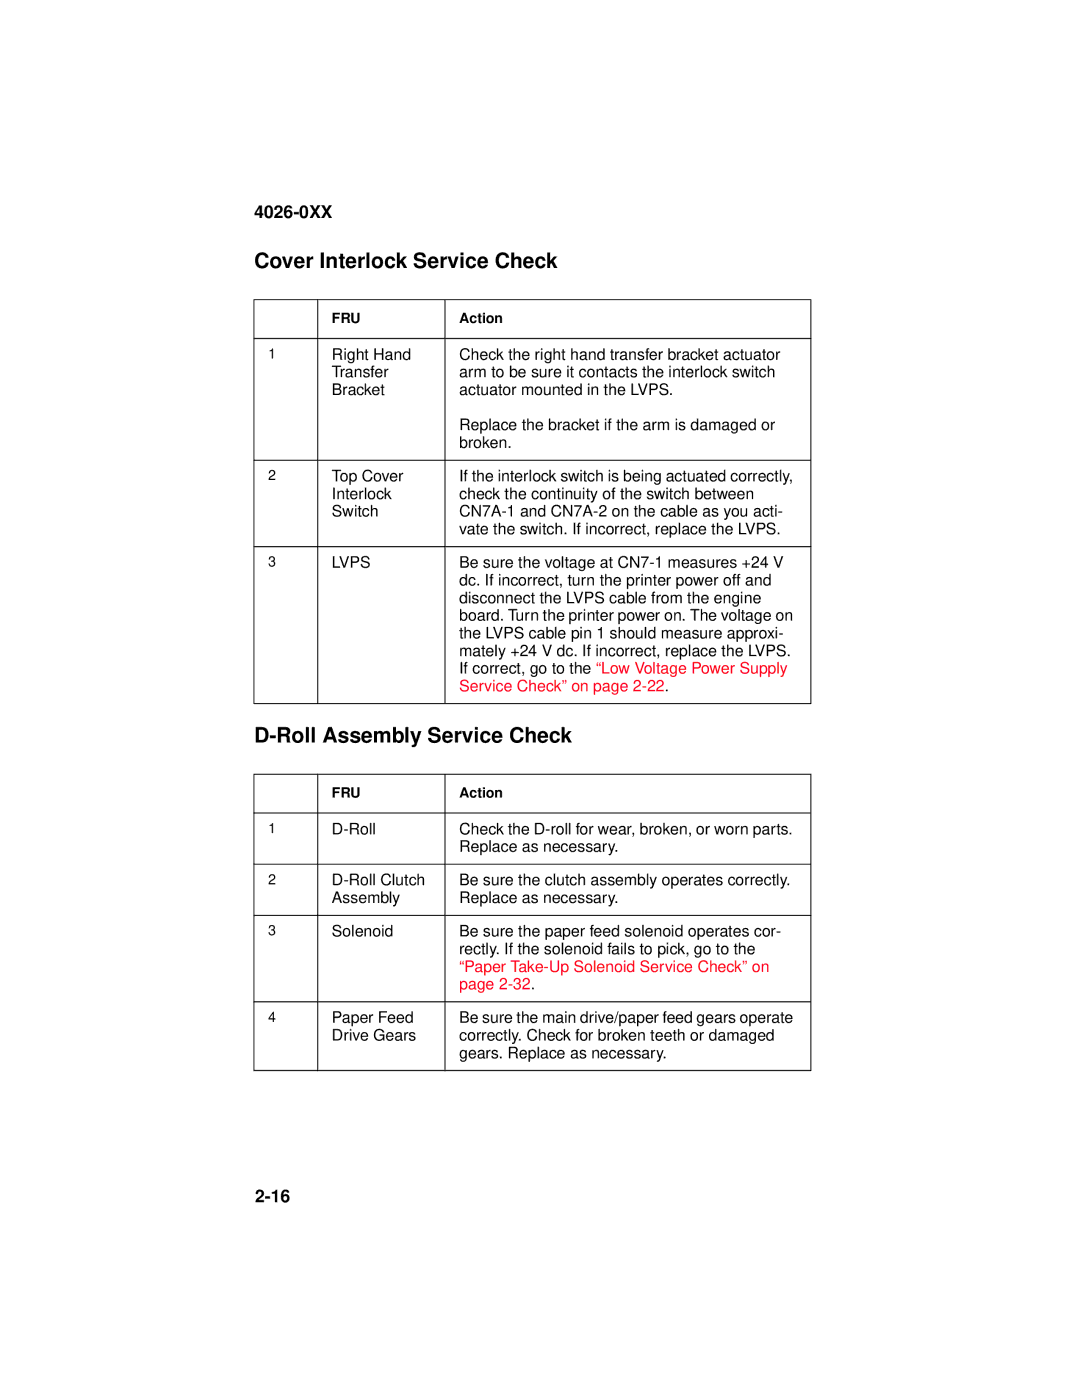
Cover Interlock Service Check
| FRU | Action |
|
|
|
1 | Right Hand | Check the right hand transfer bracket actuator |
| Transfer | arm to be sure it contacts the interlock switch |
| Bracket | actuator mounted in the LVPS. |
|
| Replace the bracket if the arm is damaged or |
|
| broken. |
|
|
|
2 | Top Cover | If the interlock switch is being actuated correctly, |
| Interlock | check the continuity of the switch between |
| Switch | |
|
| vate the switch. If incorrect, replace the LVPS. |
|
|
|
3 | LVPS | Be sure the voltage at |
|
| dc. If incorrect, turn the printer power off and |
|
| disconnect the LVPS cable from the engine |
|
| board. Turn the printer power on. The voltage on |
|
| the LVPS cable pin 1 should measure approxi- |
|
| mately +24 V dc. If incorrect, replace the LVPS. |
|
| If correct, go to the “Low Voltage Power Supply |
|
| Service Check” on page |
|
|
|
| ||
|
|
|
| FRU | Action |
|
|
|
1 | Check the | |
|
| Replace as necessary. |
|
|
|
2 | Be sure the clutch assembly operates correctly. | |
| Assembly | Replace as necessary. |
|
|
|
3 | Solenoid | Be sure the paper feed solenoid operates cor- |
|
| rectly. If the solenoid fails to pick, go to the |
|
| “Paper |
|
| page |
|
|
|
4 | Paper Feed | Be sure the main drive/paper feed gears operate |
| Drive Gears | correctly. Check for broken teeth or damaged |
|
| gears. Replace as necessary. |
|
|
|