INSTALLATION |
Return to Section TOC
Return to Section TOC
Return to Section TOC
Return to Master TOC
Return to Master TOC
Return to Master TOC
OUTPUT CONNECTIONS
![]() WARNING
WARNING
To avoid receiving a high frequency shock, keep the torch and cables in good condition.
__________________
The standard
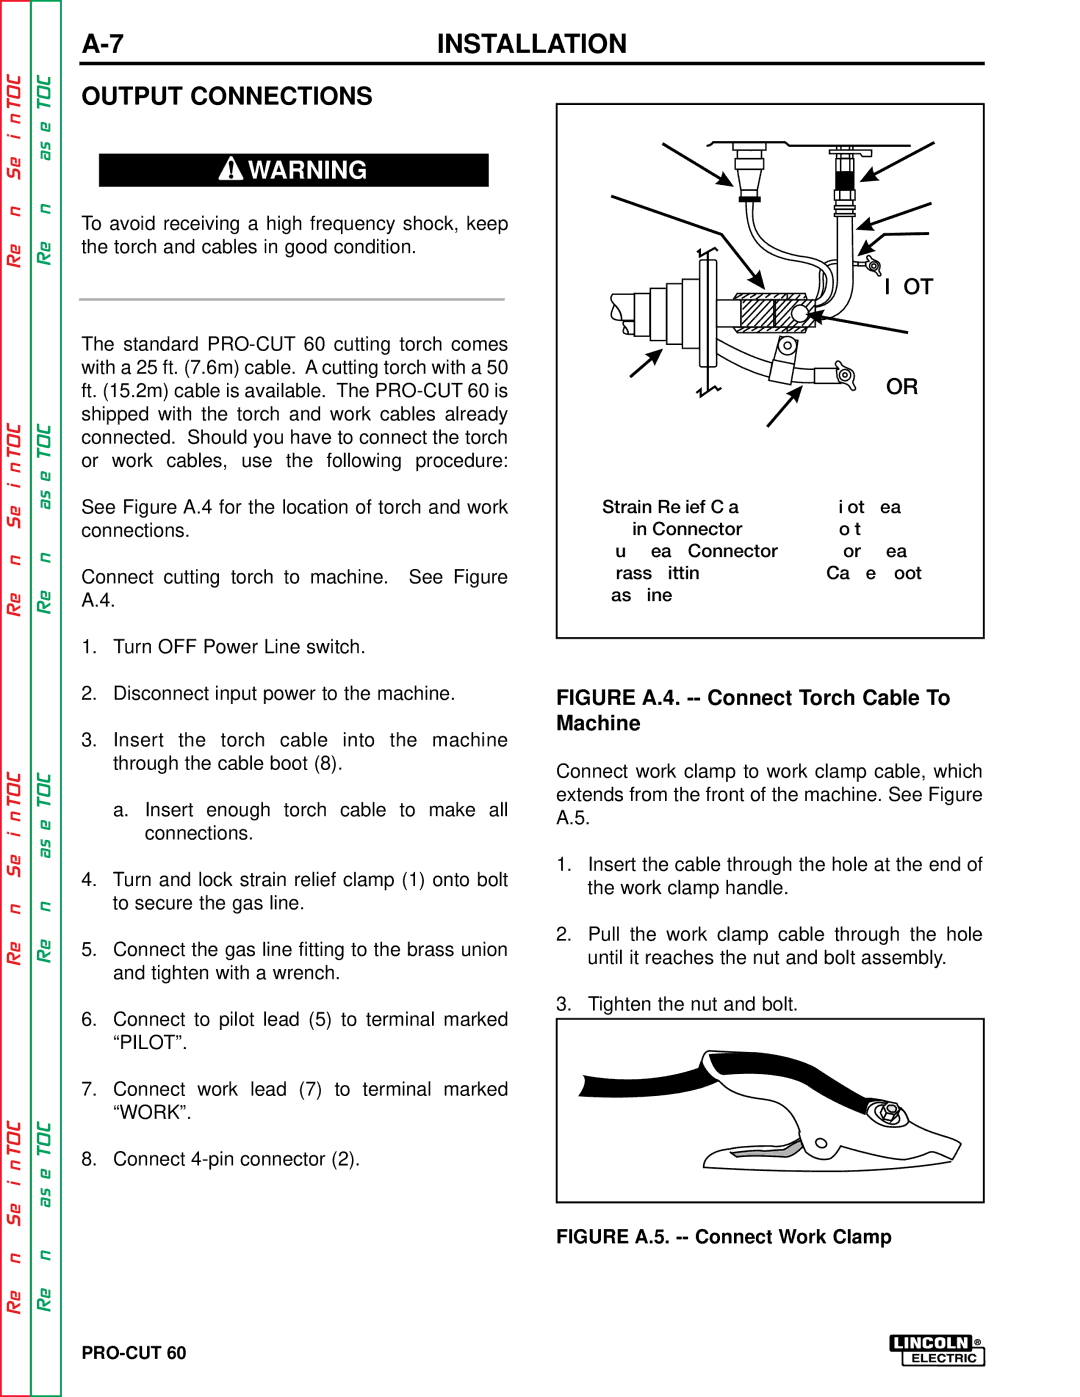
See Figure A.4 for the location of torch and work connections.
Connect cutting torch to machine. See Figure A.4.
1.Turn OFF Power Line switch.
2.Disconnect input power to the machine.
3.Insert the torch cable into the machine through the cable boot (8).
a.Insert enough torch cable to make all connections.
4.Turn and lock strain relief clamp (1) onto bolt to secure the gas line.
5.Connect the gas line fitting to the brass union and tighten with a wrench.
6.Connect to pilot lead (5) to terminal marked “PILOT”.
7.Connect work lead (7) to terminal marked “WORK”.
➁ | ➂ |
➀ | ➃ |
| ➄ |
| PILOT |
| ➅ |
➇ | WORK |
➆ |
|
➀ Strain Relief Clamp | ➄ Pilot Lead |
➁ | ➅ Bolt |
➂ Bulkhead Connector | ➆ Work Lead |
(Brass Fitting) | ➇ Cable Boot |
➃ Gas Line |
|
FIGURE A.4. -- Connect Torch Cable To Machine
Connect work clamp to work clamp cable, which extends from the front of the machine. See Figure A.5.
1.Insert the cable through the hole at the end of the work clamp handle.
2.Pull the work clamp cable through the hole until it reaches the nut and bolt assembly.
3.Tighten the nut and bolt.
Return to Section TOC
Return to Master TOC
8. Connect