TOC
TOC
TROUBLESHOOTING & REPAIR |
TRANSISTOR MODULE REMOVAL
Return to Section
Return to Section TOC
Return to Master
Return to Master TOC
REMOVAL/REPLACEMENT PROCEDURE
NOTE: It is recommended that when the Transistor Module is replaced, the Power Board and the Control Board should be replaced.
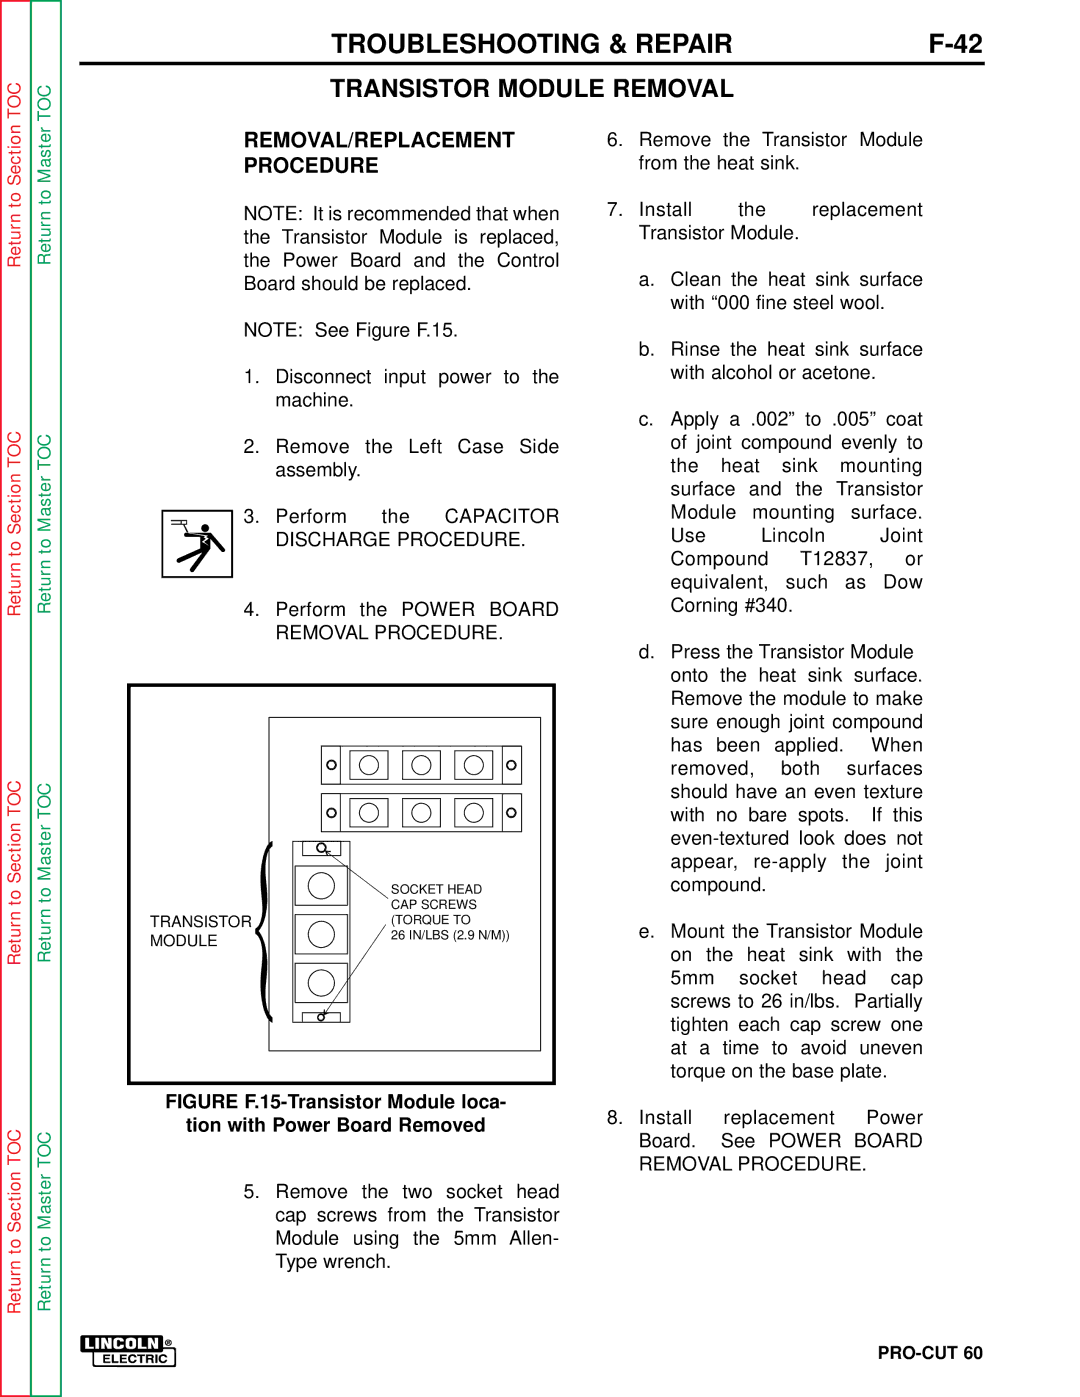
NOTE: See Figure F.15.
1.Disconnect input power to the machine.
2.Remove the Left Case Side assembly.
3.Perform the CAPACITOR DISCHARGE PROCEDURE.
4.Perform the POWER BOARD REMOVAL PROCEDURE.
6. Remove the Transistor Module | ||||
from the heat sink. |
|
| ||
7. Install | the | replacement | ||
Transistor Module. |
|
| ||
a. Clean the heat sink surface | ||||
with “000 fine steel wool. | ||||
b. Rinse the heat sink surface | ||||
with alcohol or acetone. |
| |||
c. Apply a .002” to .005” coat | ||||
of joint compound evenly to | ||||
the heat | sink | mounting | ||
surface | and | the | Transistor | |
Module | mounting | surface. | ||
Use | Lincoln |
| Joint | |
Compound | T12837, | or | ||
equivalent, | such | as | Dow | |
Corning #340. |
|
| ||
d. Press the Transistor Module | ||||
onto the heat sink surface. | ||||
Remove the module to make | ||||
Return to Master TOC
TRANSISTOR MODULE
SOCKET HEAD |
CAP SCREWS |
(TORQUE TO |
26 IN/LBS (2.9 N/M)) |
sure enough joint compound | ||||
has | been | applied. | When | |
removed, | both | surfaces | ||
should have an even texture | ||||
with no bare spots. If this | ||||
appear, | ||||
compound. |
|
|
| |
e. Mount the Transistor Module | ||||
on the heat sink with the | ||||
5mm | socket | head | cap | |
screws to 26 in/lbs. Partially | ||||
tighten each cap screw one | ||||
at a time to avoid uneven | ||||
torque on the base plate. | ||||
Return to Master TOC
FIGURE F.15-Transistor Module loca-
tion with Power Board Removed
5.Remove the two socket head cap screws from the Transistor Module using the 5mm Allen- Type wrench.
8. Install | replacement Power |
Board. | See POWER BOARD |
REMOVAL PROCEDURE. | |
