5.1 LAN CAMERA SETTING
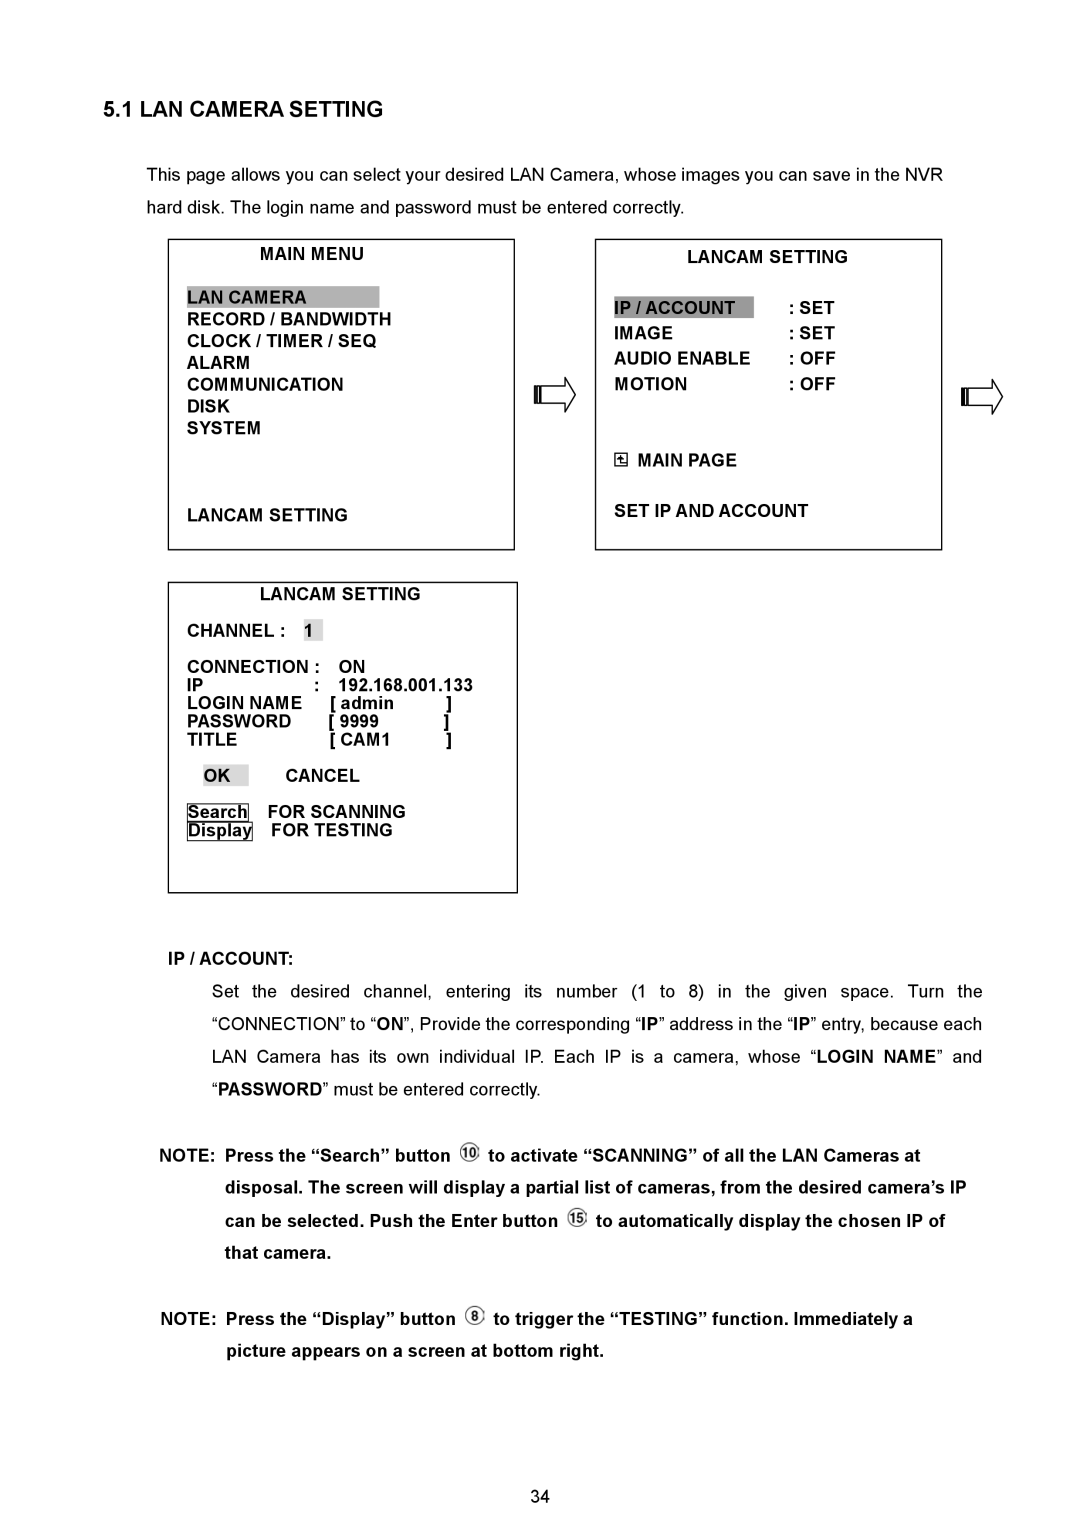
This page allows you can select your desired LAN Camera, whose images you can save in the NVR hard disk. The login name and password must be entered correctly.
MAIN MENU
LAN CAMERA
RECORD / BANDWIDTH
CLOCK / TIMER / SEQ
ALARM
COMMUNICATION
DISK
SYSTEM
LANCAM SETTING
LANCAM SETTING |
| ||
CHANNEL : |
|
|
|
1 |
|
| |
CONNECTION : | ON |
| |
IP | : | 192.168.001.133 | |
LOGIN NAME |
| [ admin | ] |
PASSWORD |
| [ 9999 | ] |
TITLE |
| [ CAM1 | ] |
LANCAM SETTING
IP / ACCOUNT | : SET |
IMAGE | : SET |
AUDIO ENABLE | : OFF |
MOTION | : OFF |
![]() MAIN PAGE
MAIN PAGE
SET IP AND ACCOUNT
OK CANCEL
Search FOR SCANNING
Display FOR TESTING
IP / ACCOUNT:
Set the desired channel, entering its number (1 to 8) in the given space. Turn the “CONNECTION” to “ON”, Provide the corresponding “IP” address in the “IP” entry, because each LAN Camera has its own individual IP. Each IP is a camera, whose “LOGIN NAME” and “PASSWORD” must be entered correctly.
NOTE: Press the “Search” button ![]() to activate “SCANNING” of all the LAN Cameras at disposal. The screen will display a partial list of cameras, from the desired camera’s IP can be selected. Push the Enter button
to activate “SCANNING” of all the LAN Cameras at disposal. The screen will display a partial list of cameras, from the desired camera’s IP can be selected. Push the Enter button ![]() to automatically display the chosen IP of that camera.
to automatically display the chosen IP of that camera.
NOTE: Press the “Display” button ![]() to trigger the “TESTING” function. Immediately a picture appears on a screen at bottom right.
to trigger the “TESTING” function. Immediately a picture appears on a screen at bottom right.
34
