ENGLISH
II. MAINTENANCE - MONTHLY
NOTE
When removing the conveyor, refer to Figure 2-9 (in Section 2, Installation).
A.Check that the oven is cool and the power is disconnected, as described in the warning at the beginning of this Section.
B.Remove the crumb trays and drive motor shroud from the oven.
C.Lift the drive end of the conveyor slightly, and push it forward into the oven. This removes the tension from the drive chain. Then, remove the drive chain from the conveyor sprocket.
D.Slide the conveyor out of the oven, folding it as it is removed.
NOTE
Split belt conveyors can only be removed from the end of the oven with the drive motor.
E.Remove the end plugs from the oven. The end plugs are shown in Figure
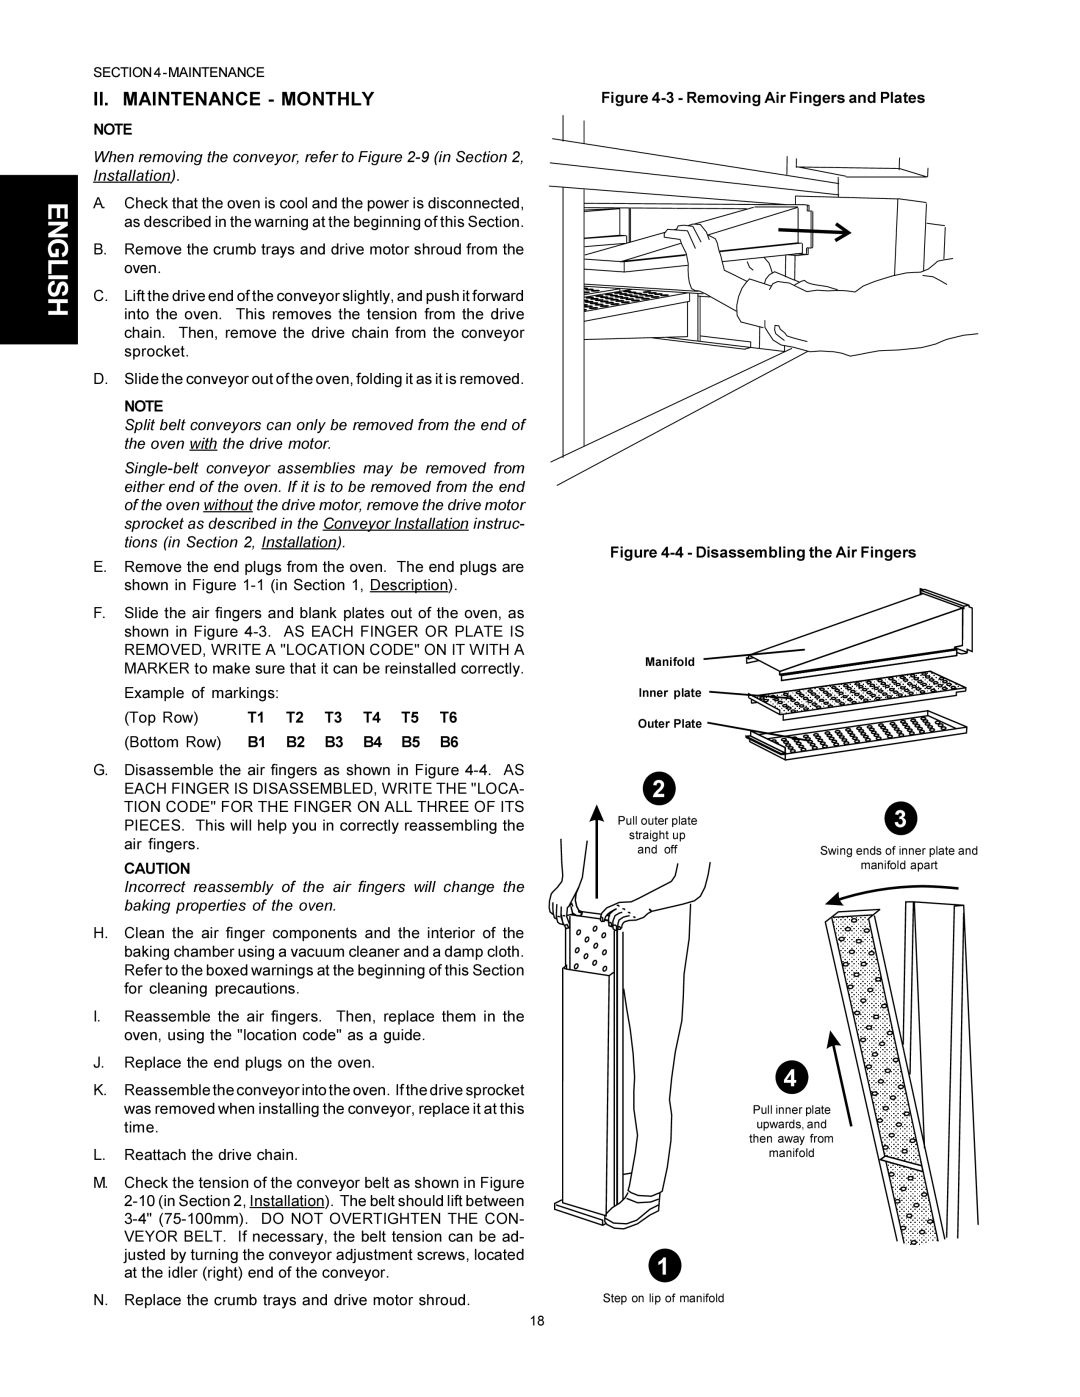
F.Slide the air fingers and blank plates out of the oven, as shown in Figure
Example of markings:
(Top Row) T1 T2 T3 T4 T5 T6 (Bottom Row) B1 B2 B3 B4 B5 B6
G.Disassemble the air fingers as shown in Figure
CAUTION
Incorrect reassembly of the air fingers will change the baking properties of the oven.
H.Clean the air finger components and the interior of the baking chamber using a vacuum cleaner and a damp cloth. Refer to the boxed warnings at the beginning of this Section for cleaning precautions.
I.Reassemble the air fingers. Then, replace them in the oven, using the "location code" as a guide.
J.Replace the end plugs on the oven.
K.Reassemble the conveyor into the oven. If the drive sprocket was removed when installing the conveyor, replace it at this time.
L.Reattach the drive chain.
M.Check the tension of the conveyor belt as shown in Figure
N.Replace the crumb trays and drive motor shroud.
Figure 4-3 - Removing Air Fingers and Plates
Figure 4-4 - Disassembling the Air Fingers
Manifold
Inner plate
Outer Plate
2
Pull outer plate | 3 |
straight up |
|
and off | Swing ends of inner plate and |
| manifold apart |
4
Pull inner plate upwards, and then away from manifold
1
Step on lip of manifold
18