Wireless Gateway User Guide
|
|
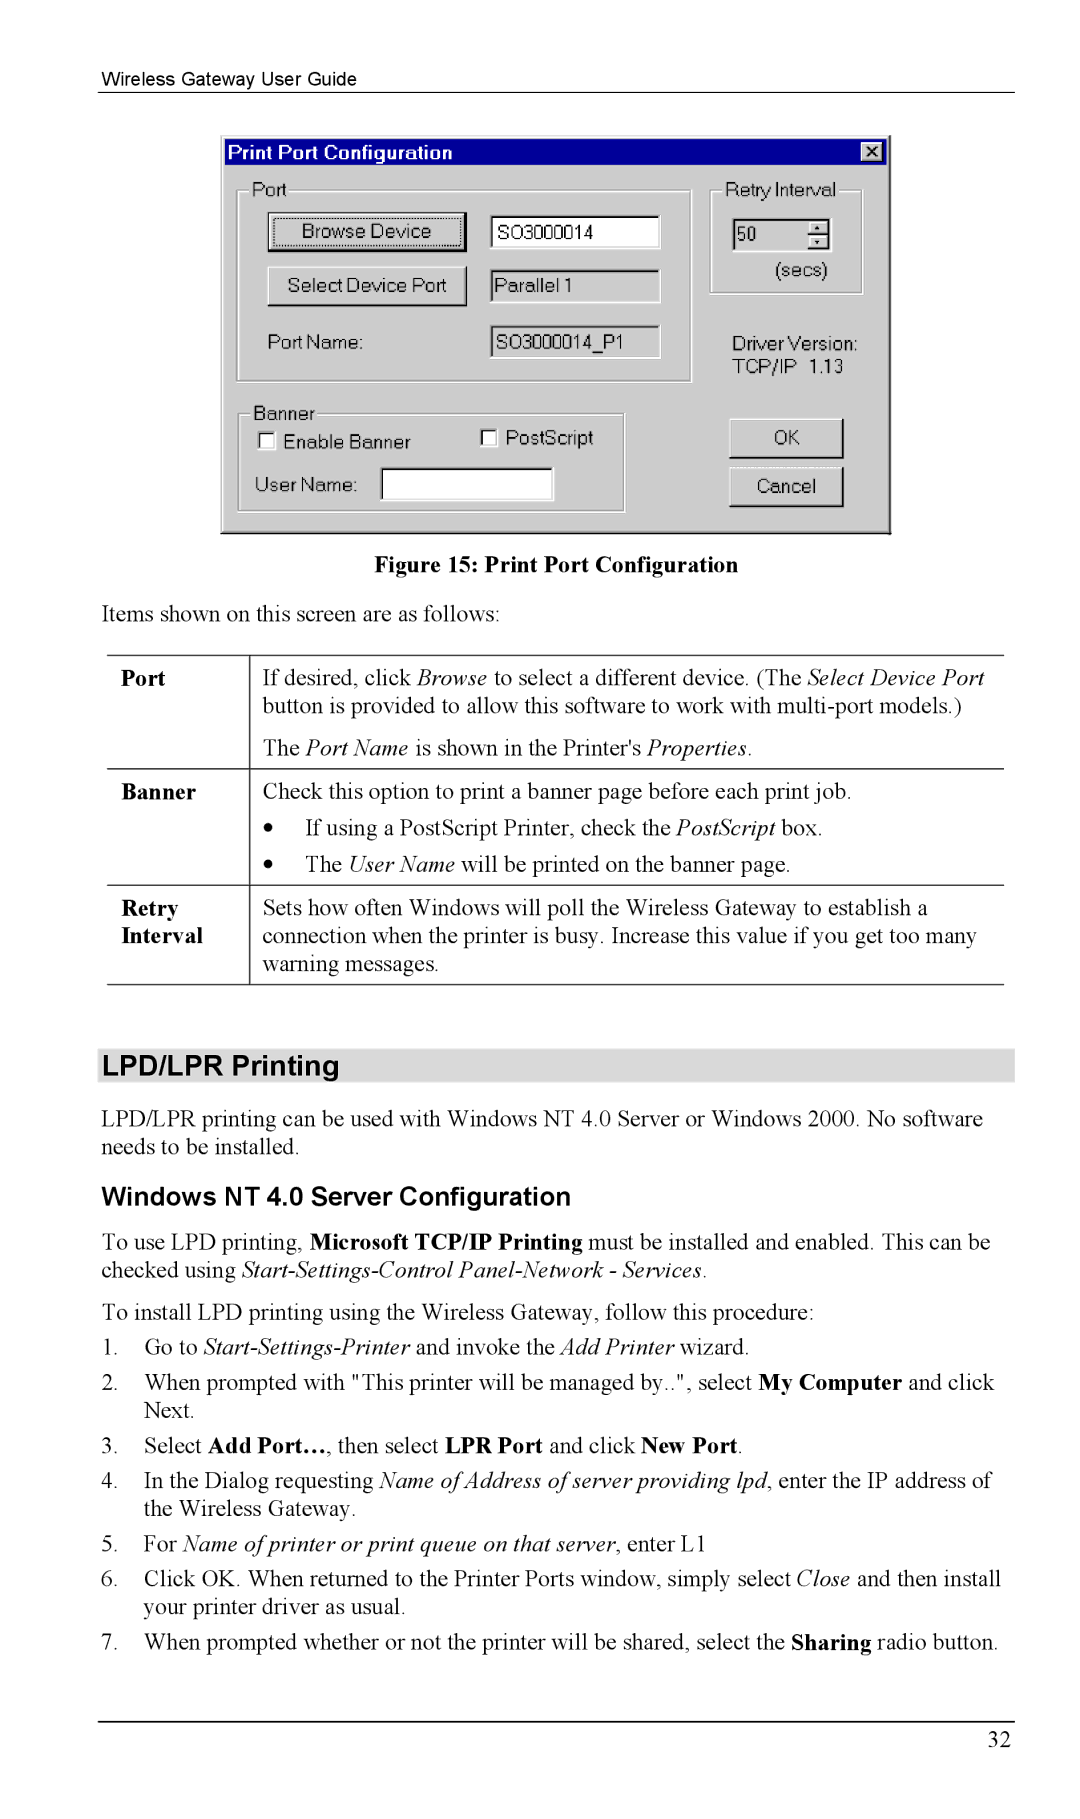
| Figure 15: Print Port Configuration |
Items shown on this screen are as follows: | |||
|
|
| |
| Port | If desired, click Browse to select a different device. (The Select Device Port | |
|
| button is provided to allow this software to work with | |
|
| The Port Name is shown in the Printer's Properties. | |
|
|
| |
| Banner | Check this option to print a banner page before each print job. | |
|
| • | If using a PostScript Printer, check the PostScript box. |
|
| • | The User Name will be printed on the banner page. |
|
|
| |
| Retry | Sets how often Windows will poll the Wireless Gateway to establish a | |
| Interval | connection when the printer is busy. Increase this value if you get too many | |
|
| warning messages. | |
|
|
|
|
LPD/LPR Printing
LPD/LPR printing can be used with Windows NT 4.0 Server or Windows 2000. No software needs to be installed.
Windows NT 4.0 Server Configuration
To use LPD printing, Microsoft TCP/IP Printing must be installed and enabled. This can be checked using
To install LPD printing using the Wireless Gateway, follow this procedure:
1.Go to
2.When prompted with "This printer will be managed by..", select My Computer and click Next.
3.Select Add Port…, then select LPR Port and click New Port.
4.In the Dialog requesting Name of Address of server providing lpd, enter the IP address of the Wireless Gateway.
5.For Name of printer or print queue on that server, enter L1
6.Click OK. When returned to the Printer Ports window, simply select Close and then install your printer driver as usual.
7.When prompted whether or not the printer will be shared, select the Sharing radio button.
32