Part II: Installation
Screens
The NetCommand™ Setup: Edit Screens
Name
Figure 1
The Name screen allows you to change the default name for each device to a custom name of up to eight characters, selecting from letters, numbers, and nine different
characters. Use ![]() to select each letter, then press ENTER to move to the next letter position. Press CANCEL to delete the
to select each letter, then press ENTER to move to the next letter position. Press CANCEL to delete the
current letter and move back one letter posi-
tion. When in the rst posi tion, the CANCEL Figure 1. Name menu. button will return the name to the original
default name.
The NetCommand™ Setup: Edit
34
Connection
Figure 2
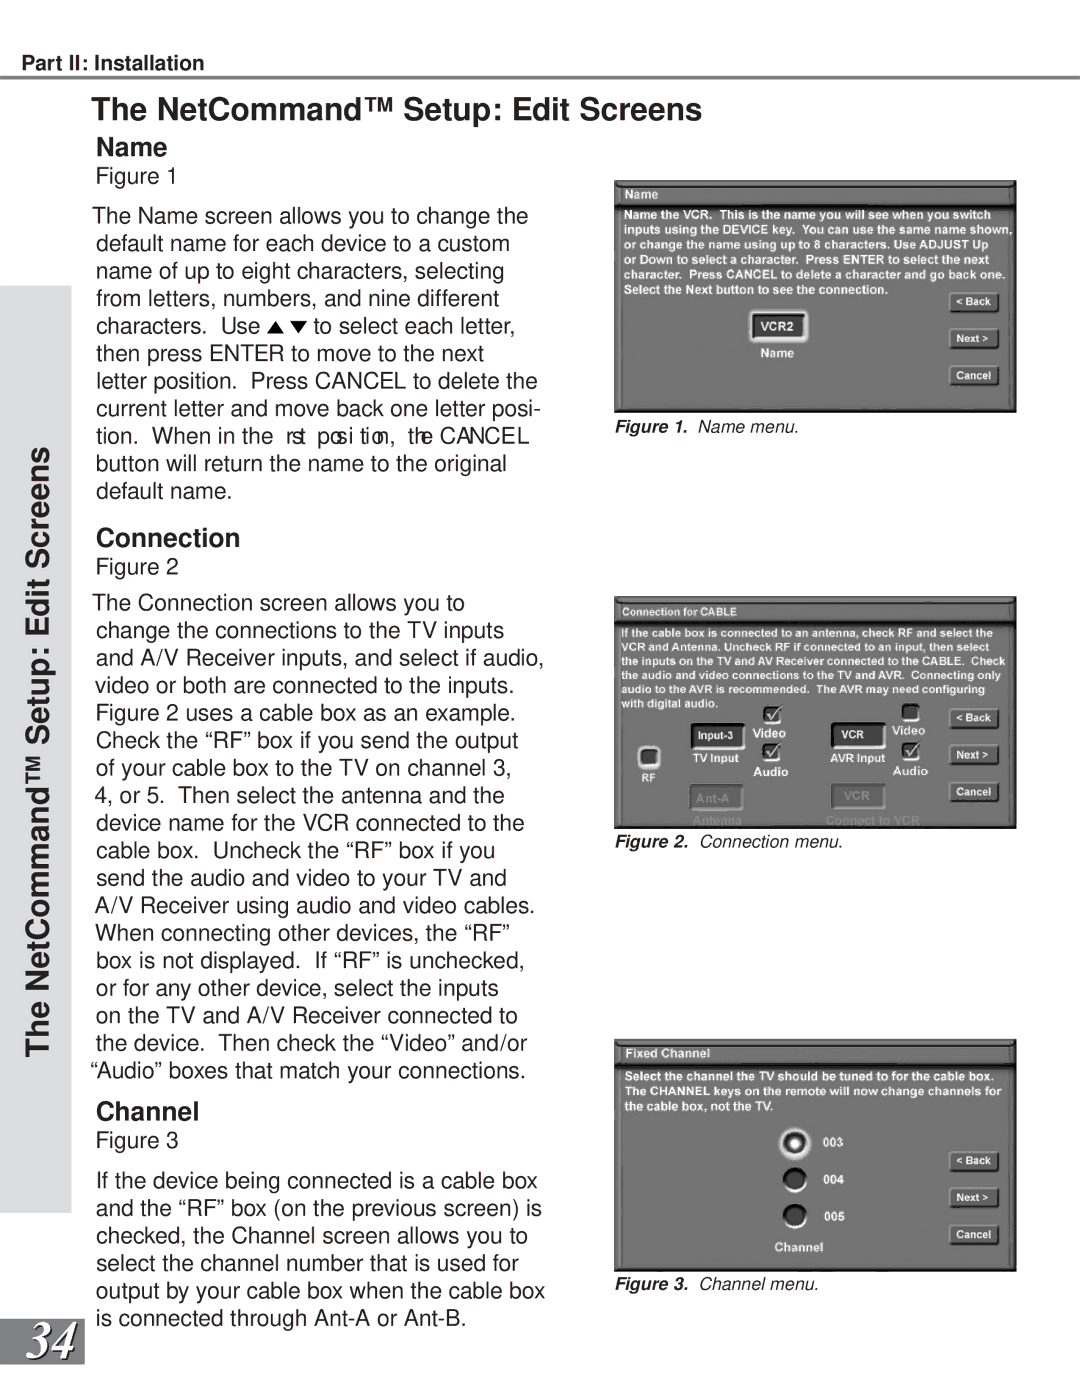
The Connection screen allows you to change the connections to the TV inputs and A/V Receiver inputs, and select if audio, video or both are connected to the inputs. Figure 2 uses a cable box as an example. Check the “RF” box if you send the output of your cable box to the TV on channel 3, 4, or 5. Then select the antenna and the device name for the VCR connected to the cable box. Uncheck the “RF” box if you send the audio and video to your TV and A/V Receiver using audio and video cables. When connecting other devices, the “RF” box is not displayed. If “RF” is unchecked, or for any other device, select the inputs on the TV and A/V Receiver connected to the device. Then check the “Video” and/or “Audio” boxes that match your connections.
Channel
Figure 3
If the device being connected is a cable box and the “RF” box (on the previous screen) is checked, the Channel screen allows you to select the channel number that is used for output by your cable box when the cable box is connected through