6. Maintenance and inspection
■Fan replacement procedure
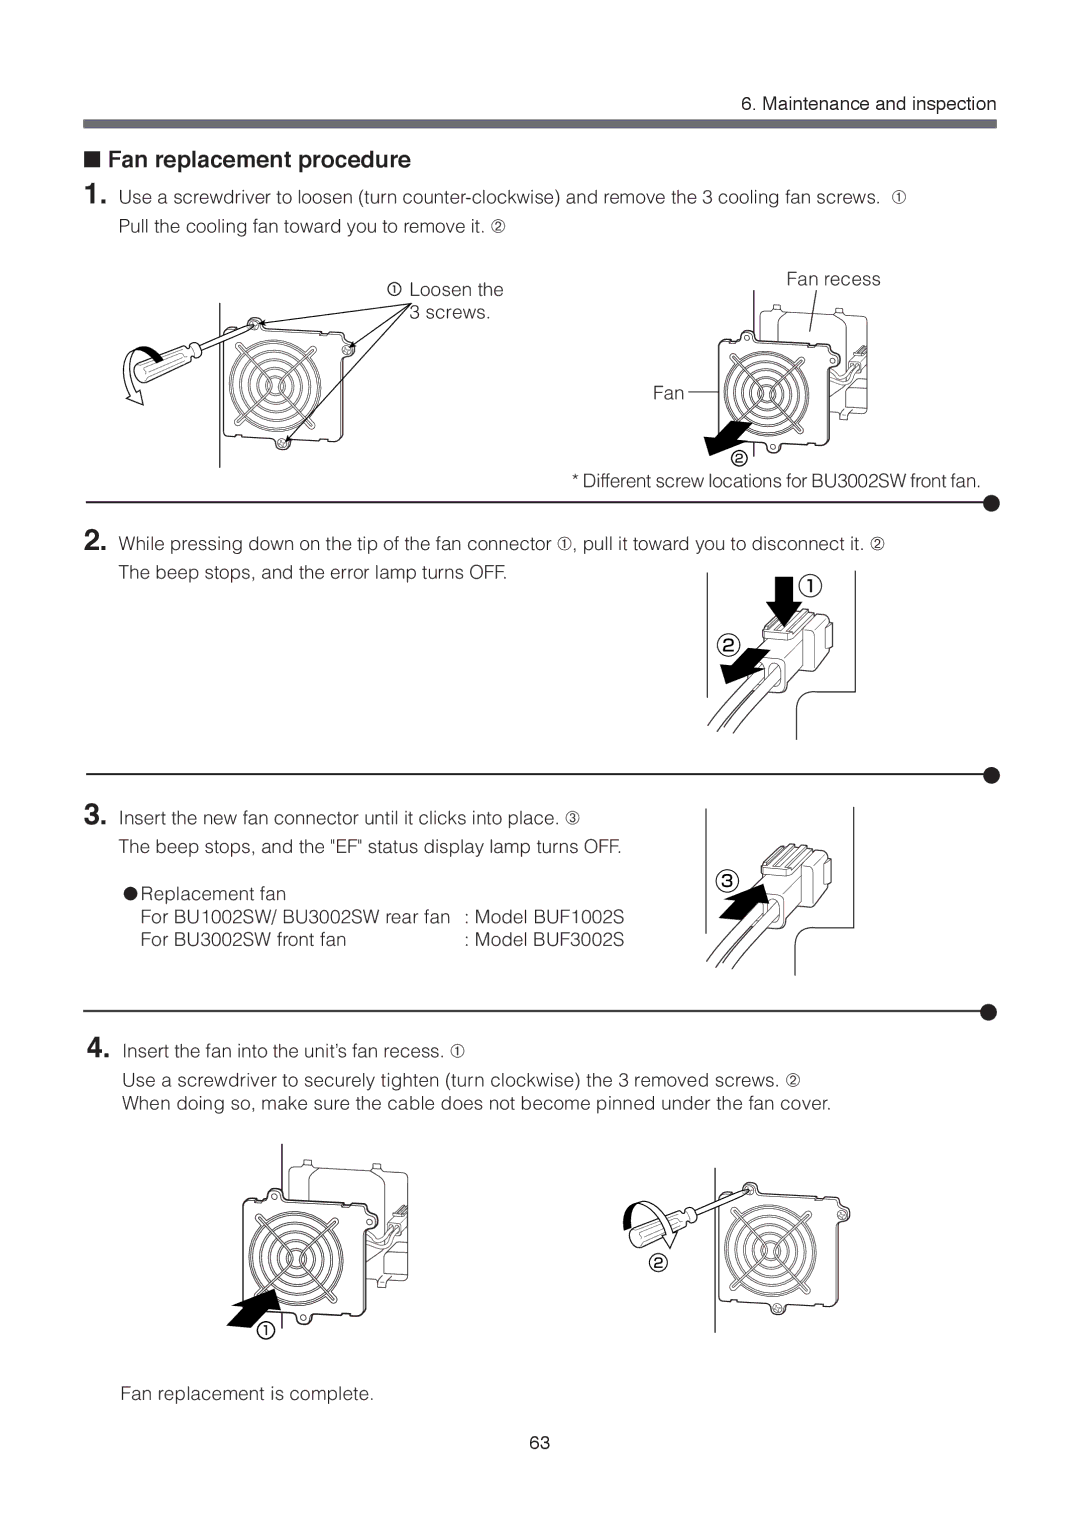
1. Use a screwdriver to loosen (turn
1 Loosen the
![]() 3 screws.
3 screws.
Fan recess
Fan
2
* Different screw locations for BU3002SW front fan.
2. While pressing down on the tip of the fan connector ➀, pull it toward you to disconnect it. ➁
The beep stops, and the error lamp turns OFF.
1
2
3. Insert the new fan connector until it clicks into place. ➂
The beep stops, and the "EF" status display lamp turns OFF.
● Replacement fan | 3 |
| |
For BU1002SW/ BU3002SW rear fan | : Model BUF1002S |
For BU3002SW front fan | : Model BUF3002S |
4. Insert the fan into the unit’s fan recess. ➀
Use a screwdriver to securely tighten (turn clockwise) the 3 removed screws. ➁ When doing so, make sure the cable does not become pinned under the fan cover.
2
1
Fan replacement is complete.
63
