Preparation
4Install the battery:
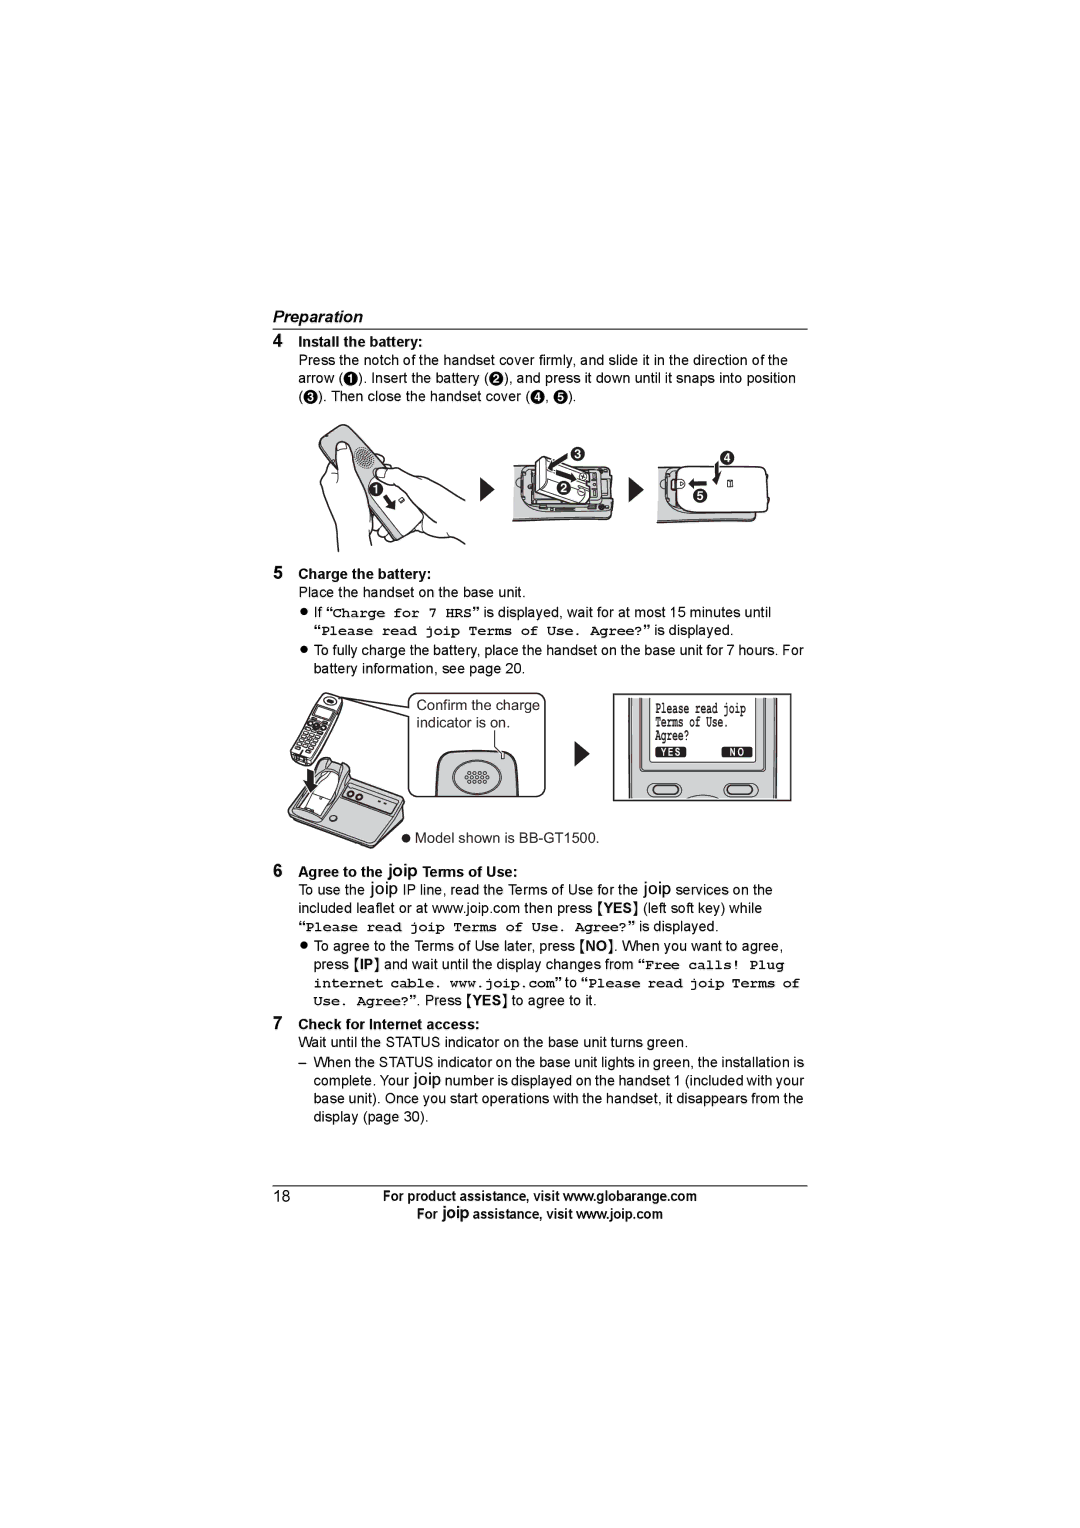
Press the notch of the handset cover firmly, and slide it in the direction of the arrow (A). Insert the battery (B), and press it down until it snaps into position (C). Then close the handset cover (D, E).
![]() C D
C D
A ![]()
![]() B
B ![]()
![]()
![]()
![]()
![]()
![]() E
E ![]()
![]()
![]()
5Charge the battery:
Place the handset on the base unit.
L If “Charge for 7 HRS” is displayed, wait for at most 15 minutes until “Please read joip Terms of Use. Agree?” is displayed.
L To fully charge the battery, place the handset on the base unit for 7 hours. For battery information, see page 20.
Confirm the charge indicator is on.
![]() Model shown is
Model shown is
Please read joip Terms of Use. Agree?
Y E S | [ N O |
6Agree to the ATerms of Use:
To use the AIP line, read the Terms of Use for the Aservices on the included leaflet or at www.joip.com then press {YES} (left soft key) while “Please read joip Terms of Use. Agree?” is displayed.
L To agree to the Terms of Use later, press {NO}. When you want to agree, press {IP} and wait until the display changes from “Free calls! Plug internet cable. www.joip.com” to “Please read joip Terms of Use. Agree?”. Press {YES} to agree to it.
7Check for Internet access:
Wait until the STATUS indicator on the base unit turns green.
–When the STATUS indicator on the base unit lights in green, the installation is complete. Your Anumber is displayed on the handset 1 (included with your base unit). Once you start operations with the handset, it disappears from the display (page 30).
18For product assistance, visit www.globarange.com
For Aassistance, visit www.joip.com