Usage cautions and notes (Continued)
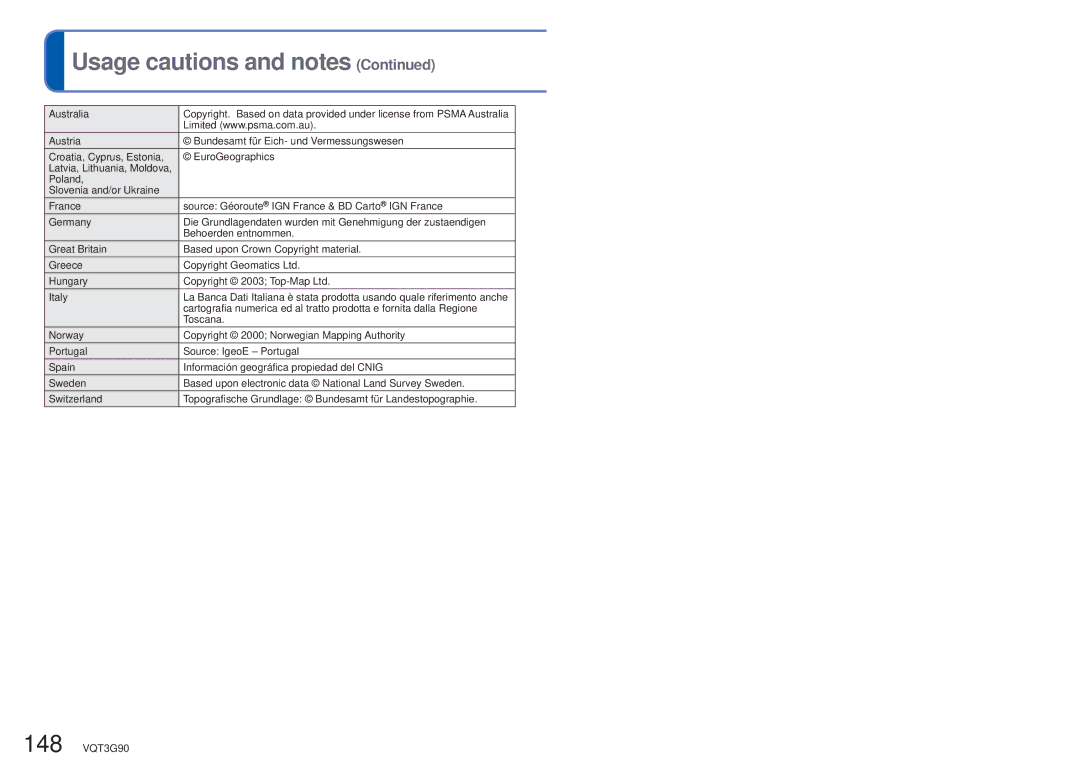
Australia | Copyright. Based on data provided under license from PSMA Australia |
| Limited (www.psma.com.au). |
Austria | © Bundesamt für Eich- und Vermessungswesen |
Croatia, Cyprus, Estonia, | © EuroGeographics |
Latvia, Lithuania, Moldova, |
|
Poland, |
|
Slovenia and/or Ukraine |
|
France | source: Géoroute® IGN France & BD Carto® IGN France |
Germany | Die Grundlagendaten wurden mit Genehmigung der zustaendigen |
| Behoerden entnommen. |
Great Britain | Based upon Crown Copyright material. |
Greece | Copyright Geomatics Ltd. |
Hungary | Copyright © 2003; |
Italy | La Banca Dati Italiana è stata prodotta usando quale riferimento anche |
| cartografia numerica ed al tratto prodotta e fornita dalla Regione |
| Toscana. |
Norway | Copyright © 2000; Norwegian Mapping Authority |
Portugal | Source: IgeoE – Portugal |
Spain | Información geográfica propiedad del CNIG |
Sweden | Based upon electronic data © National Land Survey Sweden. |
Switzerland | Topografische Grundlage: © Bundesamt für Landestopographie. |
148 VQT3G90