Setup
Recording paper!
Letter or legal size recording paper can be loaded. The unit can hold up to 150 sheets of 60 g/m2 to 75 g/m2 (16 lb. to 20 lb.) paper or 120 sheets of 90 g/m2 (24 lb.) paper.
●The unit is set for letter size paper by default. If you want to use legal size paper, change the setting (feature #16 on page 54).
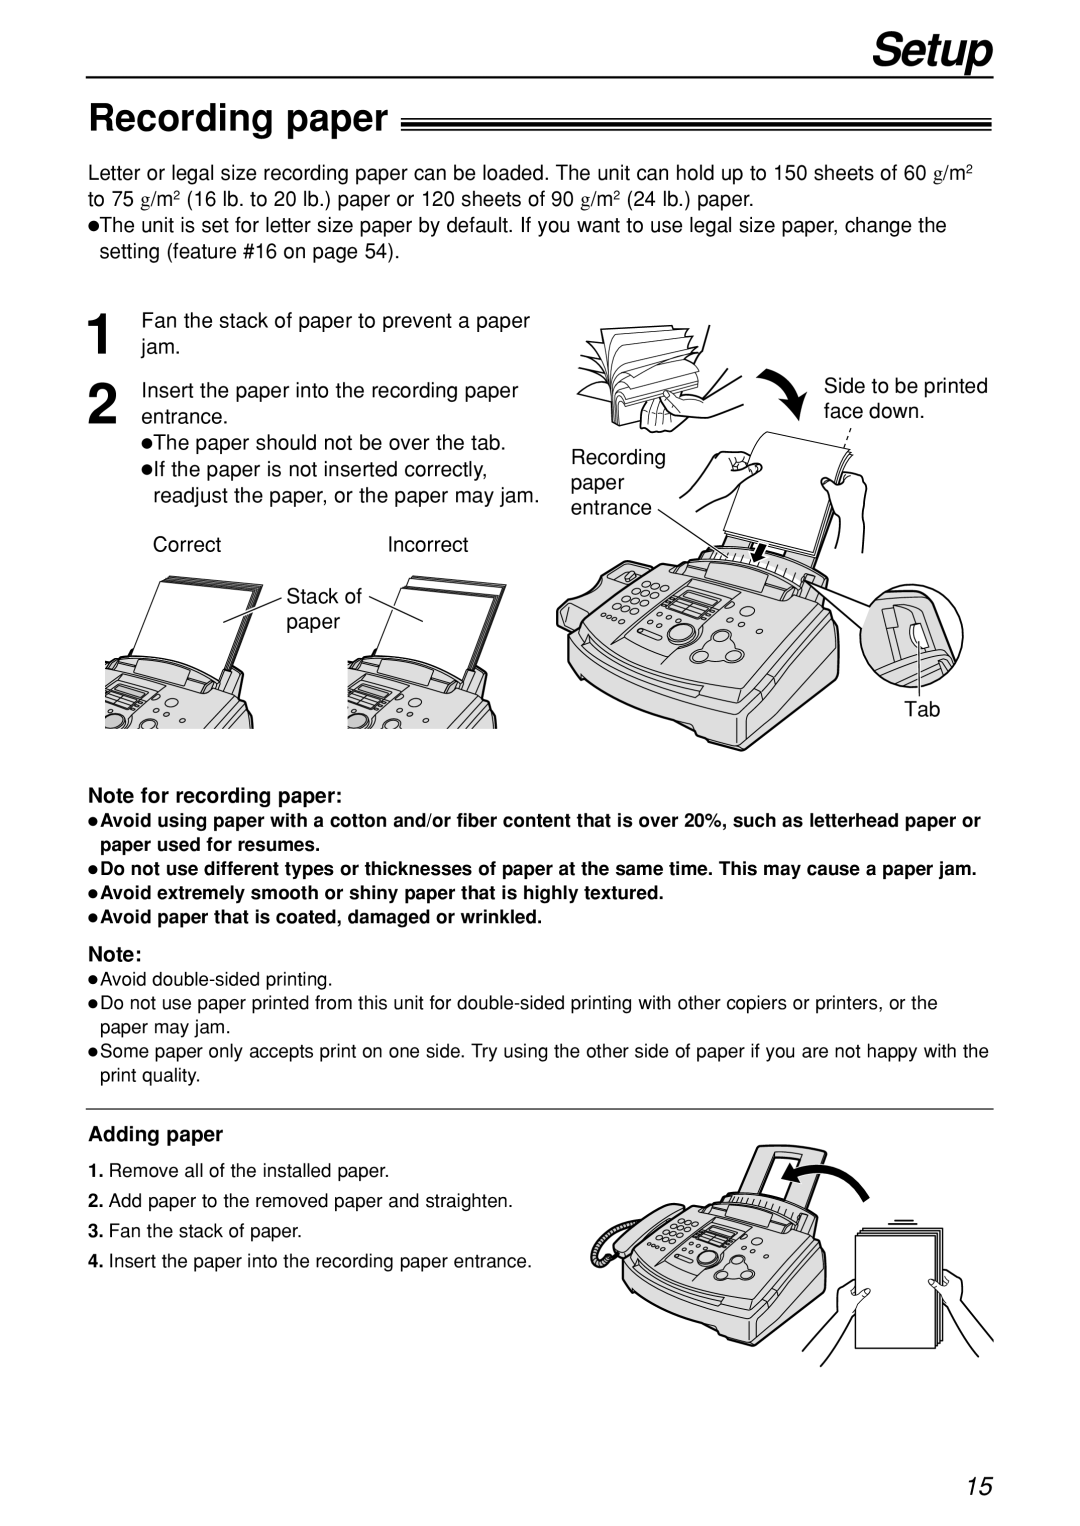
1 | Fan the stack of paper to prevent a paper | |
jam. |
| |
| Insert the paper into the recording paper | |
2 entrance. |
| |
| ●The paper should not be over the tab. | |
| ●If the paper is not inserted correctly, | |
| readjust the paper, or the paper may jam. | |
| Correct | Incorrect |
|
| Stack of |
|
| paper |
Note for recording paper:
Recording paper entrance ![]()
Side to be printed face down.
Tab
●Avoid using paper with a cotton and/or fiber content that is over 20%, such as letterhead paper or paper used for resumes.
●Do not use different types or thicknesses of paper at the same time. This may cause a paper jam.
●Avoid extremely smooth or shiny paper that is highly textured.
●Avoid paper that is coated, damaged or wrinkled.
Note:
●Avoid
●Do not use paper printed from this unit for
●Some paper only accepts print on one side. Try using the other side of paper if you are not happy with the print quality.
Adding paper
1.Remove all of the installed paper.
2.Add paper to the removed paper and straighten.
3. Fan the stack of paper.
4. Insert the paper into the recording paper entrance.
15
